20 Halloween Nails Easy Simple Ideas Anyone Can Try
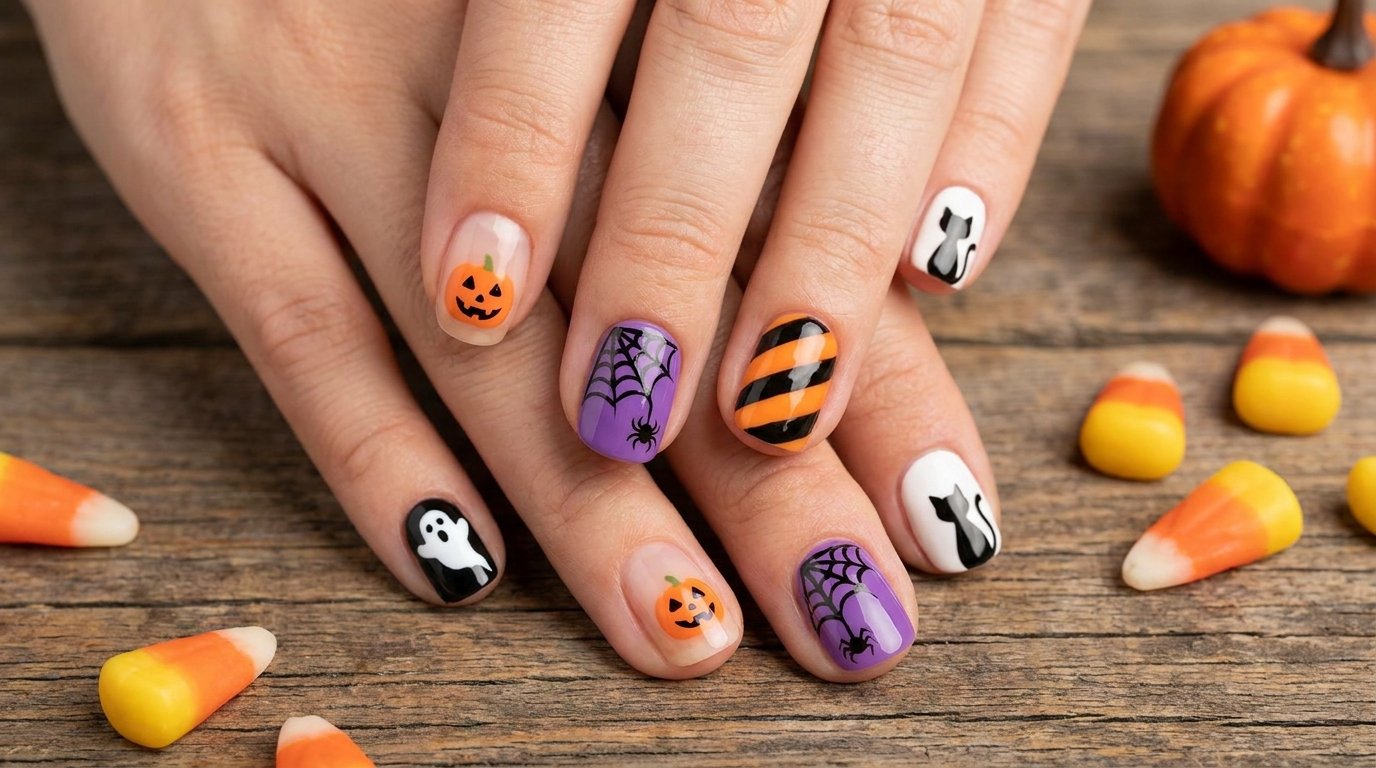
Halloween nails easy simple designs can be created with basic polish, a dotting tool, thin nail-art brush, or small stickers. The easiest options include ghosts, pumpkins, bats, spider webs, French tips, and tiny Halloween accents. These designs work especially well on short nails and are suitable for beginners who want a festive manicure without complicated techniques.
1. Black Nails with Tiny White Ghosts
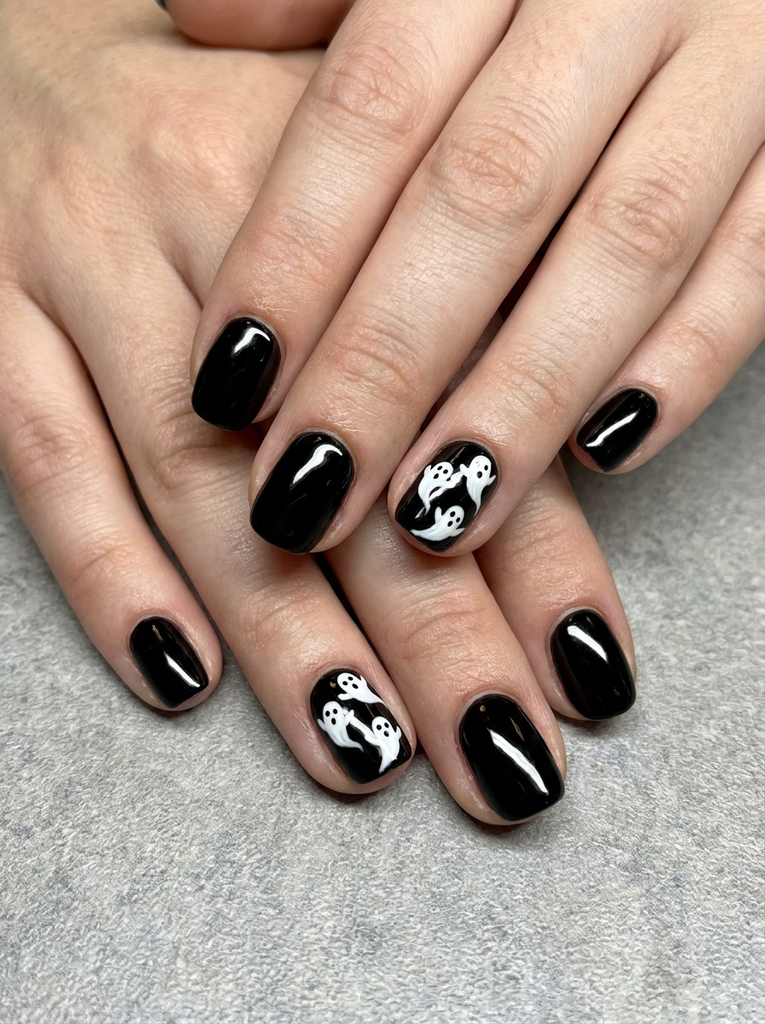
Black polish and tiny white ghosts make one of the easiest Halloween combinations. Paint most nails glossy black, then add small white ghost shapes to two accent nails.
These easy halloween nail designs are perfect when you want a bold look without complicated artwork. The design works well for Halloween parties, movie nights, or a casual October manicure.
Use a dotting tool to create the rounded ghost shape. Add two tiny black eyes after the white polish dries.
- Best for: Short to medium nails
- Difficulty: Easy DIY
For a softer version, use a sheer nude base and place only one ghost on each hand.
2. Orange Nails with Simple Black Pumpkin Faces
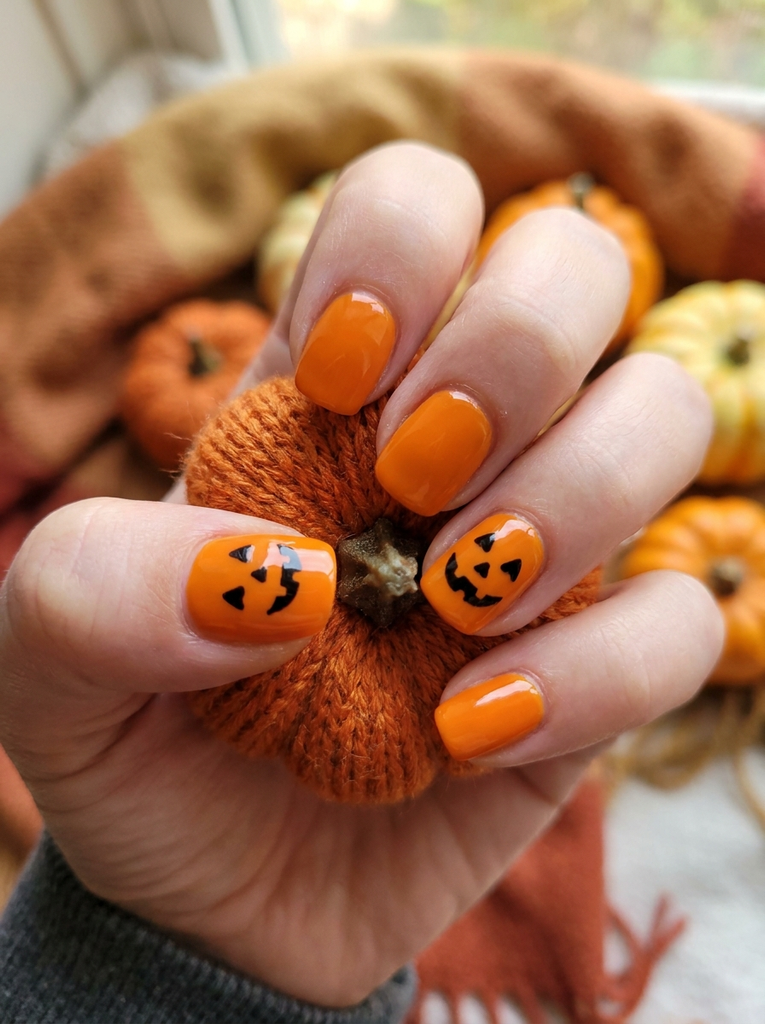
Bright orange polish instantly gives your manicure a Halloween feel. Add simple black triangle eyes and a small curved mouth to two accent nails.
These simple halloween nail designs are especially good for beginners because pumpkin faces do not need perfectly detailed artwork. They are also easy to match with Halloween costumes and accessories.
Use a dotting tool for the eyes and a fine brush for the mouth. Finish with a glossy top coat to protect the design.
- Best for: Short or medium nails
- Difficulty: Easy DIY
If bright orange feels too strong, try burnt orange for a more autumn-inspired finish.
3. Nude Nails with Black Spider Webs
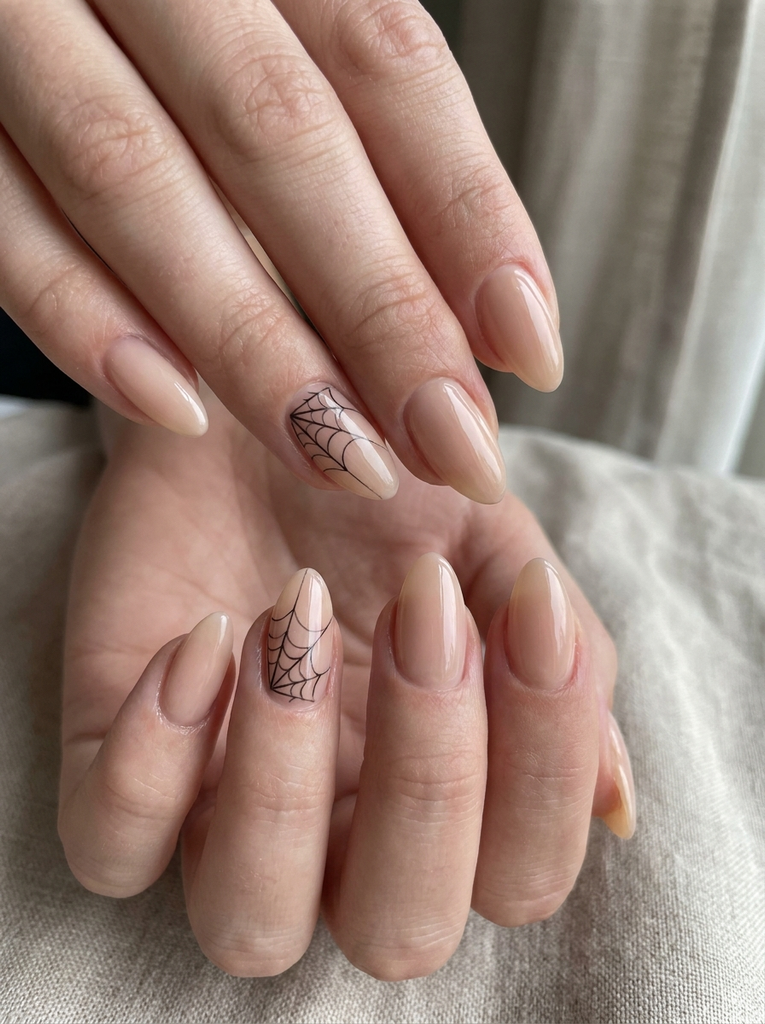
A nude or pale pink base gives simple black spider webs plenty of contrast. Draw a small web in the corner of two or three nails rather than covering the entire nail.
These easy halloween nails are great for anyone who likes Halloween details but does not want a very colorful manicure. They can easily work for both daytime and evening events.
Use a thin liner brush for the web. Start with three or four straight lines, then connect them with small curved strokes.
- Best for: Short to medium nails
- Difficulty: Easy to medium DIY
A glossy finish keeps the nude base looking clean. Matte top coat gives the same design a darker feel.
4. Black and Orange French Tips
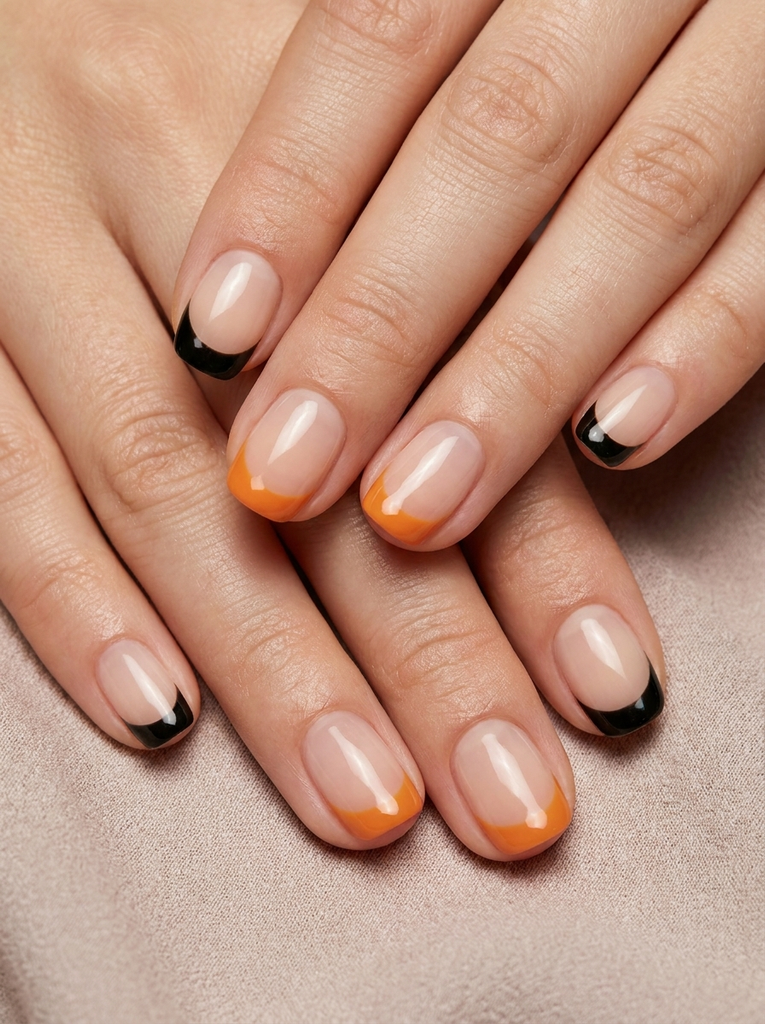
Give a classic French manicure a Halloween twist by alternating black and orange tips. Keep the base sheer nude so the colors remain the main focus.
These simple halloween nails look festive without using characters or large decorations. They are a nice choice for someone who wants a polished manicure for work before heading to a Halloween event.
French-tip guides can help beginners create cleaner curves. Apply the colors in thin layers and finish with a clear top coat.
- Best for: Short to medium nails
- Difficulty: Easy DIY
Try black tips on four nails and one orange accent tip on each hand. You can also add one tiny star for extra detail.
For a polished everyday look, explore Halloween Nails Coffin Shape Ideas that bring fresh colors, simple details, and stylish inspiration to your next manicure.
5. White Nails with Tiny Black Bats
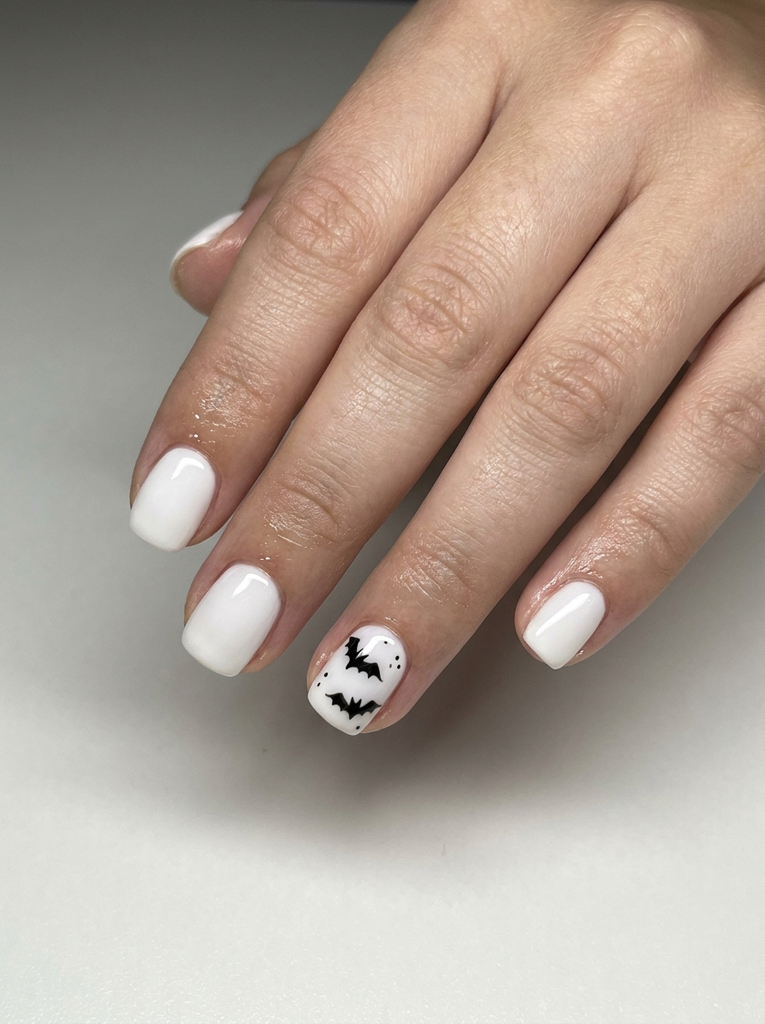
Use white or creamy polish as your base and add small black bat silhouettes. Keep the bats on two or three accent nails for a clean look.
This is one of the easiest easy halloween nail art options because the bat shape can be simplified into a few small curves. It works well for Halloween parties, school events, and casual fall outfits.
Use a thin nail-art brush for hand-painted bats. Small nail stickers are even easier if you are new to nail art.
- Best for: Short to medium nails
- Difficulty: Easy DIY
Add a few tiny black dots around the bats to represent stars. Avoid too many details if your nails are very short.
6. Clear Nails with Tiny Halloween Icons
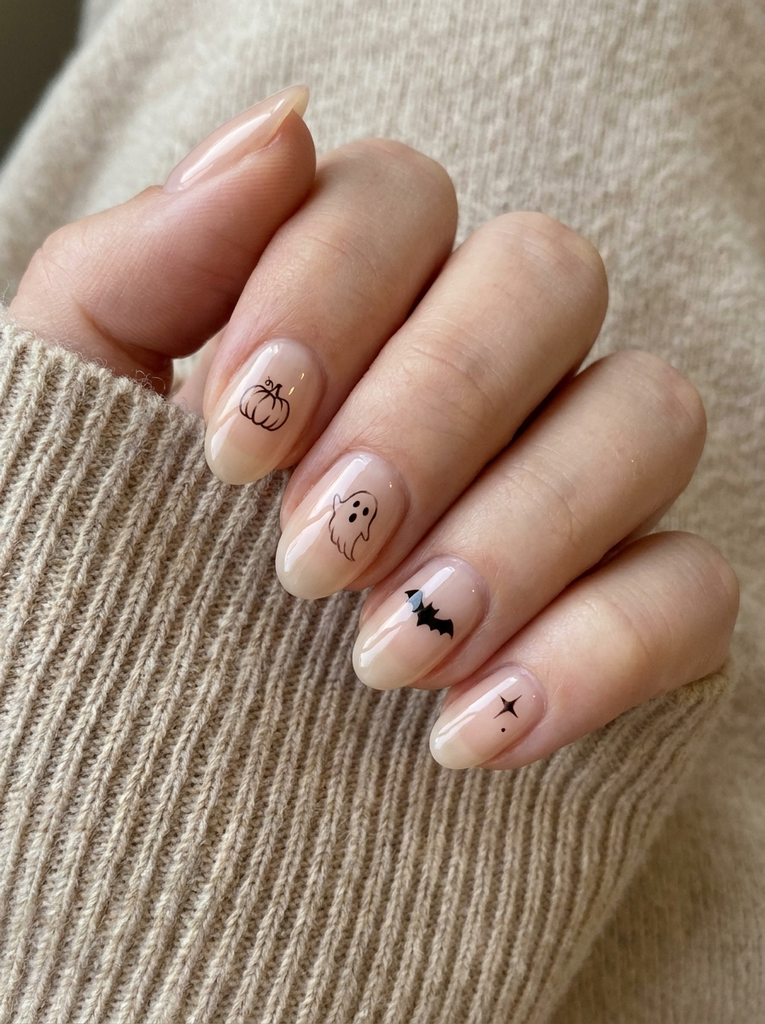
A clear or sheer nude base makes tiny Halloween symbols look delicate. Place a pumpkin, ghost, bat, and star on different nails.
These easy halloween nail ideas are ideal when you want variety without painting a completely different design on every finger. The small icons also make the manicure easy to customize.
Use nail decals for consistent shapes. If painting by hand, a dotting tool can create many of the basic shapes.
- Best for: Short to medium nails
- Difficulty: Easy DIY
Black, white, and orange are enough to create the whole set. Keeping the colors limited makes the different icons look coordinated.
7. Cute Ghost French Tips
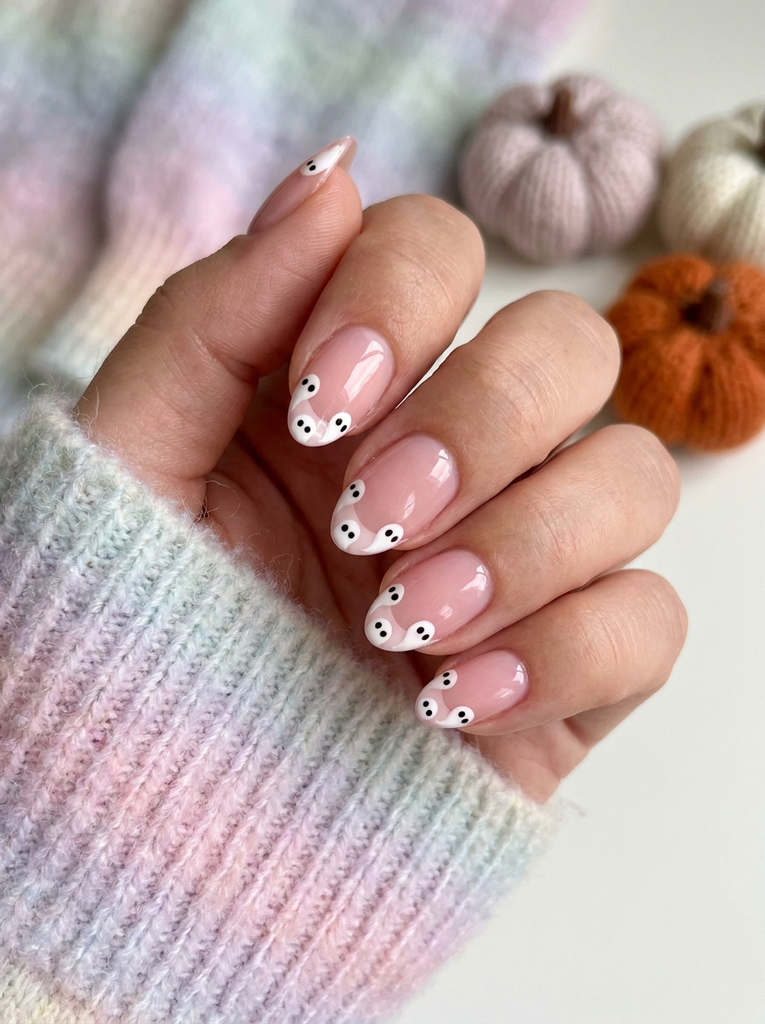
Start with a sheer pink or nude base and place tiny white ghosts along the tips. Add small black eyes and mouths for a cute Halloween finish.
These cute easy halloween nails are playful but still neat. They are a good choice if traditional black and orange feels too dramatic.
A small dotting tool makes the ghost bodies easier to create. Keep each ghost slightly rounded and let the white tips follow the natural curve of the nail.
- Best for: Short to medium nails
- Difficulty: Medium DIY
For an even easier version, use ghost stickers along the tips. Add a glossy top coat to smooth the surface.
8. Matte Black Nails with Tiny Orange Dots
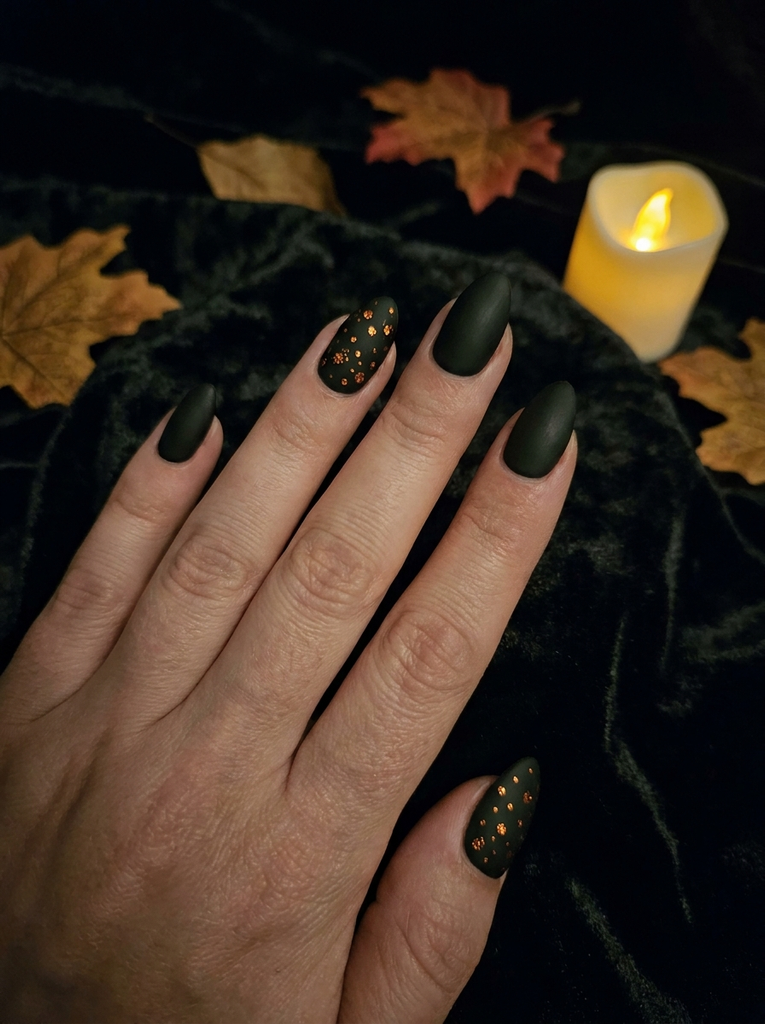
Paint every nail matte black, then add three or four tiny orange dots to one or two accent nails. The result is dark, simple, and unmistakably seasonal.
These simple halloween nail art designs are useful when you want a Halloween manicure without detailed painting. They can be completed quickly and look especially nice on short nails.
A dotting tool creates evenly sized dots. You can use the rounded end of a small bobby pin if you do not have nail-art tools.
- Best for: Short nails
- Difficulty: Beginner DIY
Try different dot sizes for a subtle confetti effect. Orange can also be replaced with metallic gold.
9. Simple Orange Nails with Black Tips
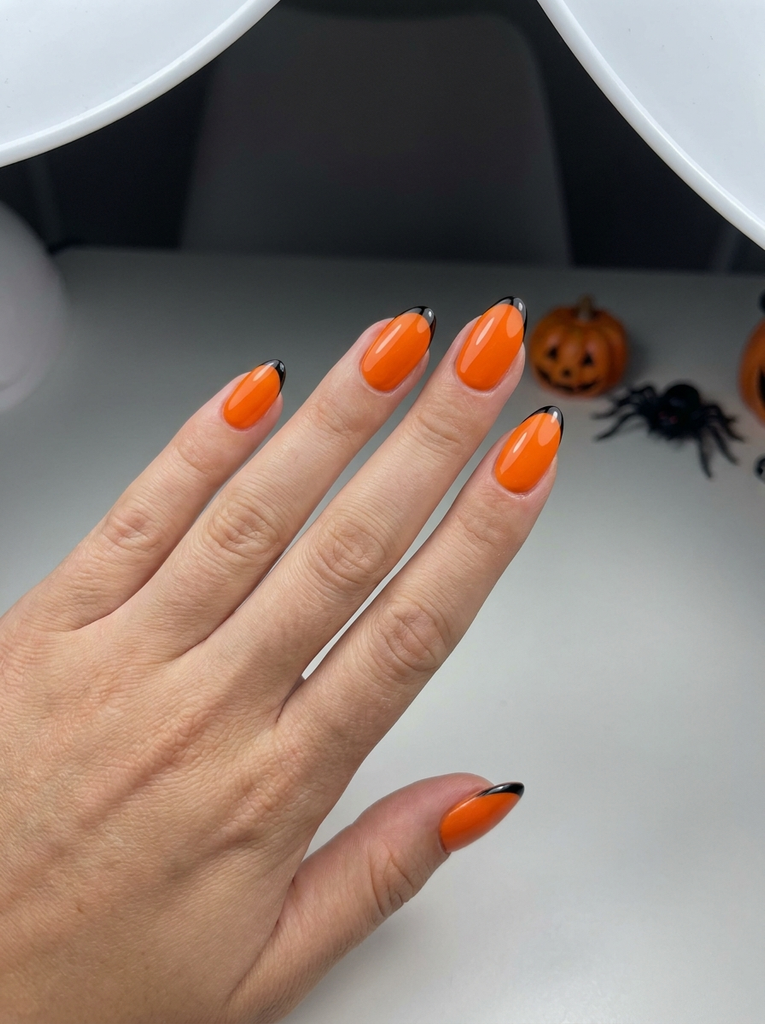
Paint the nails orange and add thin black tips across the free edge. The design uses only two colors, so it is easy to recreate at home.
These halloween nails for beginners are a good starting point for someone who has never tried Halloween nail art. The strong color contrast also photographs well for Pinterest-style nail inspiration.
Use French-tip guides if your hand is not steady. Apply the black polish only after the orange base has dried completely.
- Best for: Short to medium nails
- Difficulty: Beginner DIY
A fresh manicure looks even better with the right hair, so browse Hair Color Ideas for Warm Skin Tone for effortless combinations that feel feminine and polished.
A sheer nude base can be used instead of full orange if you prefer a lighter look.
10. White Nails with Tiny Orange Pumpkins
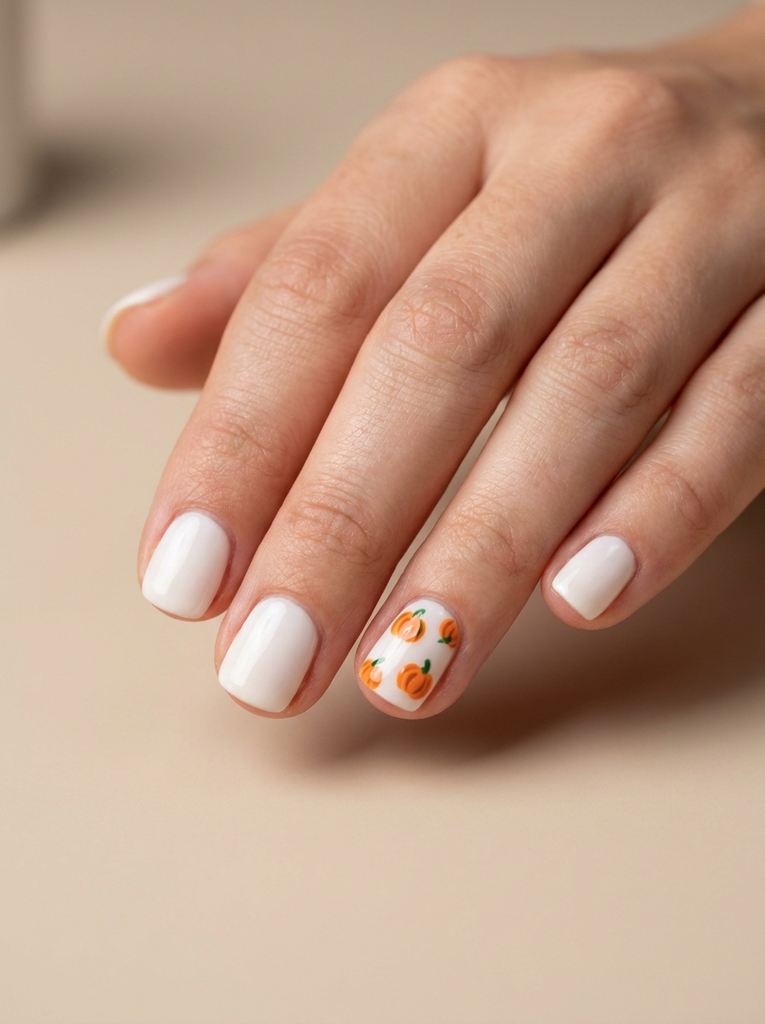
A white base gives tiny orange pumpkins a clean background. Paint pumpkins on two accent nails and keep the remaining nails plain white.
These easy halloween nails for beginners are simple enough for a first DIY attempt. The small pumpkin shapes can be created using dots rather than detailed brushwork.
Place two orange dots side by side, connect them slightly, and add a small green or black stem. Finish with a clear top coat.
- Best for: Short nails
- Difficulty: Beginner DIY
If green feels too colorful, use black stems instead. They create a stronger Halloween appearance.
11. Nude Nails with Tiny Black Crescent Moons
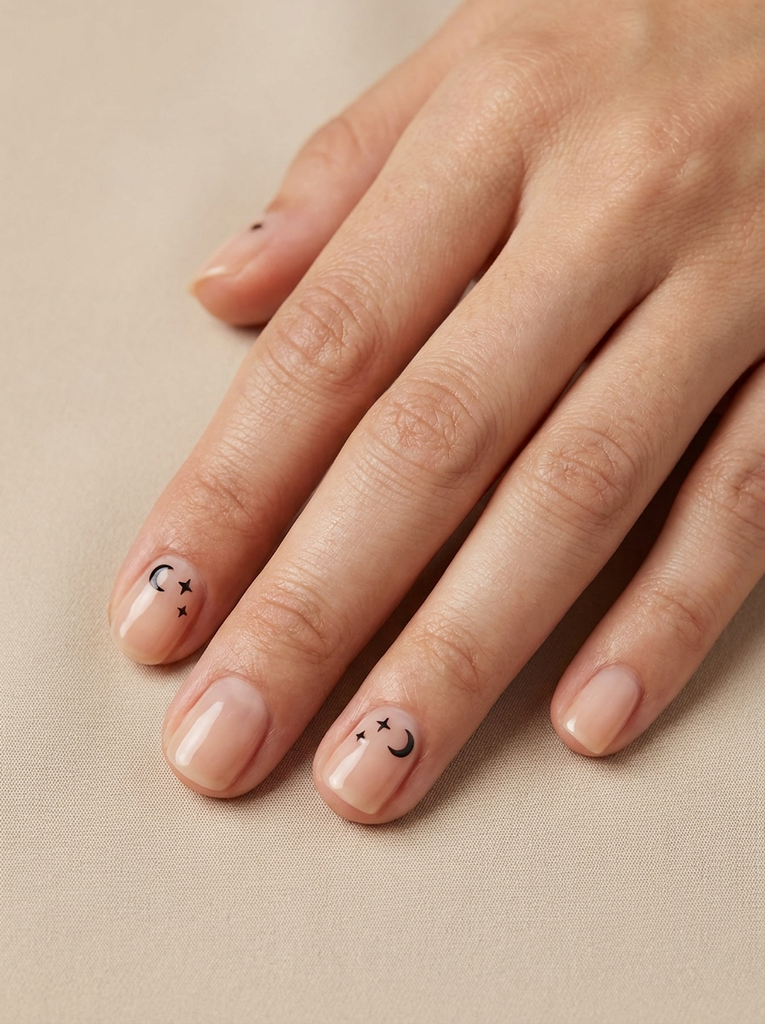
Use a nude base and add small black crescent moons near the cuticle. One or two tiny stars can be added beside the moons.
These easy halloween nails at home are subtle enough for everyday wear while still having a mysterious Halloween mood. They also suit people who prefer minimalist nail art.
Moon stickers are a simple alternative to painting. If you paint them yourself, use a small detail brush.
- Best for: Short to medium nails
- Difficulty: Easy DIY
A glossy finish gives the nude base a clean appearance. A matte finish makes the black details look softer.
12. Black Nails with One Orange Accent Nail
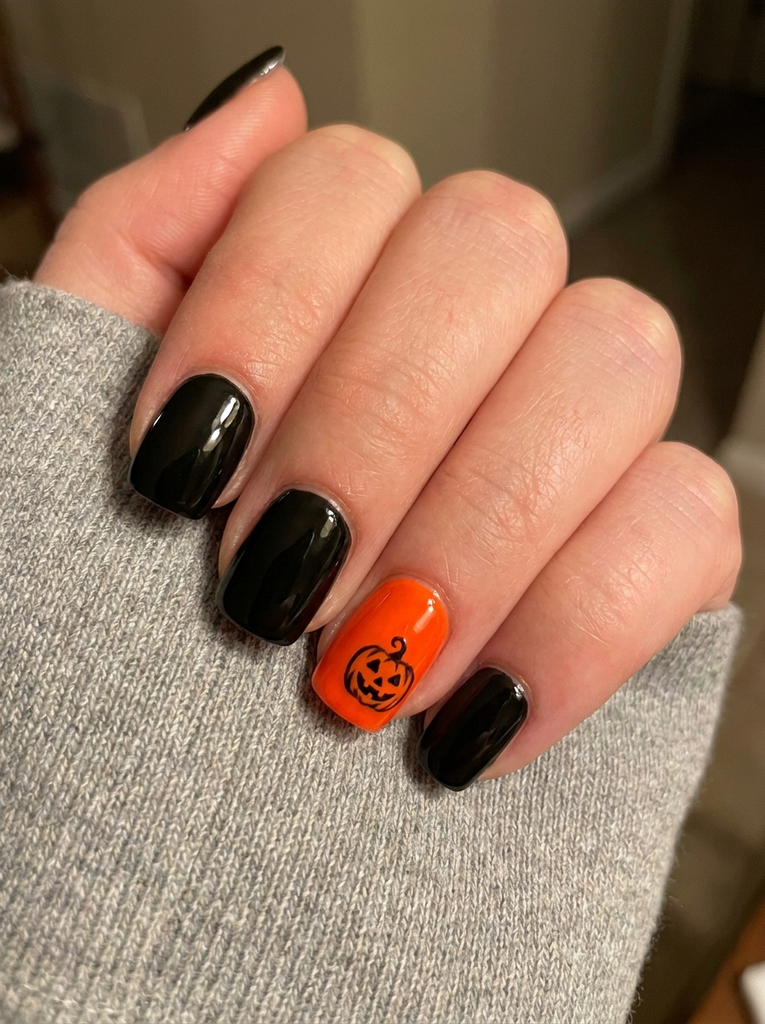
Paint nine nails black and make one accent nail bright orange. Add a tiny black pumpkin, bat, or spider to the orange nail if you want more detail.
These diy halloween nail designs are perfect for anyone who likes a bold manicure but has limited time. The design is also easy to change by switching the accent color.
Use two thin coats of polish rather than one thick coat. This helps the color dry more evenly.
- Best for: Short, square, or rounded nails
- Difficulty: Very easy DIY
A burnt-orange accent creates a more mature autumn look. Bright orange feels more traditional and playful.
13. Tiny Ghosts on Short Nails

Short nails do not need large artwork to look festive. Paint a neutral base and add one tiny ghost to each accent nail.
These easy halloween nails short styles are practical for everyday activities. The small ghost details also leave enough open space so the manicure does not look crowded.
Use a dotting tool to make the white ghost body. Add two small black dots for the eyes after the white polish is dry.
- Best for: Short natural nails
- Difficulty: Easy DIY
Beyond colorful manicures, Tattoo Ideas for Women Unique offer another way to express your personality with delicate artwork, meaningful symbols, and beautiful placement ideas.
A pale lavender or soft pink base can make the ghosts look even cuter. Keep the ghost faces simple.
14. Sheer Pink Nails with Black Spider Web Corners
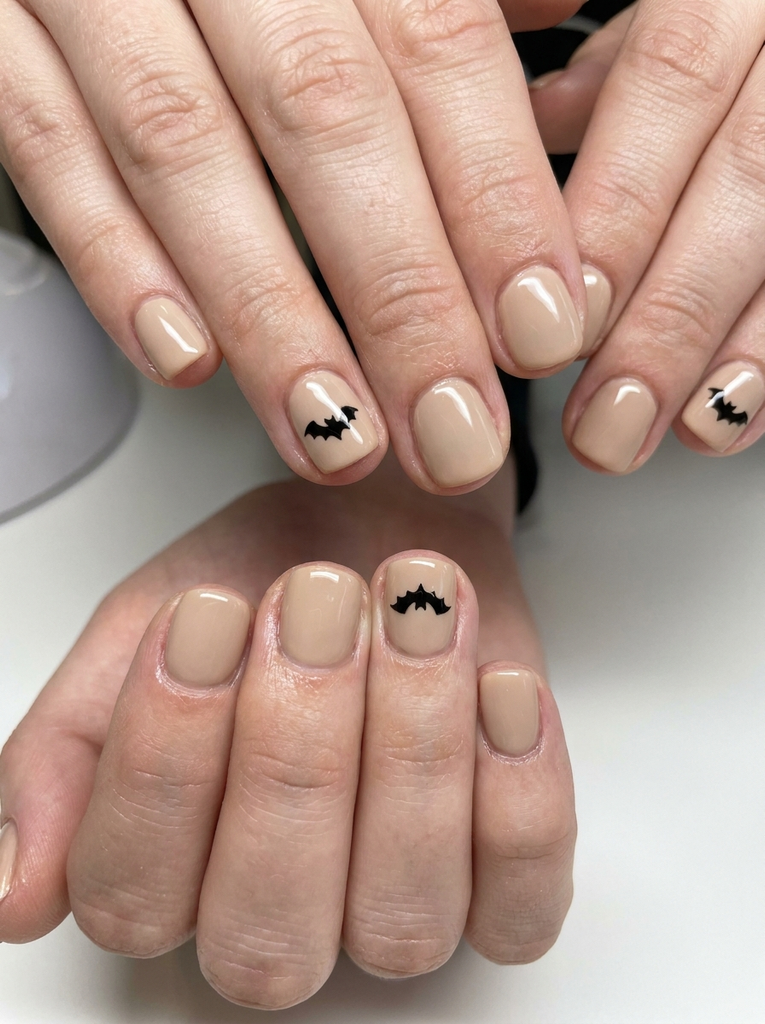
A sheer pink base gives this spooky design a softer appearance. Add a small black spider web to the outer corner of one or two nails.
These spooky easy halloween nails are a good middle ground between cute and creepy. They work for people who want Halloween nail art without a completely dark manicure.
A thin liner brush gives the best control. Draw the web with light pressure so the lines stay delicate.
- Best for: Short to medium nails
- Difficulty: Medium DIY
Add one tiny black spider to an accent nail if you want a stronger Halloween theme.
15. Burgundy Nails with Gold Halloween Stars
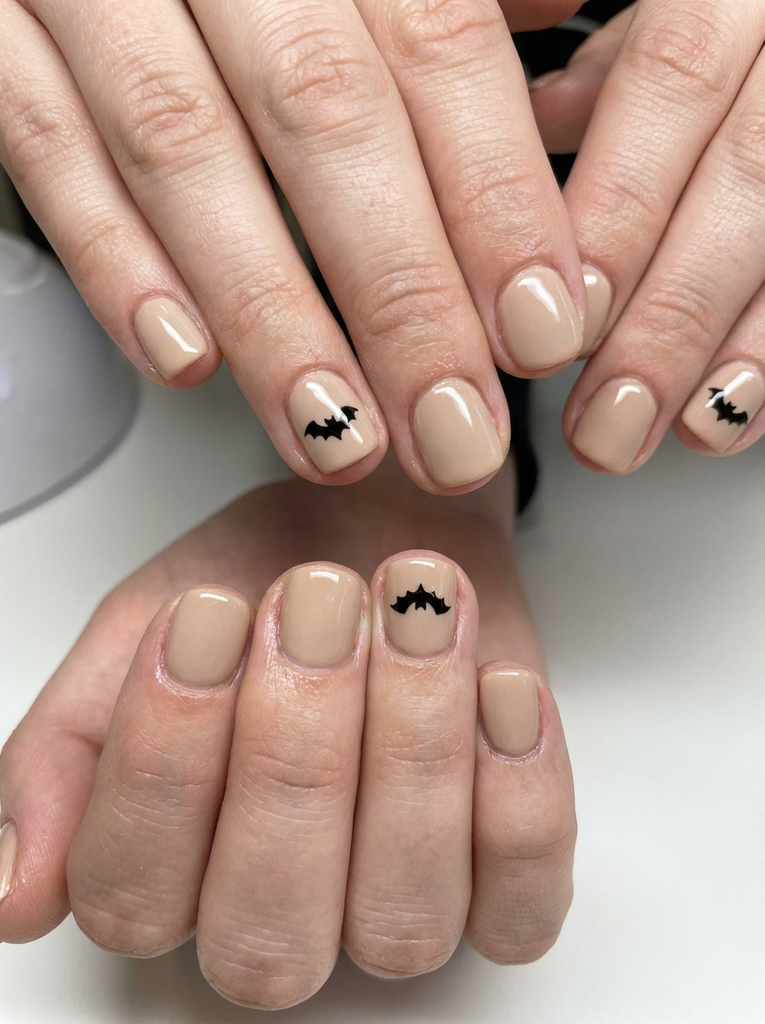
Burgundy polish creates a rich fall base, while tiny gold stars add a subtle Halloween-night feeling. Use the gold only on two or three accent nails.
These classy simple halloween nails are ideal for dinners, fall gatherings, or anyone who prefers sophisticated seasonal colors. The design can also work beyond Halloween because burgundy is a classic autumn shade.
Gold nail stickers are an easy option for beginners. Seal them under a clear top coat so they stay smooth.
- Best for: Short to medium nails
- Difficulty: Easy DIY
A matte burgundy base creates a softer look. Glossy burgundy makes the color appear deeper and richer.
16. Nude Nails with Black Minimalist Bats
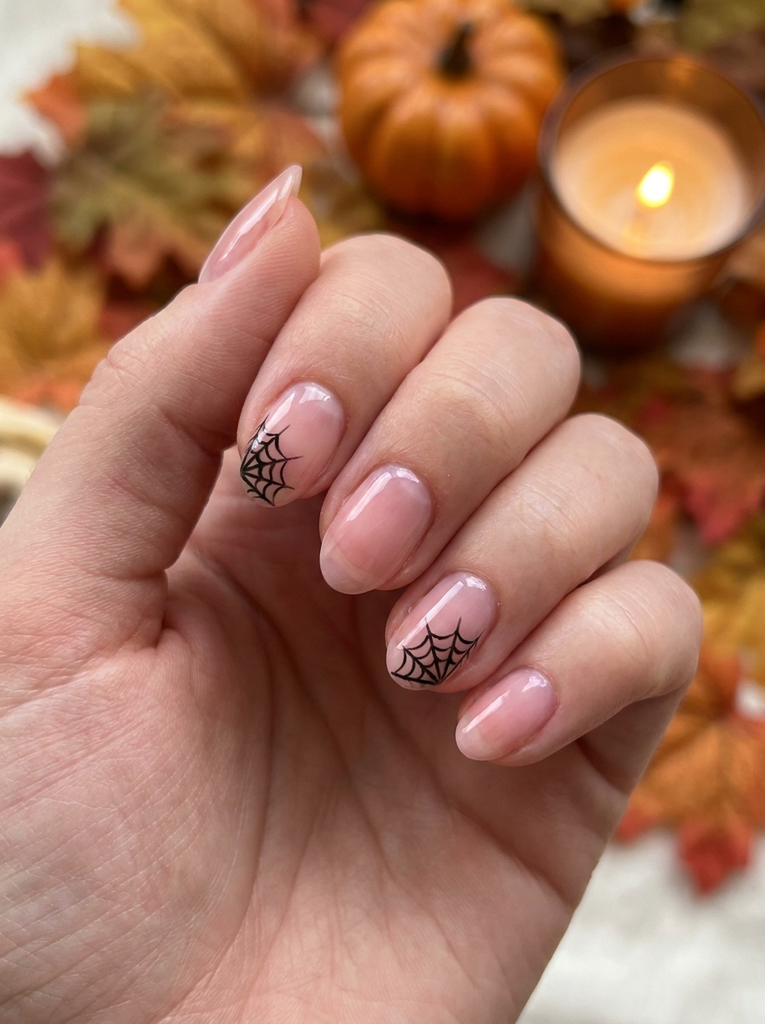
Choose a nude, beige, or sheer pink base and add one tiny black bat to each accent nail. Leave the rest of the nails plain.
These minimalist halloween nail designs are perfect for anyone who likes clean nail art. They are also easy to adapt to short nails because the design requires very little space.
Use tiny bat stickers for the most consistent result. If painting them yourself, make the wings simple rather than trying to create fine details.
- Best for: Short nails
- Difficulty: Easy DIY
A matte top coat gives this manicure a modern appearance. A glossy finish makes the nude base look brighter.
17. Black French Tips with Tiny Orange Dots
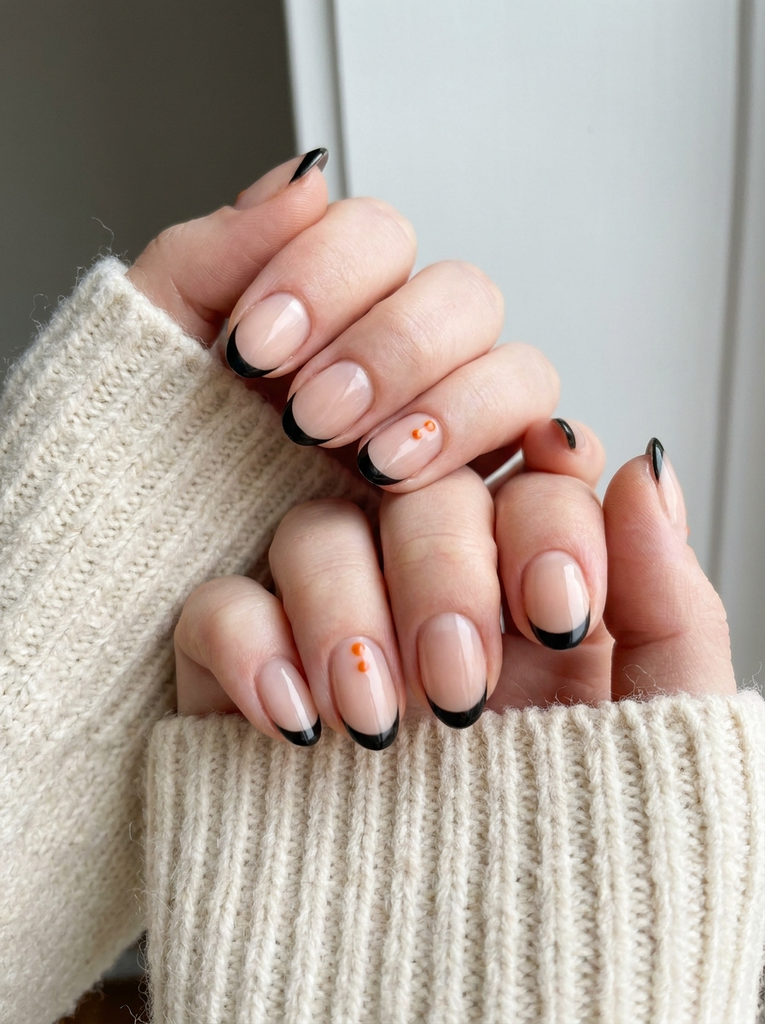
Use a nude base with thin black French tips. Add one or two tiny orange dots near the side of each accent nail.
These aesthetic easy halloween nails have a clean shape with just enough seasonal detail. They are suitable for people who want Halloween inspiration without obvious characters.
French-tip guides can make the design easier at home. Use a dotting tool for the orange details.
- Best for: Short to medium nails
- Difficulty: Medium DIY
If you love experimenting with your manicure, these Halloween Nails Black and Red Ideas can help you find beautiful styles for every season and occasion.
Keep the black tips thin if your nails are short. This helps maintain a balanced appearance.
18. Cream Nails with Tiny Black Pumpkins
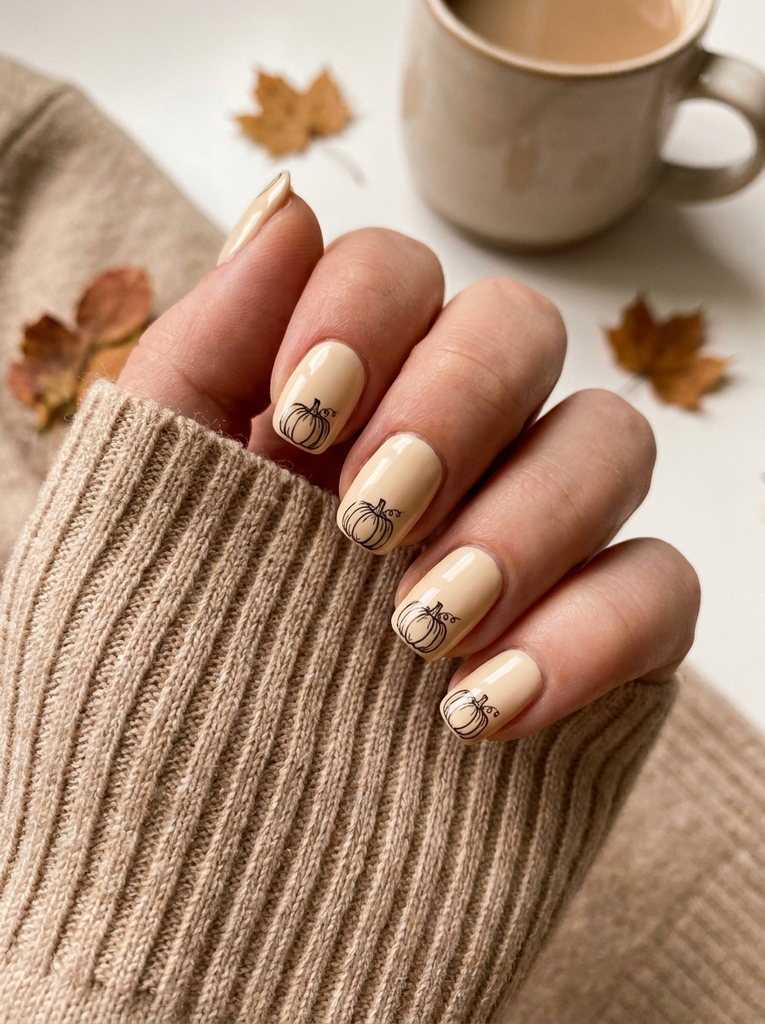
A warm cream base gives this manicure a soft autumn appearance. Add tiny black pumpkin outlines to two or three nails instead of using a bright orange color.
These cute simple halloween nails are ideal for anyone who prefers neutral colors. They also pair well with sweaters, denim, beige outfits, and other fall clothing.
Use a fine brush to outline each pumpkin. You can make the pumpkin face extremely simple with two dots and a tiny curved line.
- Best for: Short to medium nails
- Difficulty: Easy to medium DIY
For extra contrast, add one orange pumpkin to the middle finger. Keep the rest of the artwork black.
19. Black and Orange Checkerboard Nails
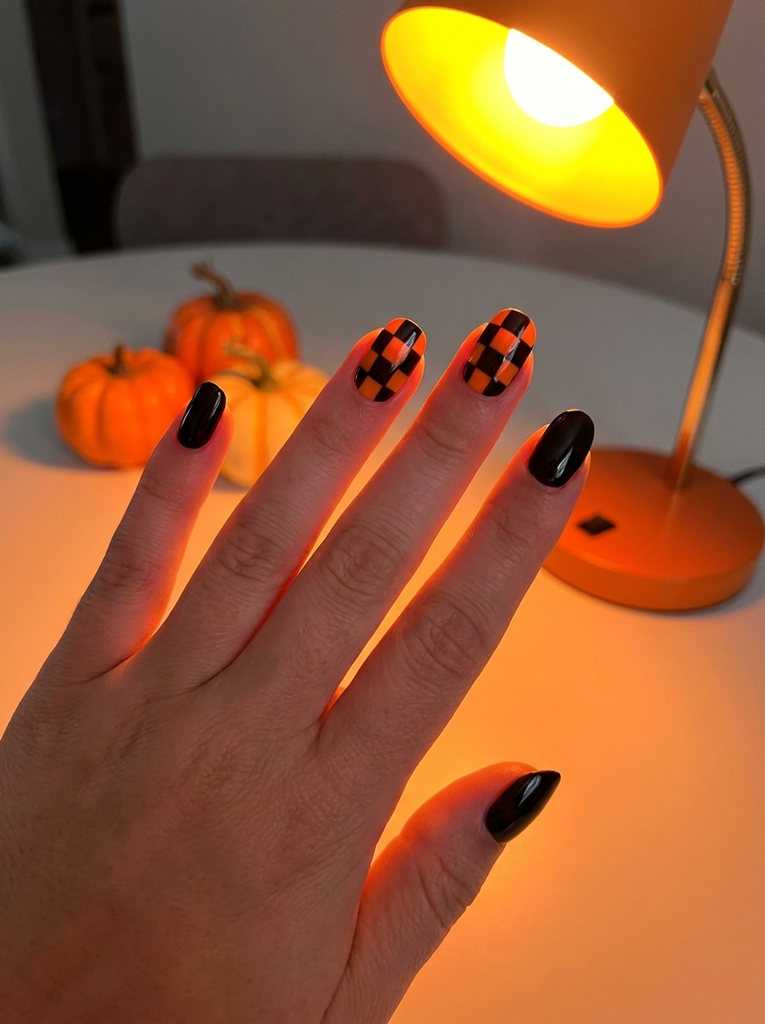
Alternate small black and orange squares across two accent nails while keeping the remaining nails solid black or orange. The pattern gives the manicure a playful Halloween feel.
These easy black and orange halloween nails are more graphic than character-based designs. They look especially fun on short square or medium-length nails.
Use thin striping tape to create straight lines before filling in the squares. Remove the tape carefully once the polish is no longer wet but has not fully hardened.
- Best for: Short to medium nails
- Difficulty: Medium DIY
You do not need to checker every nail. Two accent nails are enough to make the design noticeable without making it too busy.
20. Simple Black Nails with One Ghost Accent
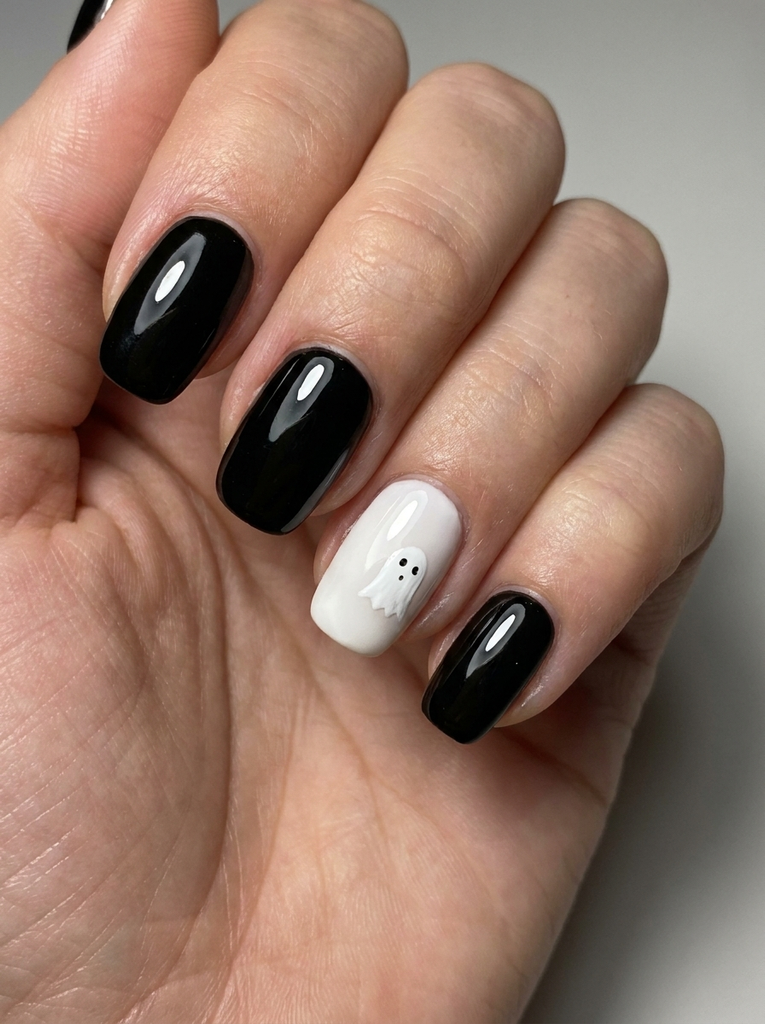
Finish with an extremely simple set: glossy black nails with one nude or white accent nail featuring a tiny ghost. The limited artwork makes this one of the quickest Halloween manicures to recreate.
This style is perfect when you want a spooky look but do not have time for detailed nail art. It also works beautifully on short nails because the design uses only one small accent.
For the ghost, use white polish and a dotting tool. Add two tiny black eyes and seal everything with a top coat.
- Best for: Short natural nails
- Difficulty: Very easy DIY
This is also a good starting point if you are completely new to nail art. Once you are comfortable with the ghost, you can add a tiny star or pumpkin.
When your manicure feels complete, pair it with Haircut Ideas for Fine Hair that create a coordinated beauty look without requiring complicated styling or extra time.
How to Make Simple Halloween Nails Last Longer
Good nail preparation can make a basic manicure look much better. Start with clean, dry nails and gently shape the edges before applying polish.
Use a base coat before your color. It gives the polish a smoother surface and can help reduce staining from strongly pigmented shades such as black and orange.
Apply two thin coats rather than one thick coat. Thin layers generally dry more evenly and are less likely to dent while you are waiting.
Finish with a top coat, especially over nail stickers or small Halloween artwork. Reapplying a clear top coat after a few days can help maintain shine and protect the design.
For gel polish, follow the manufacturer’s curing instructions and use the correct lamp. A properly applied gel manicure often lasts around two to three weeks, while regular polish usually needs refreshing sooner.
How to Choose the Right Halloween Nail Design
If you have short nails, choose small ghosts, tiny pumpkins, dots, moons, or thin French tips. Large characters can quickly make a short nail look crowded.
If you want the easiest DIY option, start with solid black or orange nails and decorate one accent nail. This gives you a festive result without requiring artwork on every finger.
For a classy manicure, choose burgundy, nude, cream, or black with small gold details. For a more traditional Halloween appearance, use black and orange together.
If you are completely new to nail art, stickers are worth trying. They can give you clean shapes without needing the steady hand required for detailed painting.
As an Amazon Associate I earn from qualifying purchases.
A basic kit does not need to be complicated. A dotting tool, fine nail-art brush, French-tip guides, nail stickers, base coat, and top coat can cover most of the designs in this list.
FAQs
What are the easiest Halloween nails to do at home?
Ghosts, dots, pumpkins, black nails, orange French tips, and simple spider webs are among the easiest options. Nail stickers can make character designs even simpler for beginners.
What Halloween nail design is best for beginners?
A solid black or orange manicure with one decorated accent nail is an excellent starting point. Tiny ghosts and pumpkins can be created with a dotting tool rather than complicated brushwork.
Can I do Halloween nail art on short nails?
Yes. Short nails work especially well with tiny ghosts, bats, pumpkins, dots, moons, and French tips. Keeping the artwork small helps the nails look balanced.
How can I make Halloween nail art look classy?
Use muted colors such as burgundy, cream, nude, black, or deep orange. Keep decorations small and limit the design to two or three accent nails.
What colors are best for easy Halloween nails?
Black and orange are the classic choices, but white, nude, burgundy, cream, purple, and gold can also work beautifully. Black provides a dramatic base, while lighter neutrals create a softer look.
How long do Halloween gel nails last?
A properly prepared and cured gel manicure commonly lasts about two to three weeks. Wear time varies depending on nail growth, preparation, product quality, and everyday use.
Conclusion
You do not need complicated artwork to create a fun Halloween manicure. Ghosts, pumpkins, bats, spider webs, French tips, and simple color combinations can all be recreated with basic tools. These halloween nails easy simple ideas include options for beginners, short nails, and more polished fall-inspired looks. Save your favorite design for your next Halloween manicure.