Halloween Nails Easy Simple Step by Step: 20 Ideas to Try
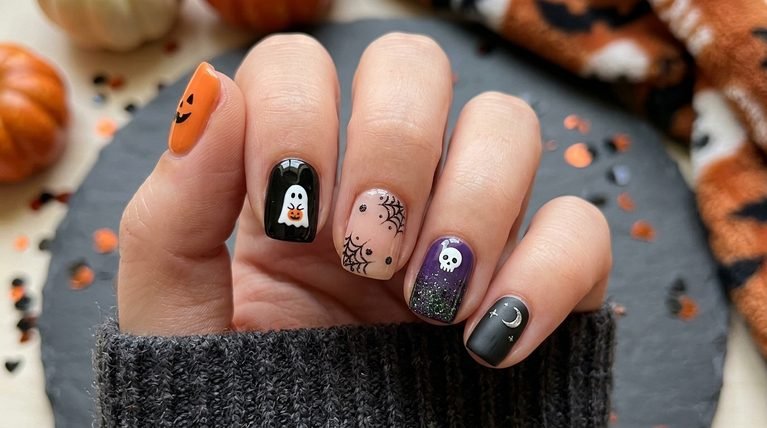
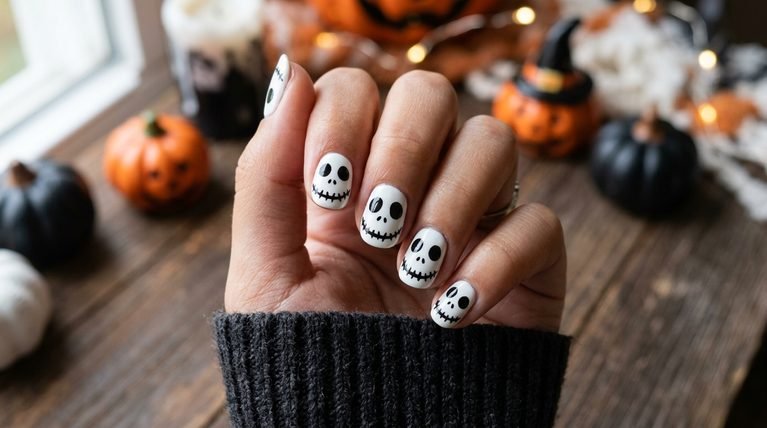
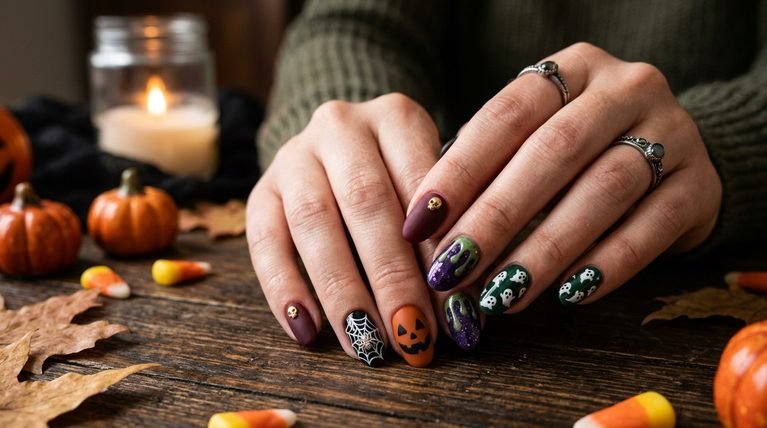
Halloween nails can be created at home with regular polish, a fine brush, toothpick, or dotting tool. The easiest designs use simple shapes such as ghosts, pumpkins, bats, spider webs, and French tips. These 20 ideas include beginner-friendly instructions, color combinations, and step-by-step methods for creating Halloween nail art without complicated techniques.
1. Easy Ghost Nails with Black Eyes
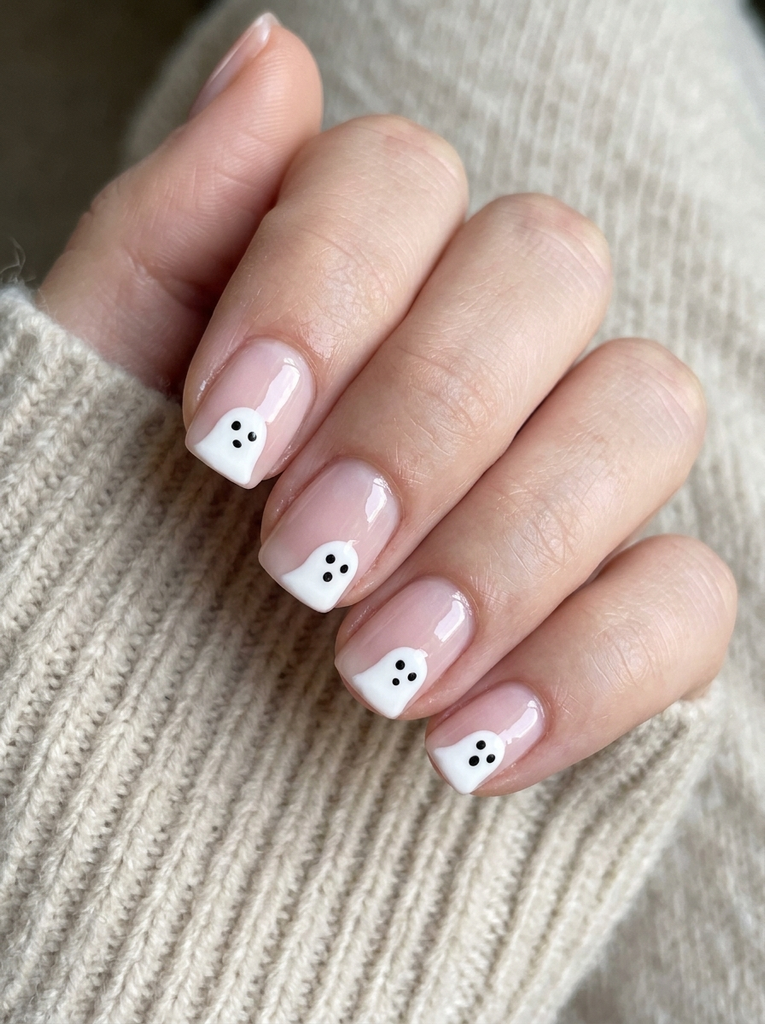
Cute little ghosts are one of the easiest Halloween designs to paint. Start with a sheer, nude, or pale pink base so the white ghosts stand out. This design works especially well on short or medium nails because the ghost shape does not need much space.
For the ghost, make a small white oval or rounded shape near the tip of the nail. Add two tiny black dots for eyes and one small dot for the mouth. A glossy top coat makes the white details look cleaner.
How to paint it step by step:
- Apply your base color and let it dry.
- Paint a small white ghost shape.
- Add two black dots for eyes.
- Add a tiny black mouth.
- Seal everything with a top coat.
- Best for: Short, square, or rounded nails
- Difficulty: Easy DIY
The result is simple without looking boring. It is also a great starting point for Halloween nails for beginners.
2. Simple Pumpkin Tips with Orange Polish
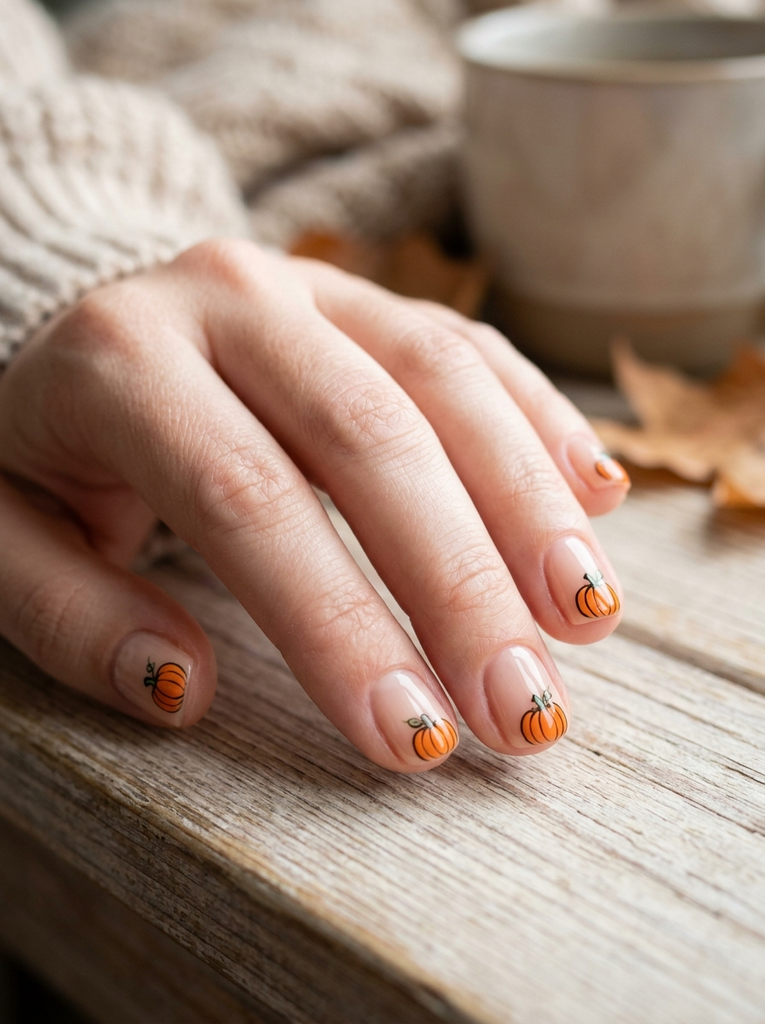
Orange pumpkin tips give you a Halloween look without covering the entire nail. Keep the base sheer or nude, then paint a small orange pumpkin near the tip. A thin black line can define the pumpkin and make it easier to recognize.
These are easy halloween nails for beginners because you only need a few small details. Use a toothpick or fine nail brush for the pumpkin stem. This style is perfect for everyday October wear.
- Best for: Short to medium nails
- Difficulty: Easy DIY
3. Black Cat Silhouette Halloween Nails
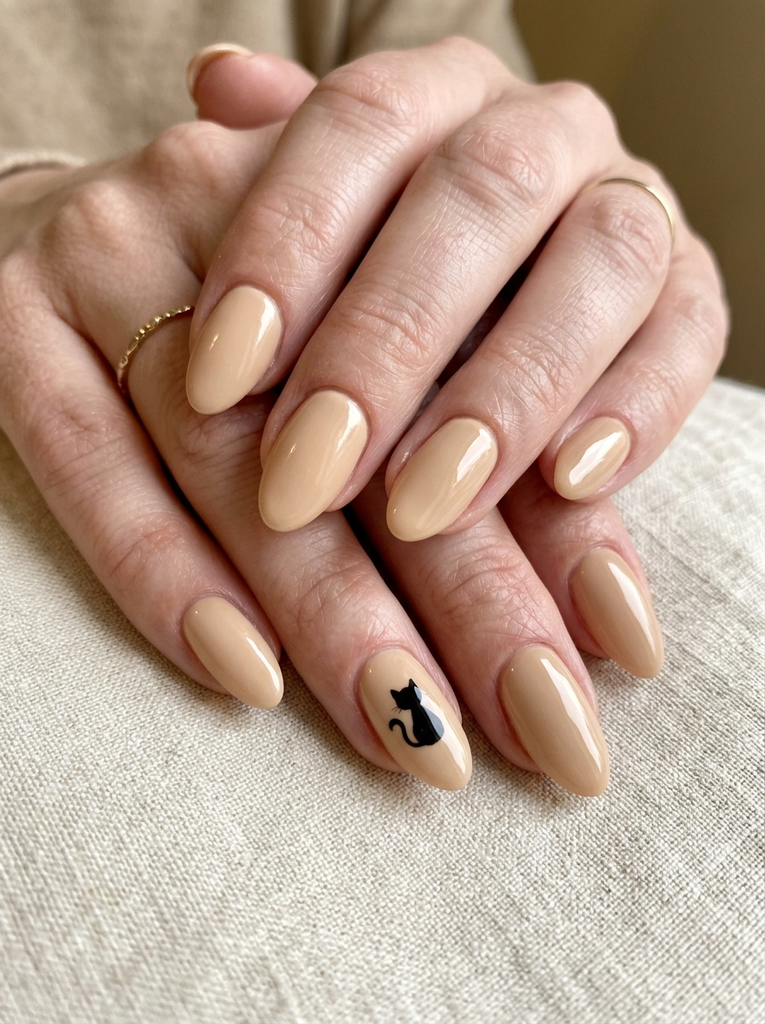
Black cats are perfect if you want something cute with a slightly spooky feel. Paint a tiny cat silhouette on one or two accent nails instead of every nail. Use black polish over a nude, beige, orange, or deep red base.
For a simple silhouette, create a rounded head and two pointed ears. Add a tiny curved tail if you have enough space. Keep the other nails plain for a cleaner finish.
- Best for: Short and medium nails
- Difficulty: Easy DIY
4. Tiny Bat Nails on a Nude Base
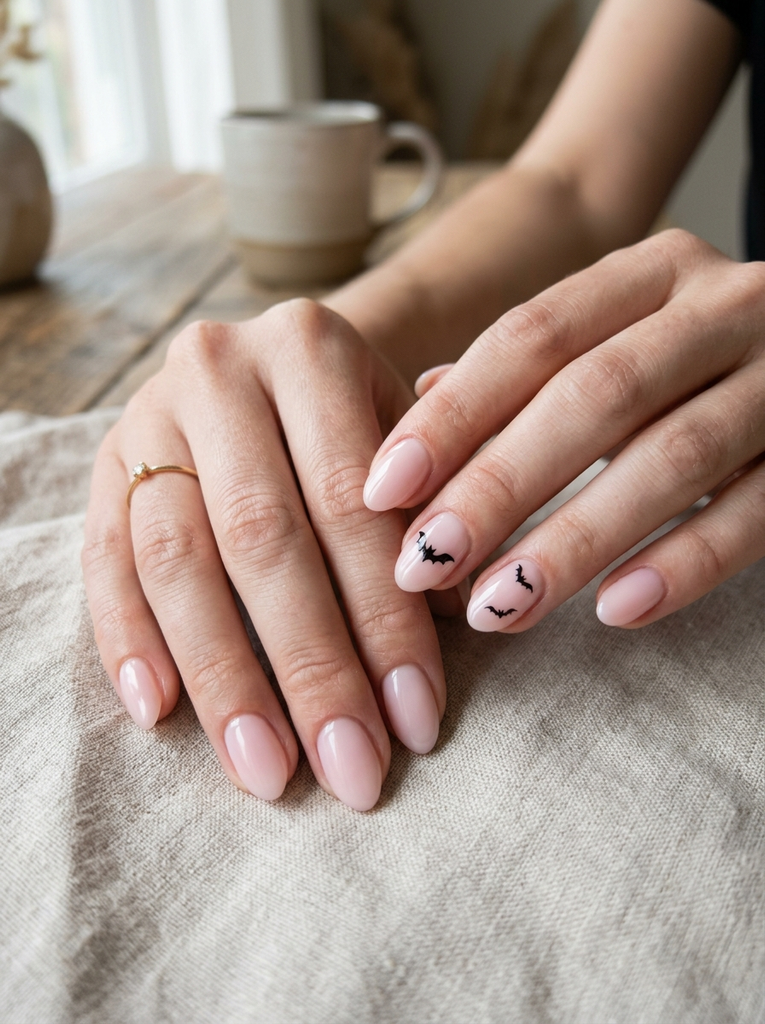
Small black bats look surprisingly stylish against a neutral base. This is one of those simple halloween nail art ideas that can be worn beyond a Halloween party. Choose nude, milky pink, or beige as the background.
Make the bat with two small curved wings and a tiny center body. You do not need perfect symmetry because the small shape will still read as a bat. A glossy top coat helps the design stay smooth.
- Best for: Short, oval, or almond nails
- Difficulty: Easy DIY
5. Easy Spider Web Corner Nails
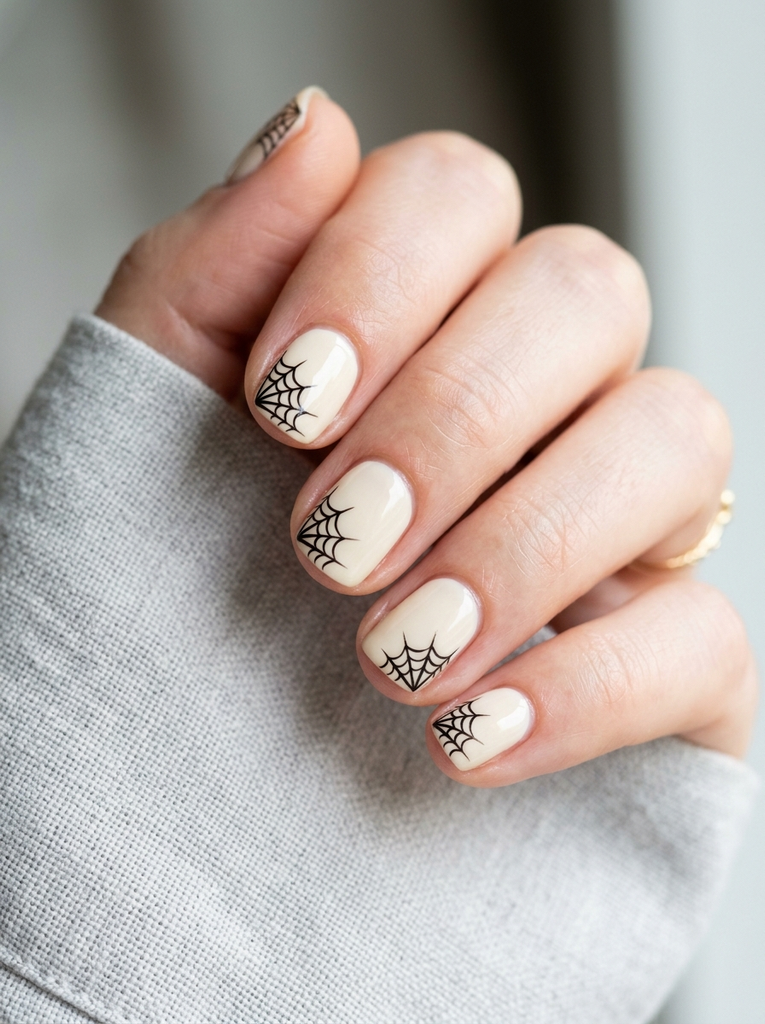
Instead of painting a full spider web, place a small web in one corner of each nail. This keeps the design light and makes the details much easier to paint. A black web over a pale base creates a strong Halloween contrast.
Start with three or four thin lines coming from one corner. Connect them with short curved lines. A toothpick can work if you do not have a nail art brush.
- Best for: Short and medium nails
- Difficulty: Easy DIY
These are easy halloween nail designs that look detailed even though the actual pattern is very simple.
6. Black and Orange Half-Moon Nails
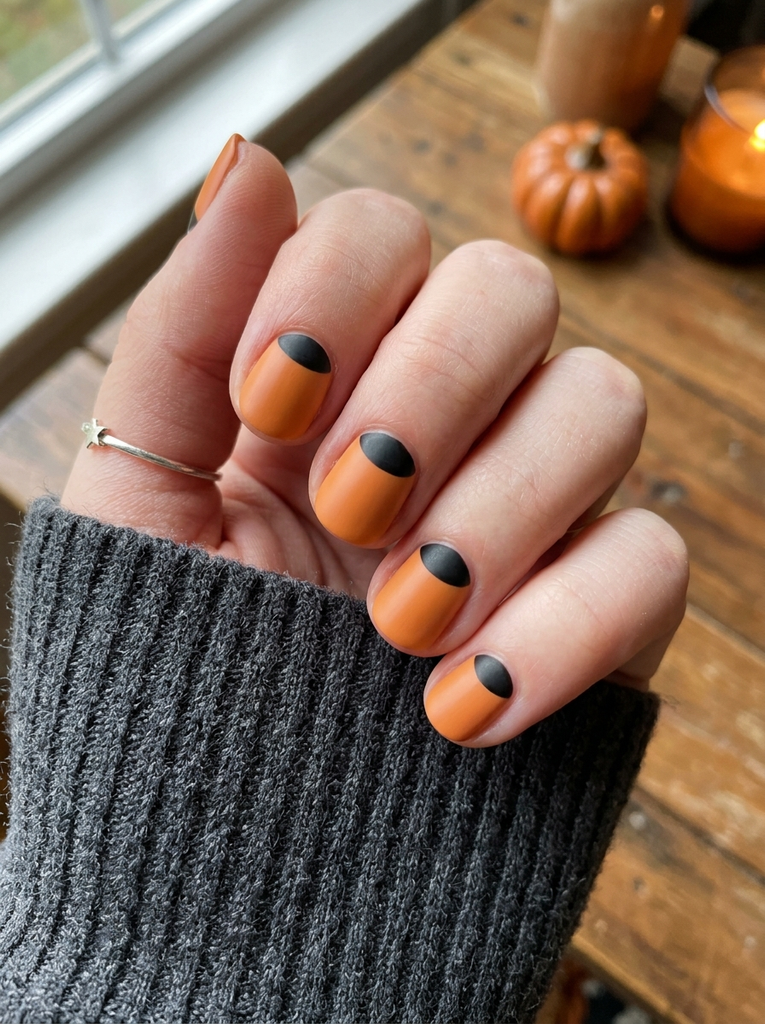
Black and orange are classic Halloween colors, but you do not need pumpkins or ghosts to make them seasonal. Paint one color across the nail and add the second color around the base in a half-moon shape.
You can use a small sticker or round reinforcement sticker as a guide if freehand painting feels difficult. Let the first color dry completely before adding the second. Finish with a glossy top coat.
- Best for: Short square or rounded nails
- Difficulty: Easy DIY
This is a great choice if you want easy halloween nail art with simple geometric shapes.
7. Tiny Spider Nails with One Accent Nail
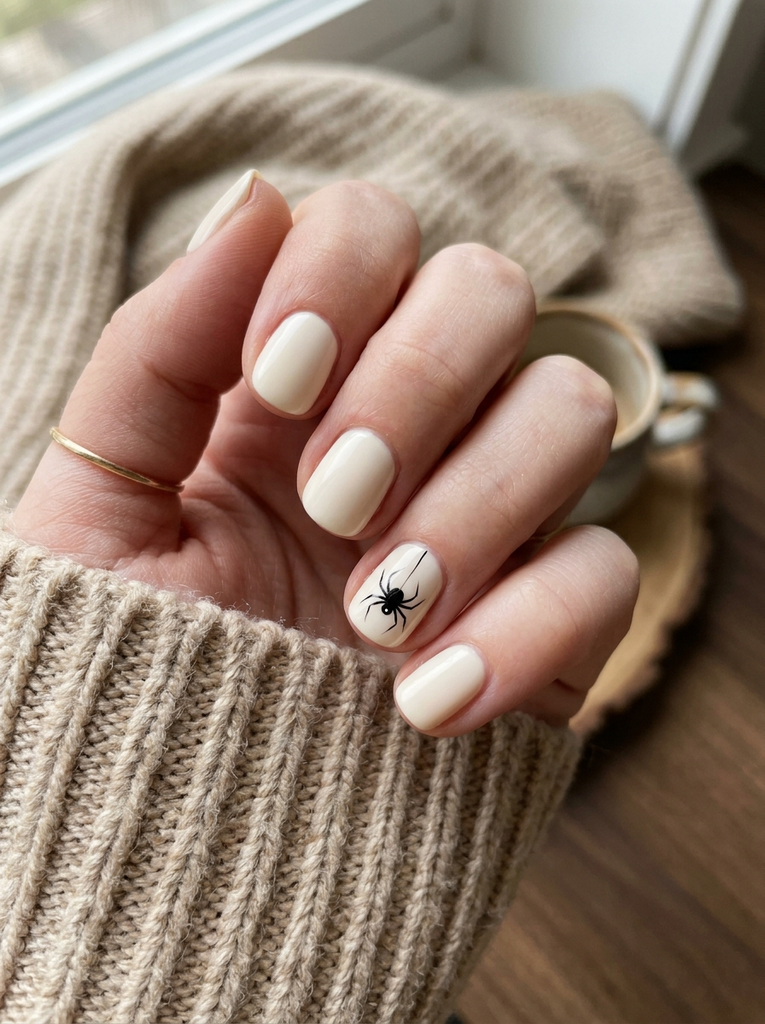
A tiny spider can create a spooky effect without covering the whole manicure. Keep four nails in a plain Halloween shade and place the spider on one accent nail. Black polish works beautifully over orange, cream, nude, or white.
Paint a small black dot for the body. Add four thin legs on each side and a tiny thread above it. A fine brush gives the cleanest result, but a sharpened toothpick can also work.
- Best for: Short to medium nails
- Difficulty: Easy DIY
These spooky halloween nails easy enough for beginners are especially fun for a Halloween party.
8. Easy Black French Tips with Tiny Bats
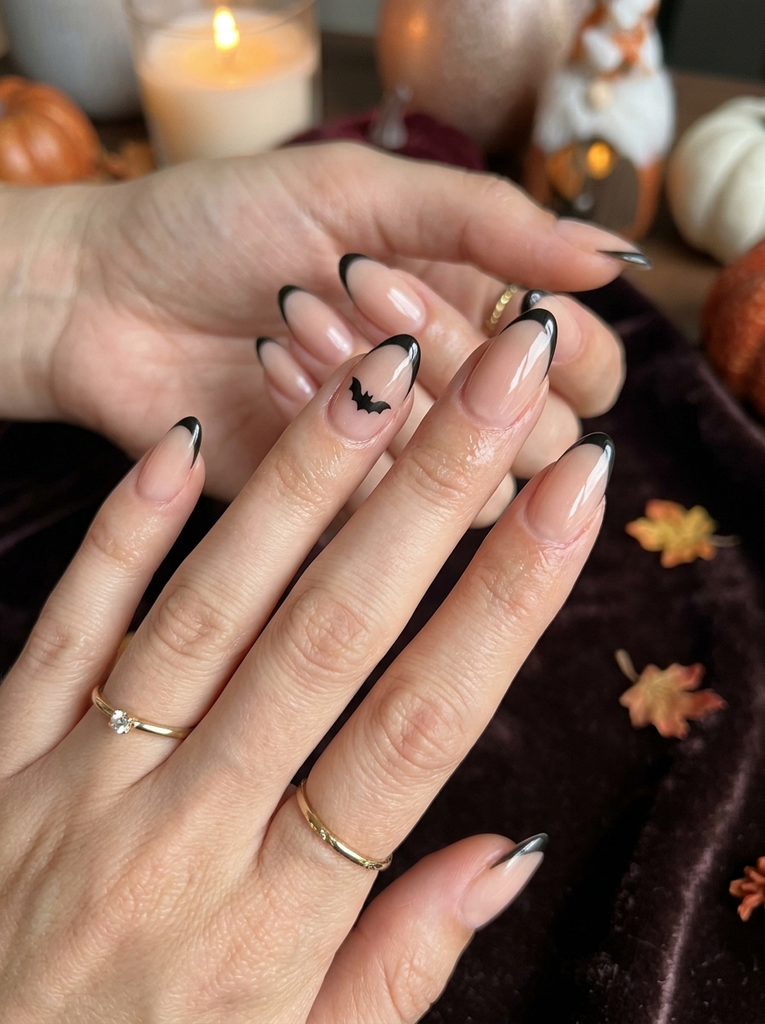
Black French tips instantly make a regular manicure feel more Halloween-ready. Keep the base sheer pink or nude and paint thin black tips. Add one or two tiny bats above the tips for an extra seasonal detail.
Use a French-tip guide if you struggle to create an even curve. After the tips dry, use a tiny brush for the bats. This style looks particularly pretty on almond nails.
- Best for: Short to medium almond nails
- Difficulty: Easy DIY
These easy halloween nail ideas work for both casual October outfits and Halloween dinners.
9. Orange French Tips with Black Dots
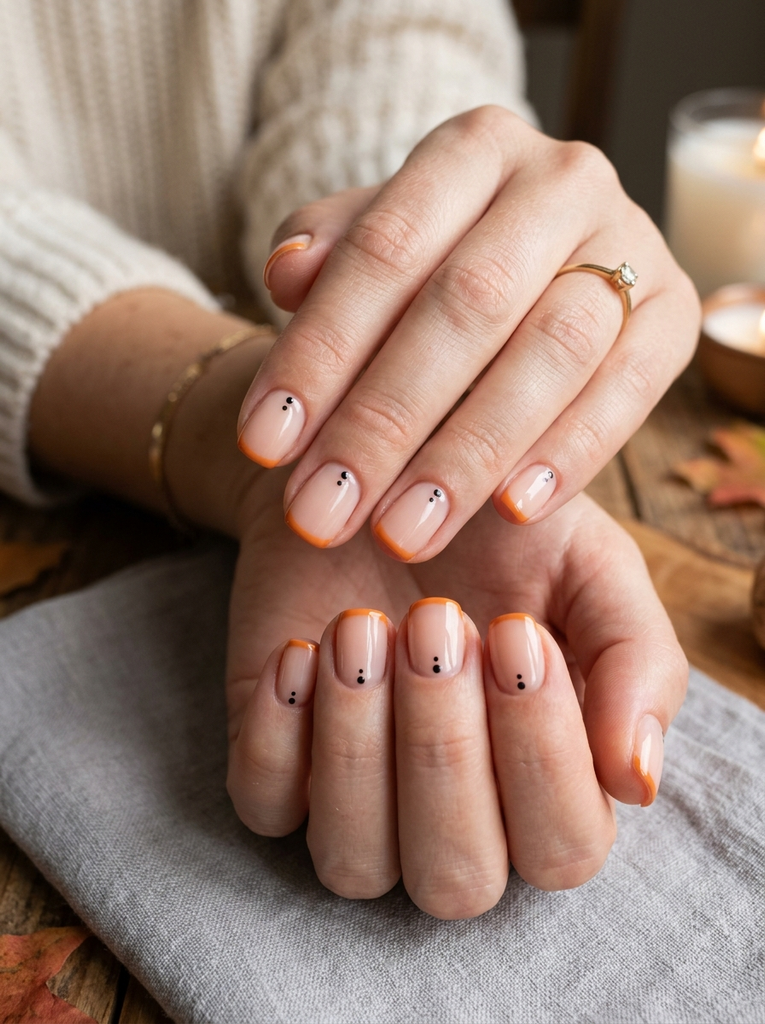
Orange French tips are a softer alternative to a full orange manicure. Use a sheer nude base and paint a narrow orange line across each tip. Add tiny black dots near the base for a subtle Halloween touch.
The orange does not need to be neon. A pumpkin orange or burnt orange shade gives the manicure a more wearable finish. Keep the dots small so they do not overwhelm short nails.
- Best for: Short and medium nails
- Difficulty: Easy DIY
10. Minimal Ghost French Tips
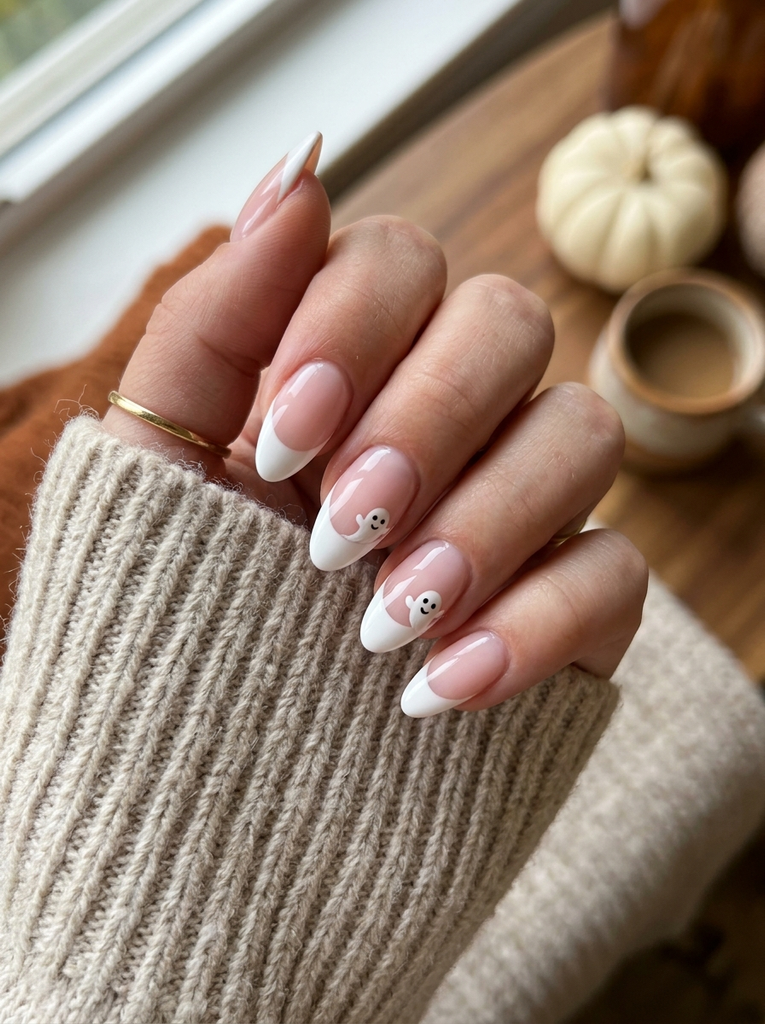
Combine a classic French manicure with tiny white ghosts for a cute seasonal look. Paint your regular French tips first, then add small ghost shapes on one or two nails.
For the ghosts, use a dotting tool or the end of a bobby pin. Add two black eyes after the white polish dries. This is one of the easiest ways to create simple halloween nails at home while keeping the manicure neat.
- Best for: Short and medium nails
- Difficulty: Beginner DIY
11. Easy Pumpkin Accent Nails
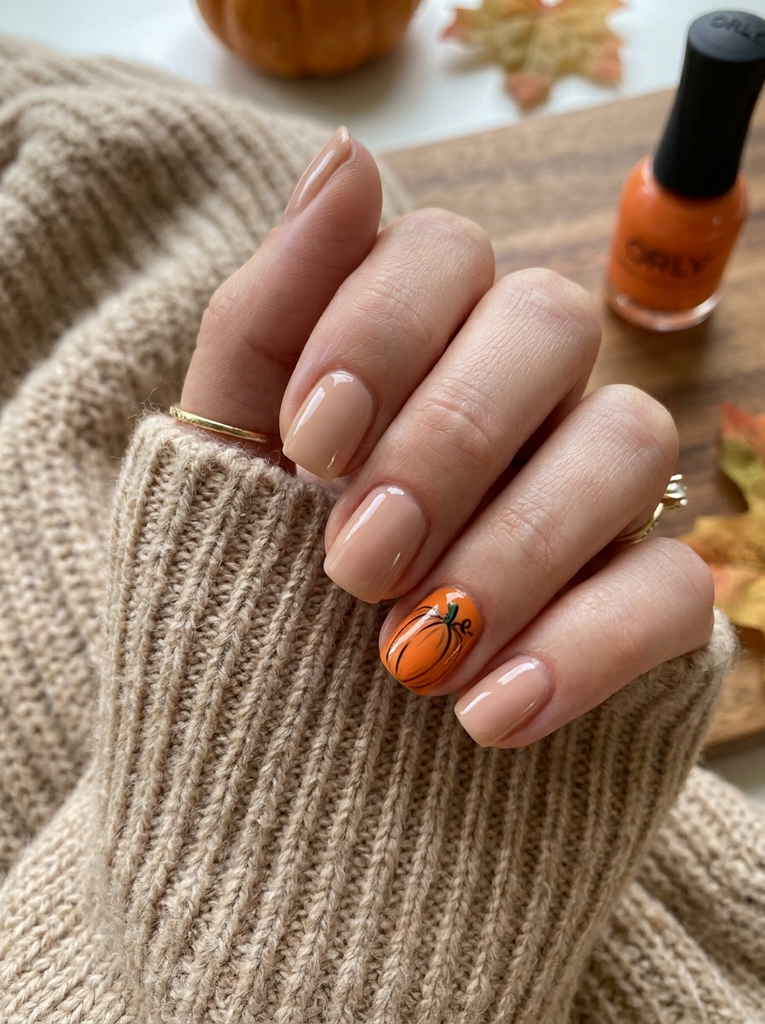
You can make pumpkin nails without painting detailed pumpkins on every finger. Use an orange base on two accent nails and keep the remaining nails nude or black.
Add a small curved black line across the pumpkin and a green or black stem. If you want a faster version, simply paint three small orange dots in a pumpkin shape and connect them.
- Best for: Short nails
- Difficulty: Beginner DIY
These diy halloween nail designs are ideal when you want recognizable Halloween details without complicated artwork.
12. Simple Black Halloween Nails with Glossy Finish
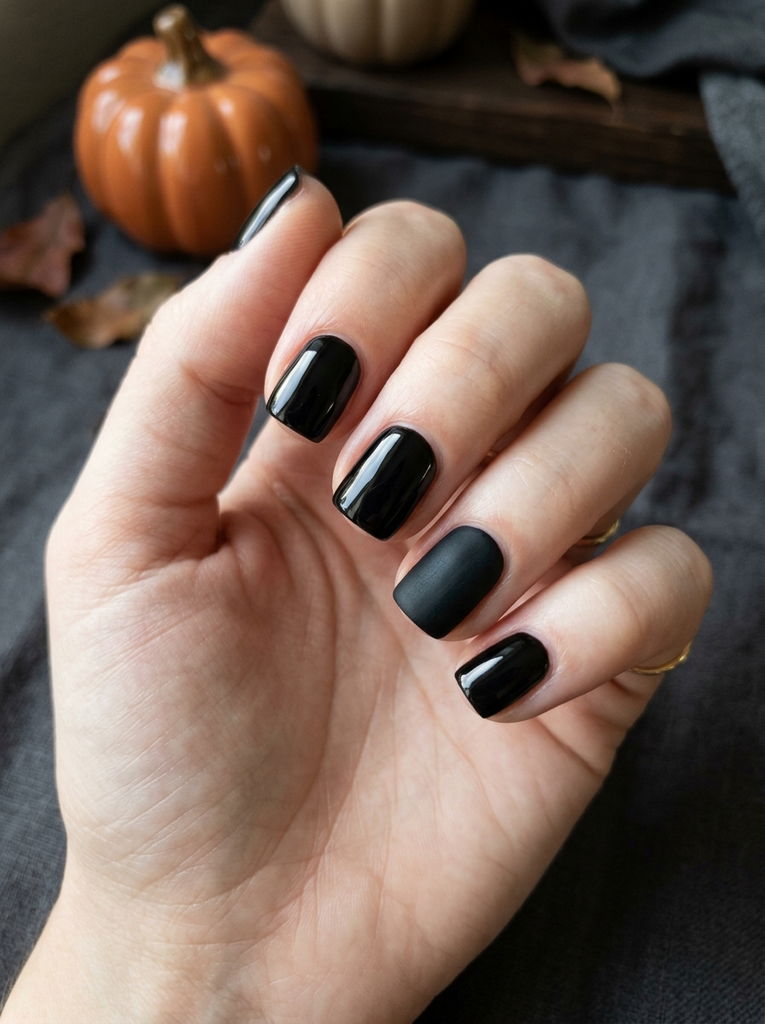
Sometimes the easiest Halloween manicure is a full black set. Choose a rich black polish and apply two thin coats rather than one thick coat. Let each layer dry before adding the next.
For a little extra interest, use a glossy top coat on most nails and a matte top coat on one accent nail. The contrast creates a stylish finish without adding painted artwork.
- Best for: Short, square, almond, or oval nails
- Difficulty: Very easy DIY
These simple halloween nail designs are a good choice when you have little time but still want a seasonal manicure.
13. Orange and Nude Checkerboard Nails
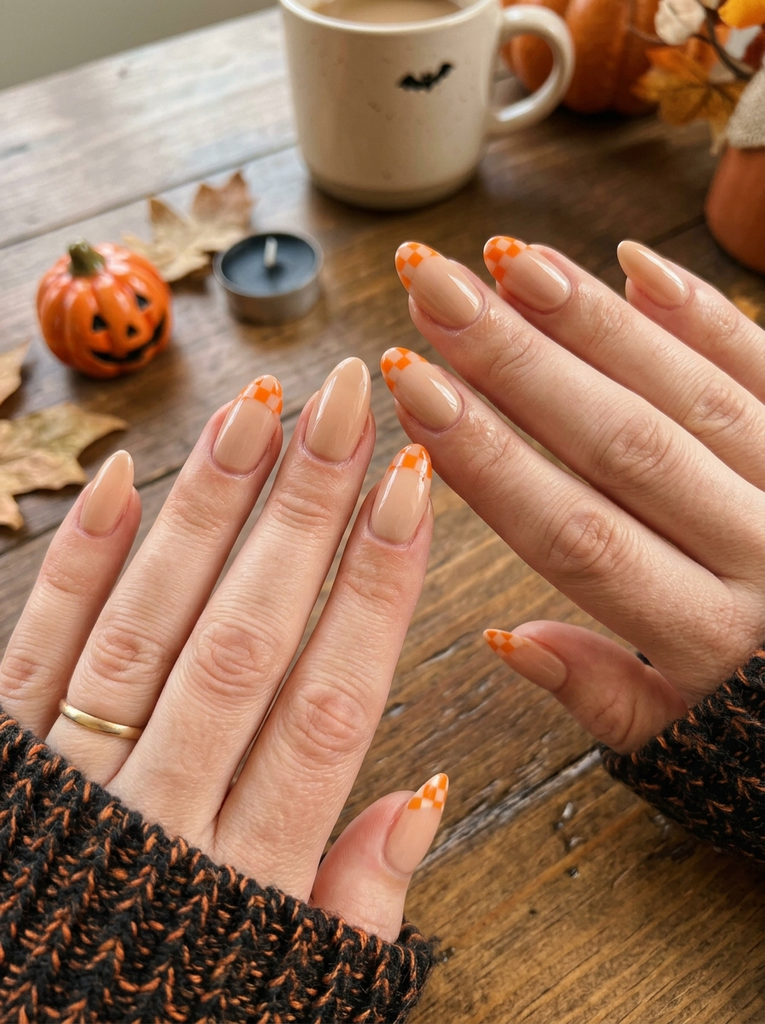
Checkerboard patterns can look complicated, but a tiny version is easier than it seems. Paint a nude base and create small orange squares over selected nails. You only need a few squares to create the effect.
Use thin lines first to divide the nail into sections. Fill alternate sections with orange polish after the lines dry. For cleaner edges, nail striping tape can help.
- Best for: Medium nails
- Difficulty: Easy to moderate DIY
These cute halloween nails easy enough for a beginner can be adjusted to match almost any Halloween outfit.
14. Simple Spider Web French Tips
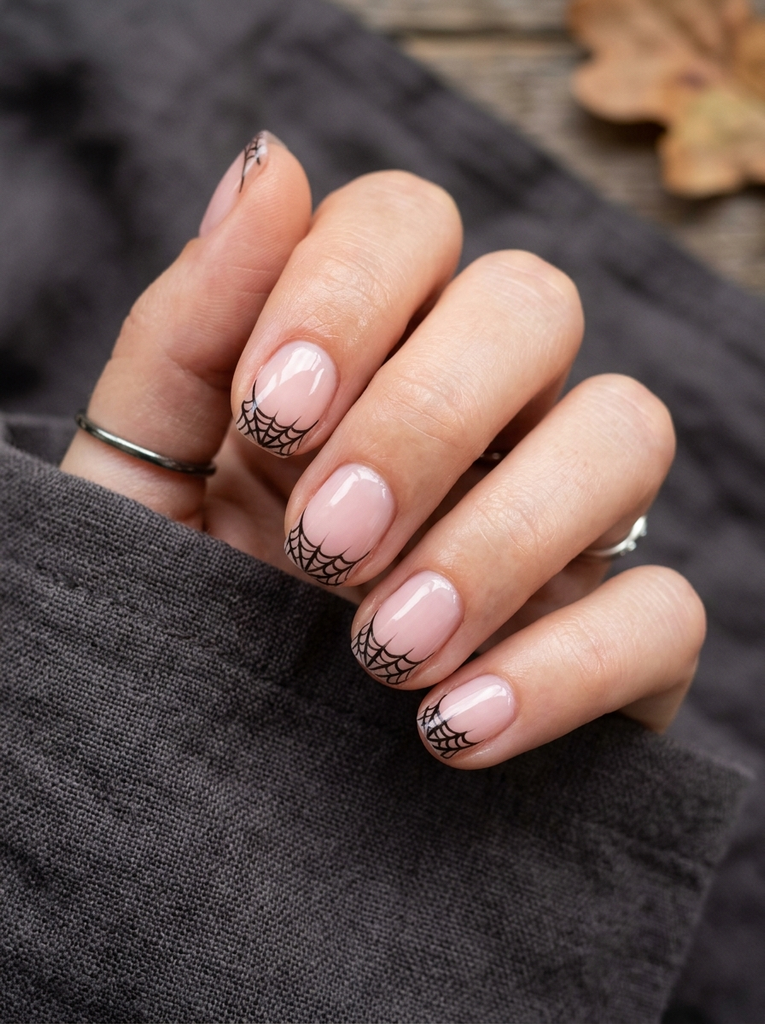
For a more detailed version of French tips, replace the traditional white line with a small black spider web. Keep the base nude or milky pink so the web remains visible.
Draw three thin lines from one side of the tip. Connect them with curved horizontal lines. You can use a toothpick for the tiny sections if you do not own a detail brush.
- Best for: Short and medium nails
- Difficulty: Moderate DIY
This design gives you simple spooky halloween nails without needing a full Halloween scene.
15. Cute Ghost and Pumpkin Mix
Mixing ghosts and pumpkins makes a playful Halloween manicure. Use a nude or pale orange base and place one character on each accent nail. Keep the remaining nails in a solid color to prevent the manicure from looking too busy.
Paint the pumpkins with three simple curved sections. For the ghosts, use small white rounded shapes with black eyes. A glossy top coat brings the colors together.
- Best for: Short and medium nails
- Difficulty: Easy DIY
This is a fun choice for cute halloween nails easy enough to recreate at home.
16. Spooky Black Drip Tips
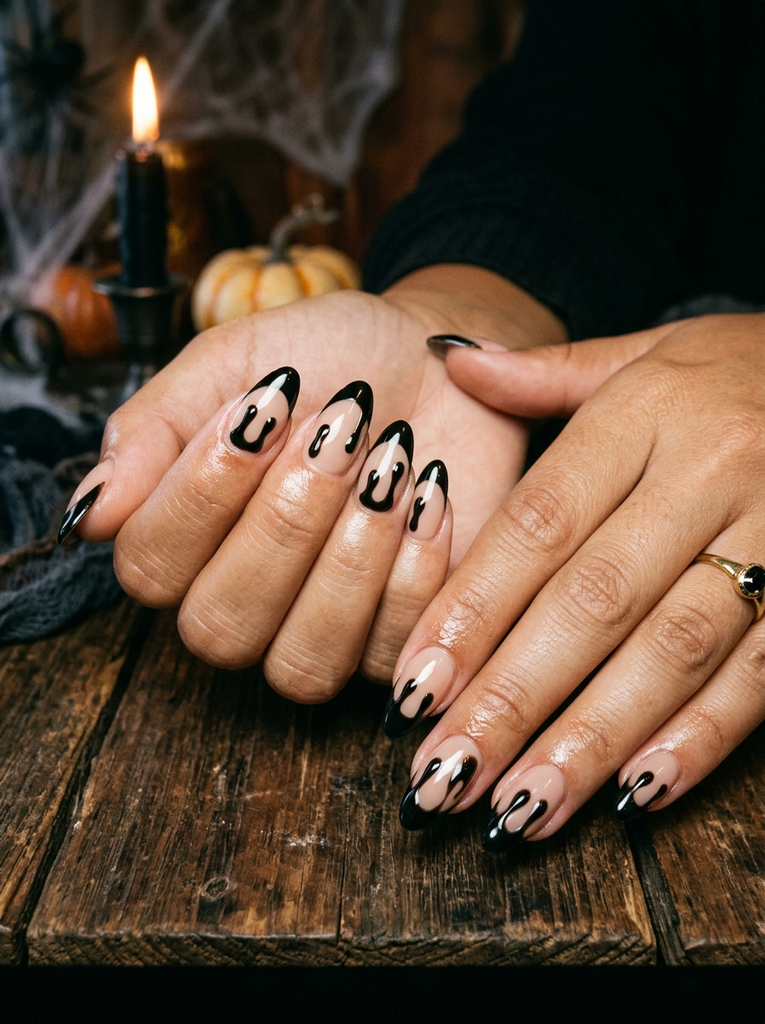
Black drip tips create a dramatic Halloween effect while using only one main detail. Start with a nude, pale pink, or orange base. Paint black French tips, then add a few rounded drips extending downward.
The drips do not need to match perfectly. Vary their lengths slightly for a more natural look. Use a fine brush for the narrow sections and a dotting tool for rounded ends.
- Best for: Medium and long nails
- Difficulty: Easy to moderate DIY
These spooky easy halloween nail designs are especially striking for Halloween parties and evening events.
17. Aesthetic Nude Nails with Tiny Bats
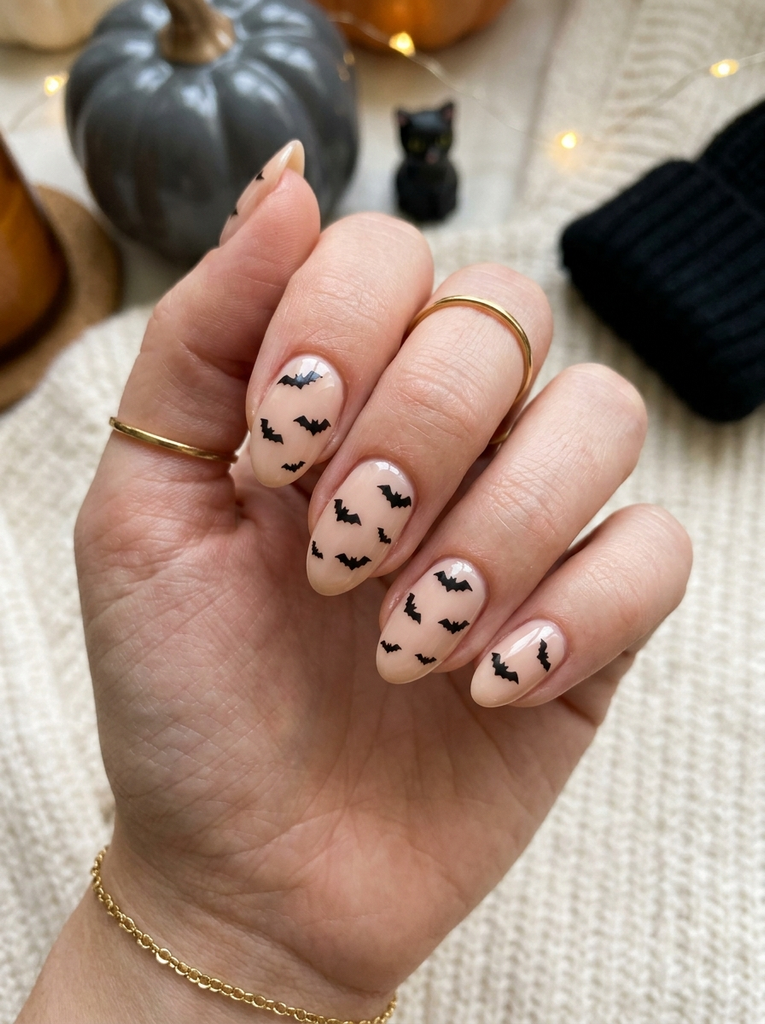
If you prefer subtle manicures, keep the entire base nude and add tiny black bats. Place the bats at different heights so the nails feel more playful. The neutral background keeps the design wearable.
Use a very small brush or toothpick to make each bat. Two curved wings and a tiny center body are enough. Seal with a clear top coat after the artwork has dried.
- Best for: Short and almond nails
- Difficulty: Easy DIY
These aesthetic easy halloween nails are ideal if traditional orange and black designs feel too bold.
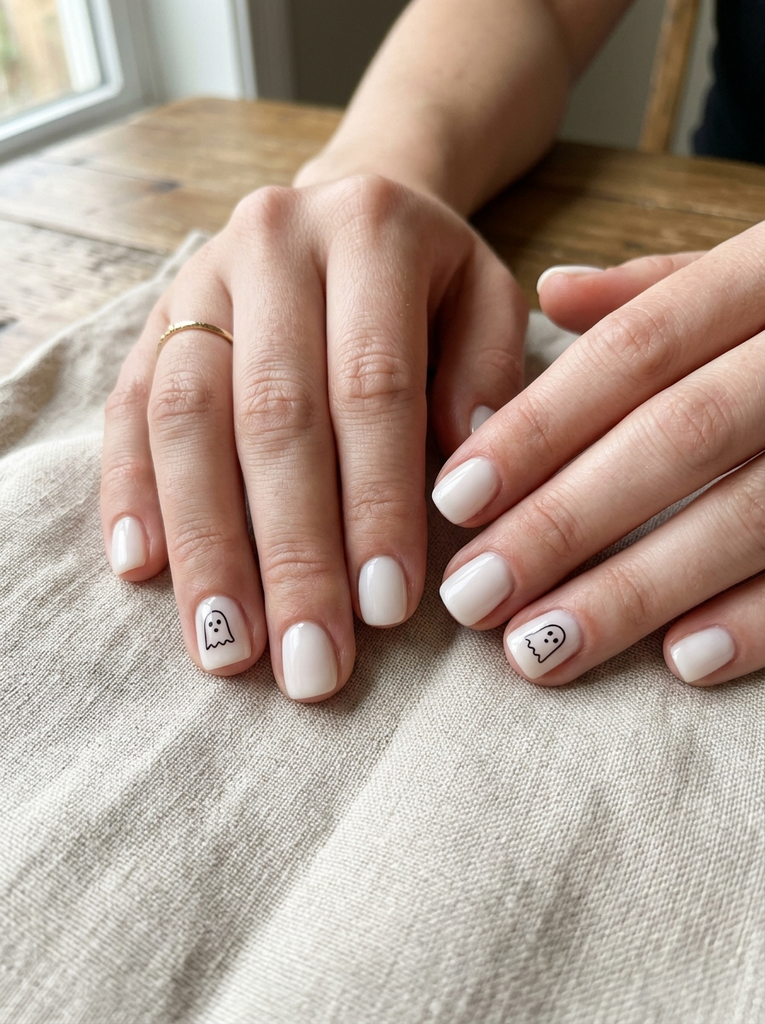
18. Minimalist Black and White Ghost Nails
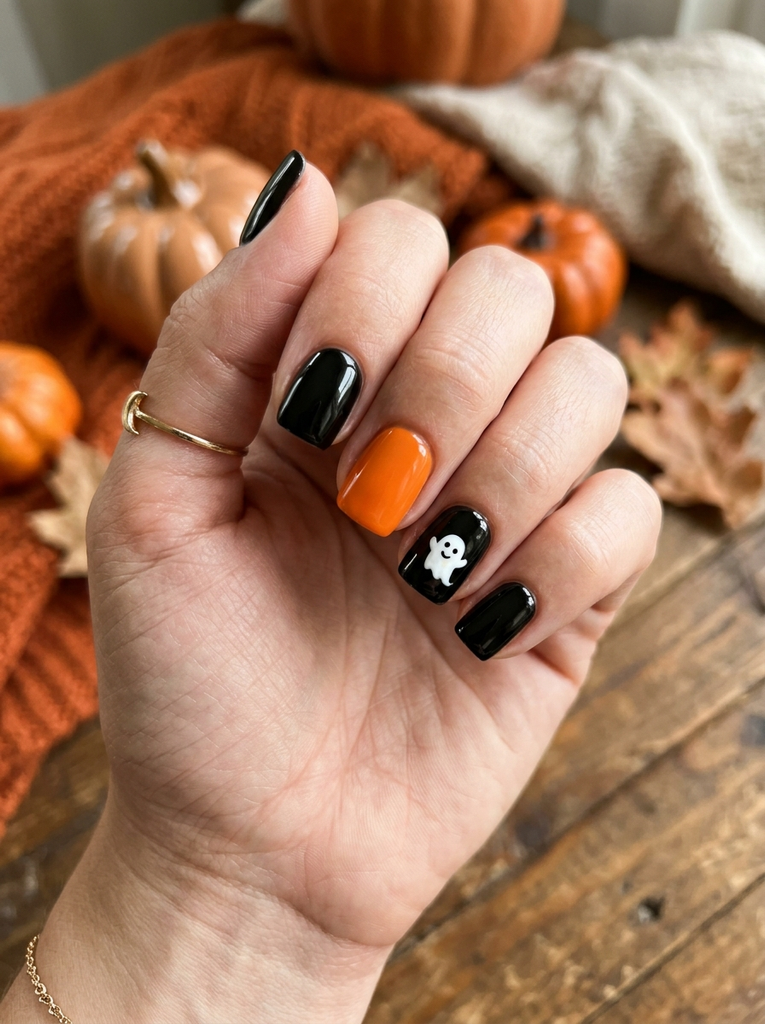
Black and white create a clean Halloween look without bright colors. Paint most nails white or milky white, then add tiny black ghost outlines to two accent nails.
You can make the ghost outline with a thin black brush. Leave the center white and add two small eyes. This is one of the minimalist halloween nail designs that works well throughout October.
- Best for: Short and medium nails
- Difficulty: Easy DIY
19. Easy Halloween Nails with Toothpick Details
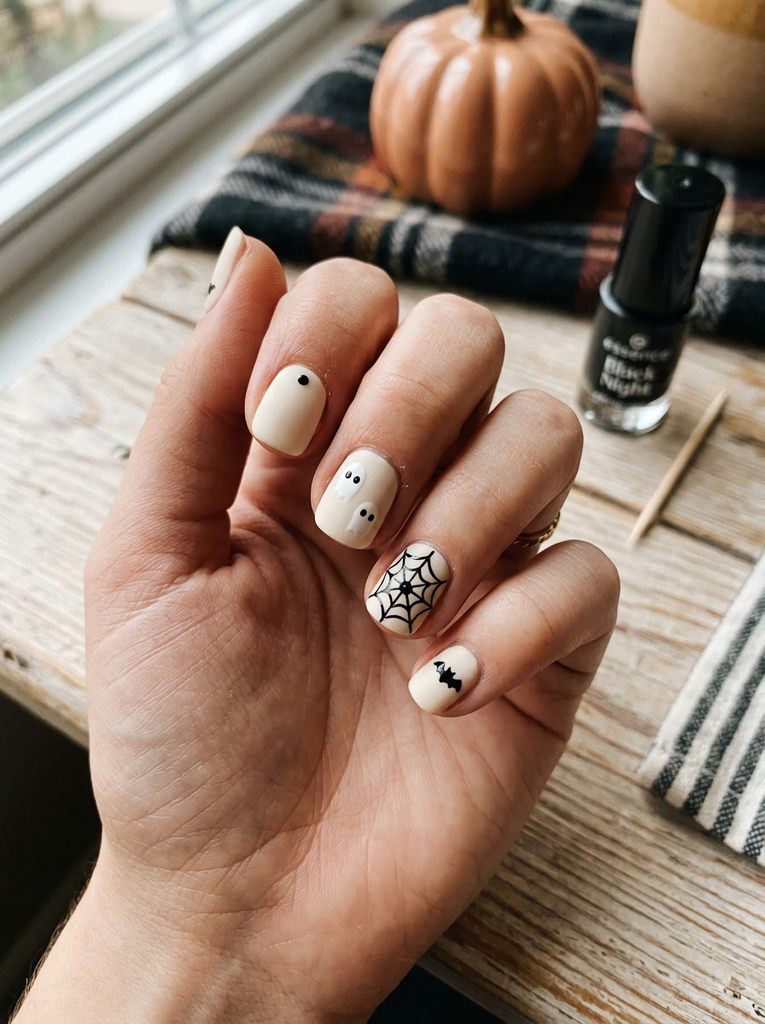
You do not need a professional nail-art kit to create Halloween designs. A clean toothpick can make tiny dots, spider legs, ghost eyes, pumpkin lines, and small web details.
Start with a completely dry base coat. Dip only the tip of the toothpick into a small amount of polish, then touch it gently to the nail. Wipe the toothpick between colors so the details stay crisp.
- Best for: Short nails and beginners
- Difficulty: Very easy DIY
This method is especially useful for easy halloween nails without tools. If you already have regular polish at home, you may not need anything else.
20. Easy Black and Orange Halloween Mix
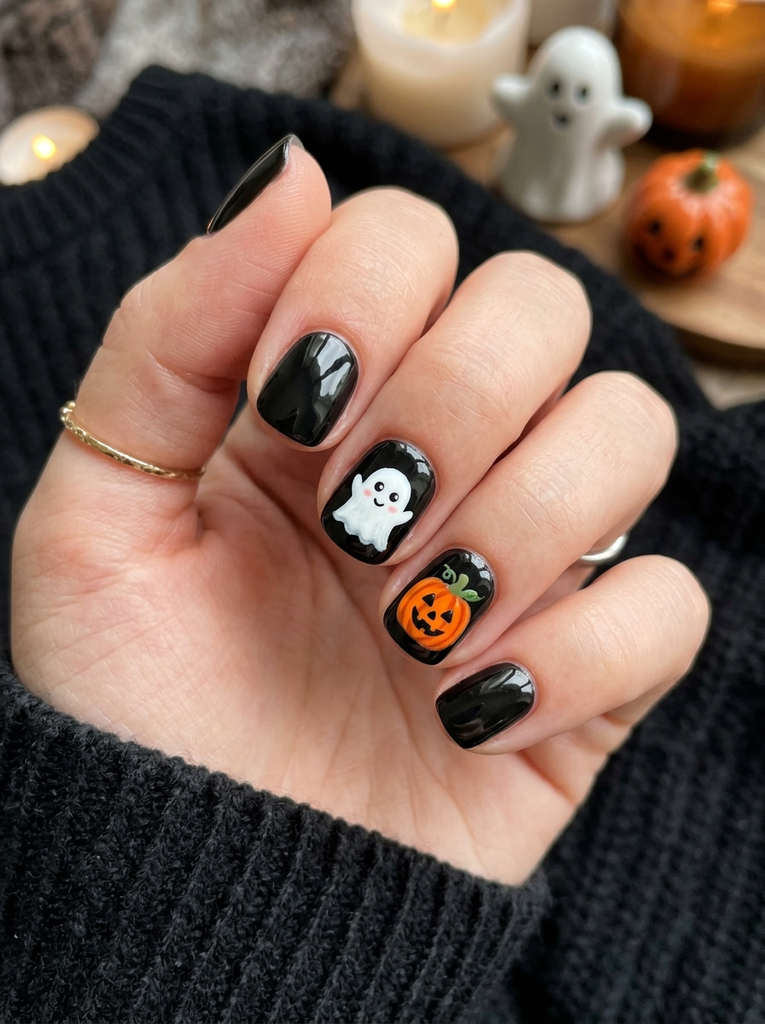
A black and orange manicure is a reliable final choice when you want several Halloween elements in one set. Paint two nails orange, two nails black, and use one accent nail for a tiny ghost, pumpkin, or spider web.
Keep the artwork small so the colors remain the main focus. A glossy top coat can help regular polish look smoother and protect the design. Gel polish can last around two to three weeks when professionally applied and properly cured, while regular polish usually needs more frequent touch-ups.
- Best for: Short, square, almond, or oval nails
- Difficulty: Easy DIY
These easy black and orange halloween nails are simple enough for a last-minute manicure and colorful enough to stand out in photos.
How to Make Easy Halloween Nail Art at Home
Creating Halloween nails at home is mostly about keeping the shapes small and the colors simple. You do not need perfect artwork to make a manicure look festive.
Start by cleaning your nails and gently pushing back the cuticles. Apply a thin base coat, then add your chosen background color.
Let the base dry before painting details. Working over wet polish can cause small designs to smear.
For tiny artwork, use a toothpick, bobby pin, or small nail-art brush. A dotting tool is useful for eyes, pumpkin sections, spider bodies, and other rounded details.
If you want to know how to paint halloween nails step by step, use this basic order:
- Clean and shape the nails.
- Apply a base coat.
- Add one or two thin coats of your background color.
- Allow the base to dry.
- Paint the Halloween design.
- Let the artwork dry.
- Apply a top coat.
For beginners, it is better to practice the design on paper before putting it on your nails. This helps you see how much polish to use and how large the design should be.
How to Choose the Right Halloween Nail Design
Short nails usually look best with small designs. Ghost faces, tiny bats, French tips, dots, and simple pumpkins can fit comfortably without making the nail look crowded.
Longer nails give you more room for spider webs, drip effects, checkerboards, and larger characters. However, length is not required for a good Halloween manicure.
Your color choice also changes the mood. Orange and black feel traditional and playful, while nude, burgundy, white, and black can create a softer or more elegant result.
If you are new to nail art, choose a design with one main shape. A tiny ghost or pumpkin is easier to paint than a complete haunted-house scene.
FAQs
What are the easiest Halloween nails for beginners?
Ghosts, pumpkins, bats, dots, and simple French tips are among the easiest Halloween designs for beginners. They can be created with regular polish and simple tools such as a toothpick or bobby pin.
Can I do Halloween nail art at home without a nail-art kit?
Yes. A toothpick, bobby pin, or the tip of a small brush can create many basic designs. These tools work well for dots, eyes, spider legs, pumpkin lines, and small webs.
What Halloween nail designs work best on short nails?
Small ghosts, bats, pumpkins, French tips, dots, and tiny spider webs work especially well on short nails. Keeping the artwork near the center or tip helps prevent the manicure from looking crowded.
How do you make easy Halloween nails last longer?
Start with clean, dry nails and apply a base coat before the color. Finish with a top coat and seal the free edge of each nail to help reduce early chipping.
What colors are best for simple Halloween nails?
Black, orange, white, nude, deep red, and purple are popular Halloween choices. You can use only two colors for a simple manicure or combine three shades for more contrast.
Can I use a toothpick for Halloween nail art?
Yes. A toothpick can create very small dots and thin details when used gently. It is especially useful for spider legs, ghost faces, pumpkin lines, and simple spider webs.
Conclusion
The best Halloween manicure does not have to be complicated. These 20 designs show how ghosts, pumpkins, bats, spider webs, French tips, and classic Halloween colors can become fun halloween nails easy design ideas for beginners and experienced nail lovers alike. Choose a design that matches your nail length and comfort level, then save this post for your next manicure.