Halloween Nails Green and Black: 20 Distinct Nail Art Ideas for Spooky Season
Yes—this guide answers how to wear halloween nails using green and black together, with 20 distinct designs. Each idea covers color choices, nail shape, length, finish, and a practical tip so you can recreate the look at home or in a salon.
1. Spooky Green and Black Marble Nails
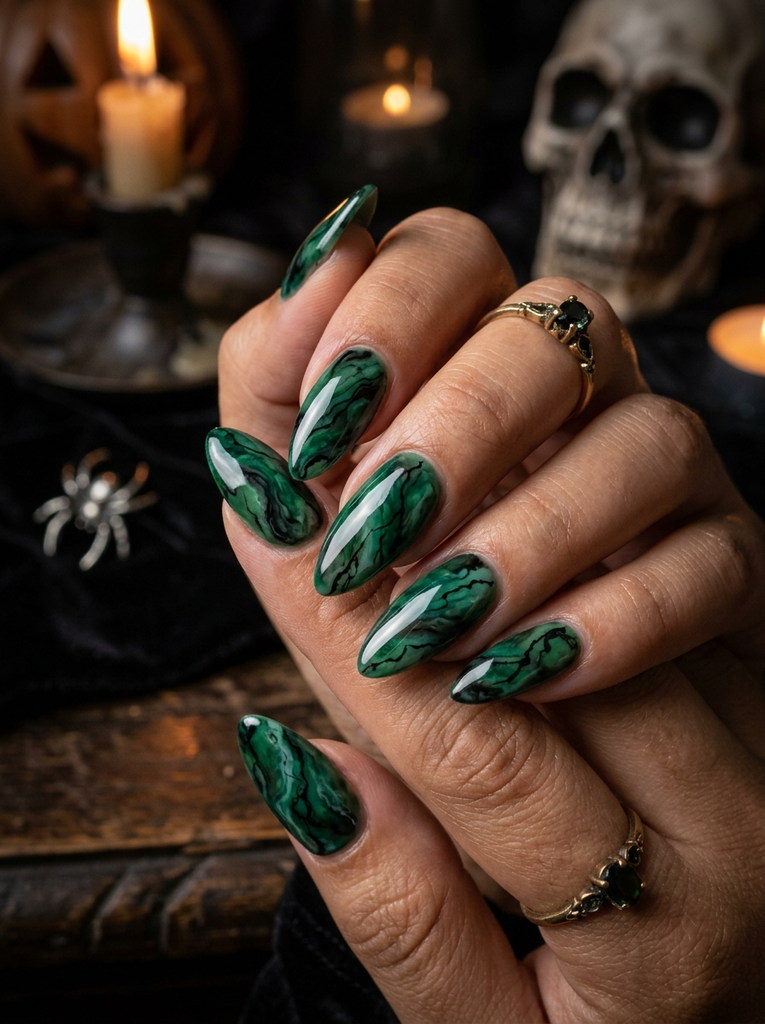
These nails mimic natural marble with emerald green swirls and black veins. Use a light touch to keep the veins crisp, and consider a thin layer of clear top coat for shine. Shape almond, length medium for visible detail. Finish: high gloss. Suits: artistic types and party goers. Occasion: Halloween parties, photo ops. Tip: Use a fine liner brush to paint vein lines and smooth edges with acetone for a clean look.
- Best for: Medium-length almond nails that showcase the swirling pattern.
- Difficulty: Moderate; practice steady brushwork for vein lines.
- Best occasion: Costume parties, spooky shoots.
- Tip: Keep the green slightly translucent to mimic natural marble.
2. Witchy Lime Green and Black Moon Nail Art
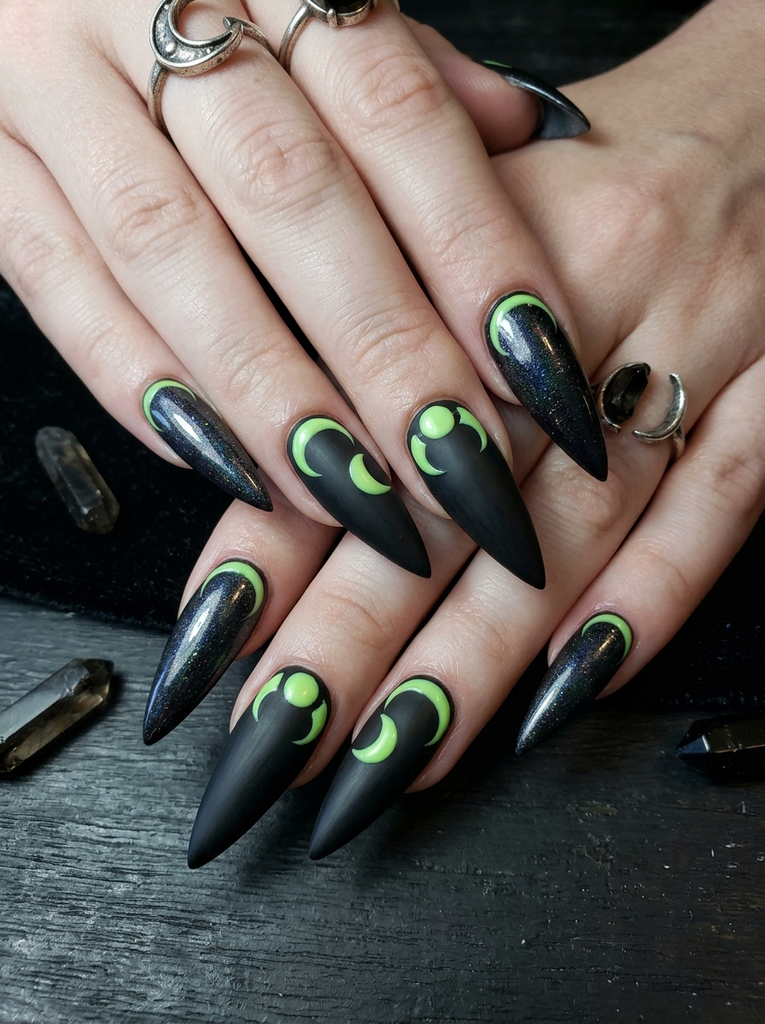
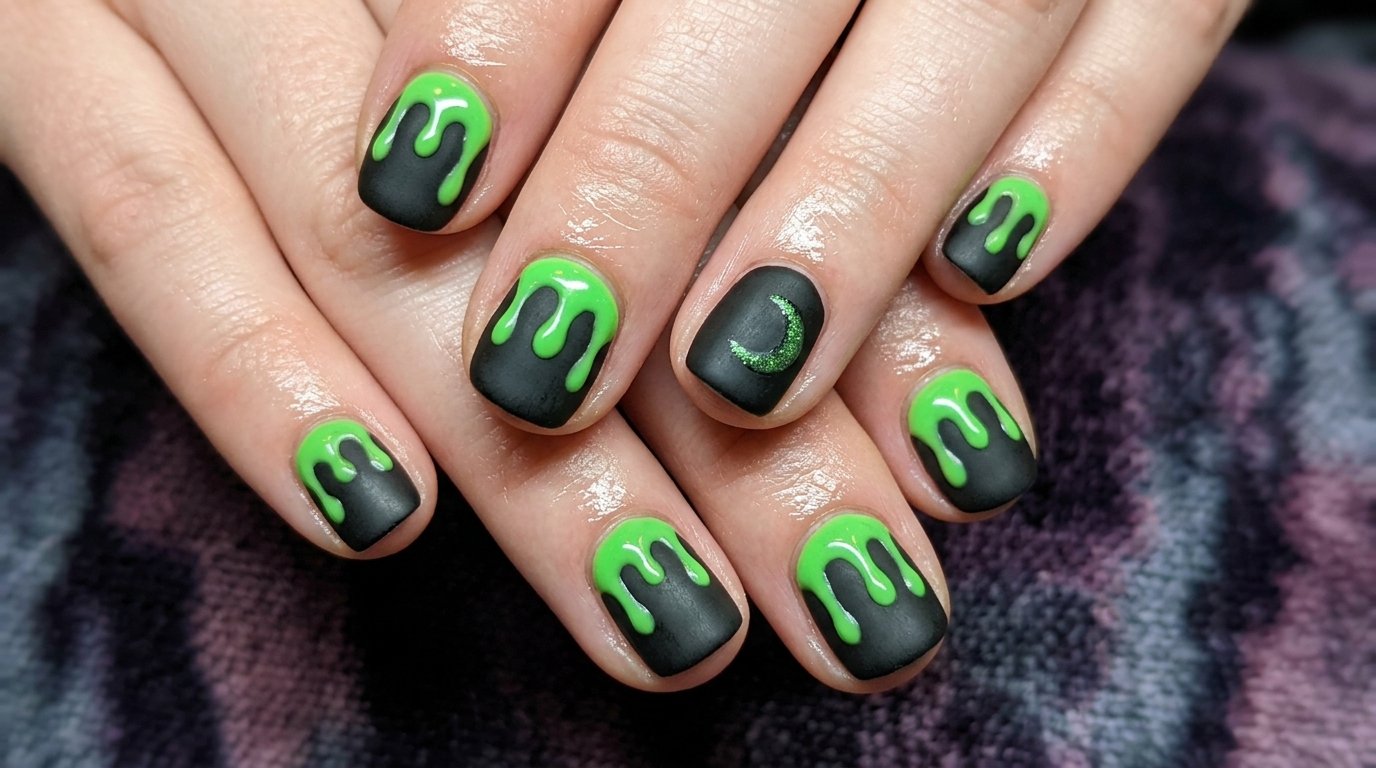
Inky black nails are punctuated with lime green moon phases or crescent shapes along the cuticle, lending a witchy vibe. Shape: stiletto or almond for dramatic effect. Length: long for the moons to breathe. Finish: high gloss with a subtle shimmer top coat. Suitable for: fans of celestial motifs and Halloween parties. Tip: Use a stamping plate or freehand crescent shapes with a fine brush.
- Best for: Long almond or stiletto nails that show off the moons.
- Difficulty: Moderate; clean crescent shapes take a steady hand.
- Best occasion: Moonlit gatherings and photo moments.
- Tip: Seal edges to prevent chipping on active hands.
3. Black Green Halloween Nail Designs with Chrome Finish
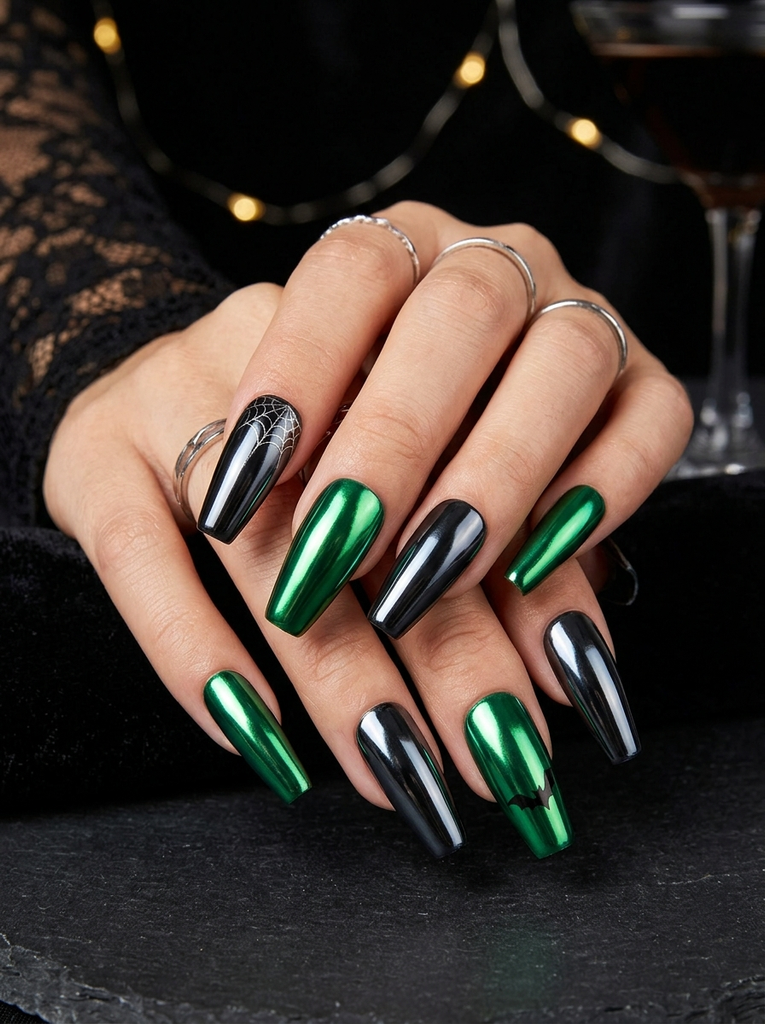
A bold metallic look uses black and green chrome powder for a mirror-like finish. Apply a black or deep green base, then press on chrome powder with a soft brush for a reflective surface. Nail shape: coffin or almond; length: medium. Finish: glossy chrome. Suits: fashion-forward Halloween lovers. Tip: Tap a clear top coat over the chrome to maintain shine and reduce fingerprint marks.
- Best for: Short to medium coffin nails showcasing the chrome.
- Difficulty: Moderate; handling powder requires a steady hand.
- Best occasion: Night-out events and costume parties.
- Tip: Use a lint-free wipe between steps to keep powder from clumping.
When your manicure feels complete, pair it with Hair Color Ideas for Brunettes that create a coordinated beauty look without requiring complicated styling or extra time.
4. Green and Black Glitter Gradient Nails
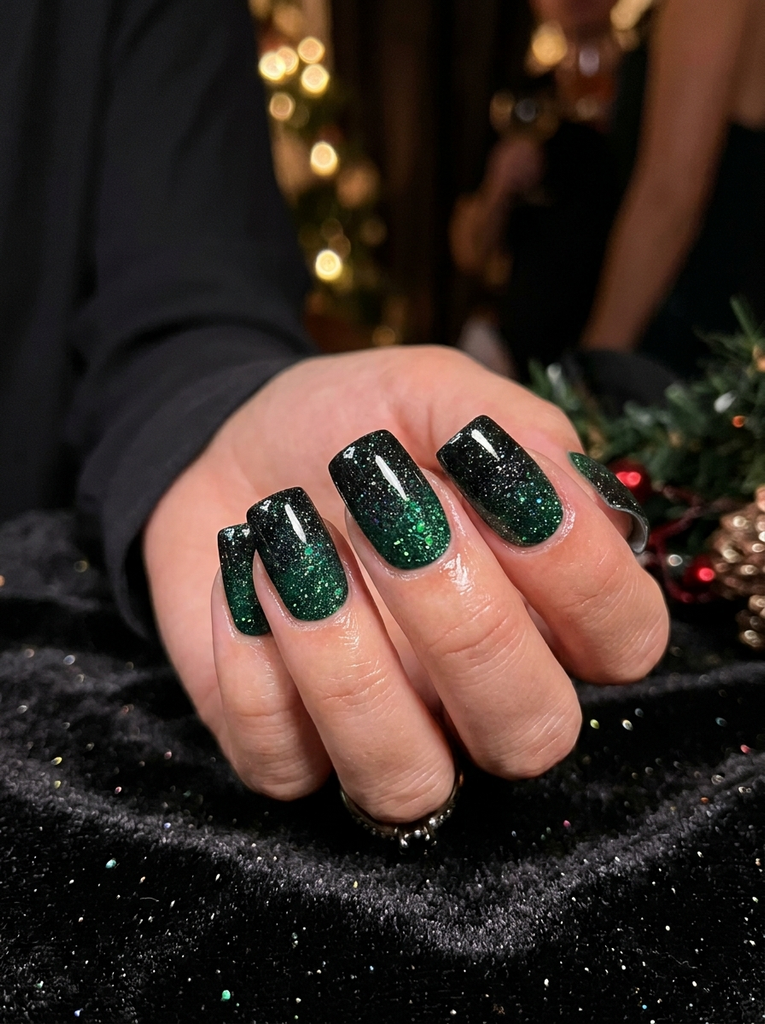
A dramatic gradient from forest green to black with glitter fades in. Shape: square or rounded square; length: medium. Finish: sparkly with a smooth gradient. Best for: party nights and glam Halloween looks. Tip: Use a makeup sponge to apply glitter for a seamless blend.
- Best for: Medium-length nails with squared edges.
- Difficulty: Easy to moderate depending on glitter density.
- Best occasion: Halloween parties or photoshoots.
- Tip: Tap on only the tips first, then sweep inward to avoid bulk.
5. Lime Green Skeleton Nail Design
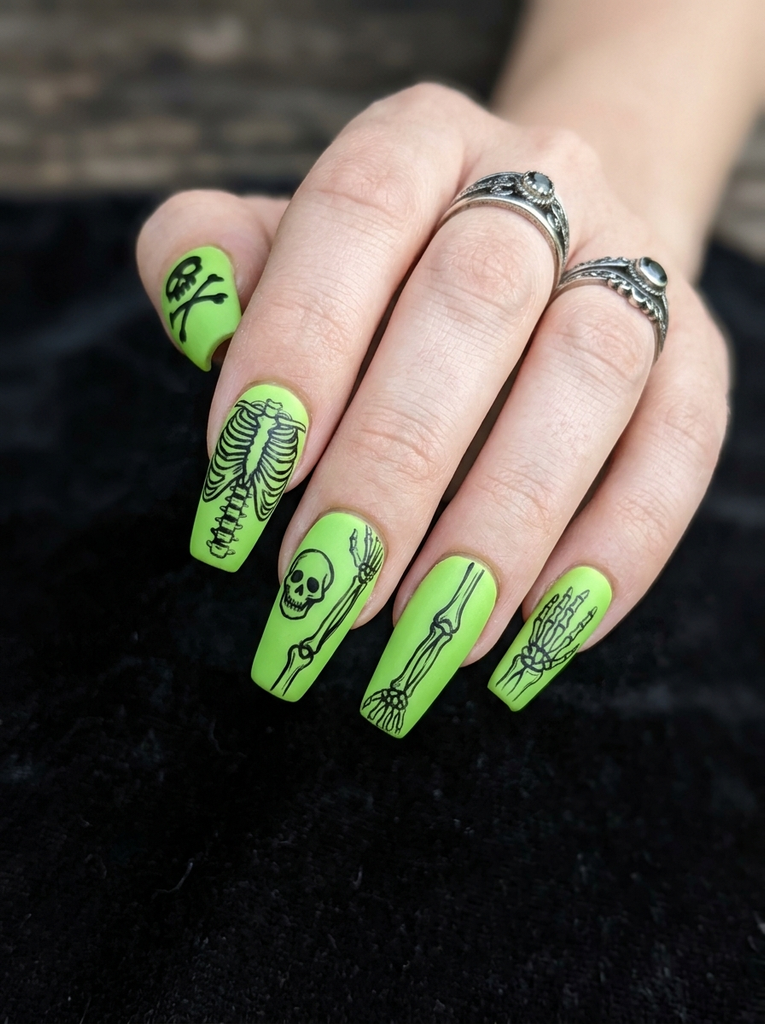
Bright lime green nails featuring delicate black skeleton bones traced with a fine brush. Shape: coffin or almond; length: medium-long for detail. Finish: satin for a spooky texture. Suits: gothic or spooky stylists. Tip: Use a very thin brush and steady motions to keep bone lines clean and accurate.
- Best for: Longer nails that hold intricate line work.
- Difficulty: Moderate; precision is key for bone shapes.
- Best occasion: Halloween parties and themed events.
- Tip: Start with light gray as a base for bone contrast.
6. Green and Black Almond Nails with Stamps
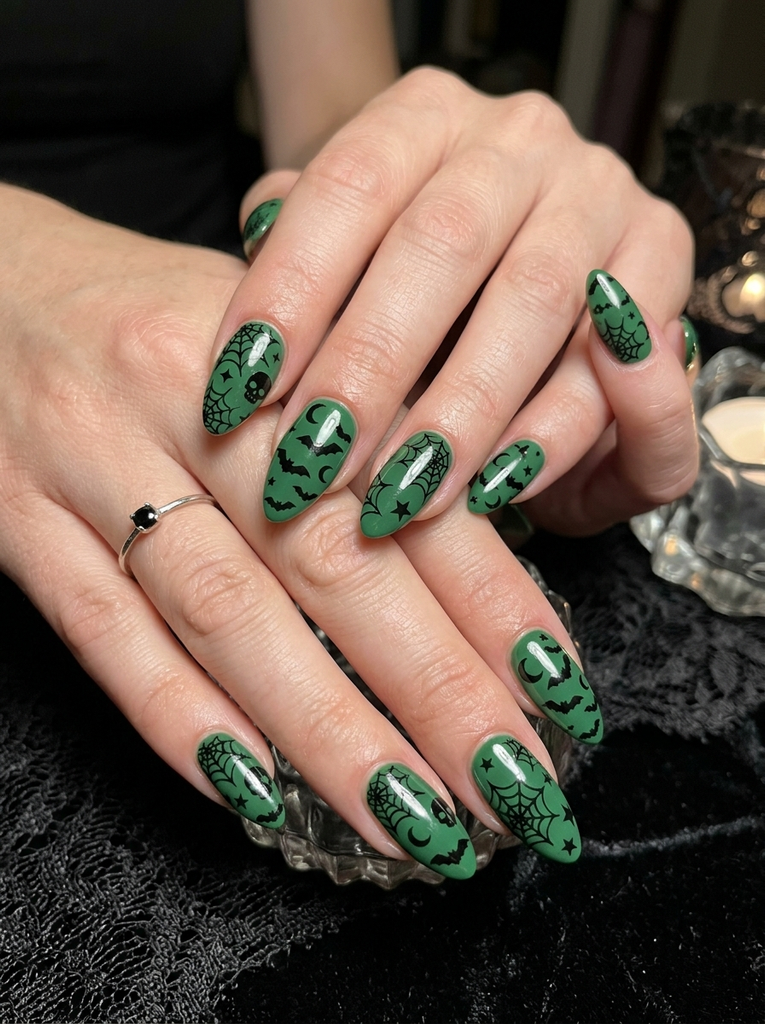
Place green and black stamping plates over a solid base for repeated spooky motifs. Shape: almond; length: medium. Finish: semi-gloss. Suitable for: lovers of quick, cohesive designs. Tip: Use a silicone stamper and a thin top coat to avoid smudging the transfer.
- Best for: Neat, repeated patterns on medium nails.
- Difficulty: Moderate due to stamping alignment.
- Best occasion: Costume parties and club nights.
- Tip: Clean the stamper with alcohol between designs to prevent ghost images.
7. Black Green Halloween Nail Art with French Tips
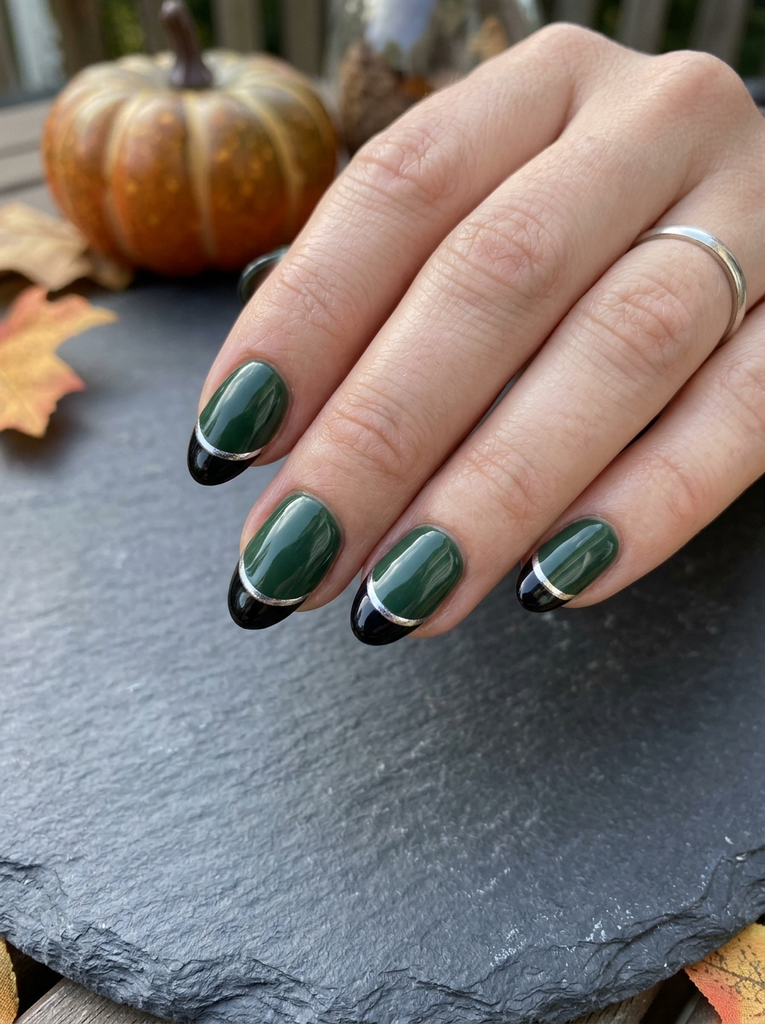
Classic French tips updated with black and green tips. Base: forest green; tip color: deep black with a tiny chrome stripe along the edge. Shape: almond or oval; length: short to medium. Finish: glossy. Best for: minimalists who still want a seasonal twist. Tip: Use nail tape to keep crisp, even lines.
- Best for: Short to medium nails needing a subtle nod to Halloween.
- Difficulty: Easy to moderate; tape helps maintain clean lines.
- Best occasion: Work events or family gatherings with a costume-friendly vibe.
- Tip: Recheck line alignment after your top coat dries to avoid smudges.
8. Green and Black Matte Tips over Green Nails
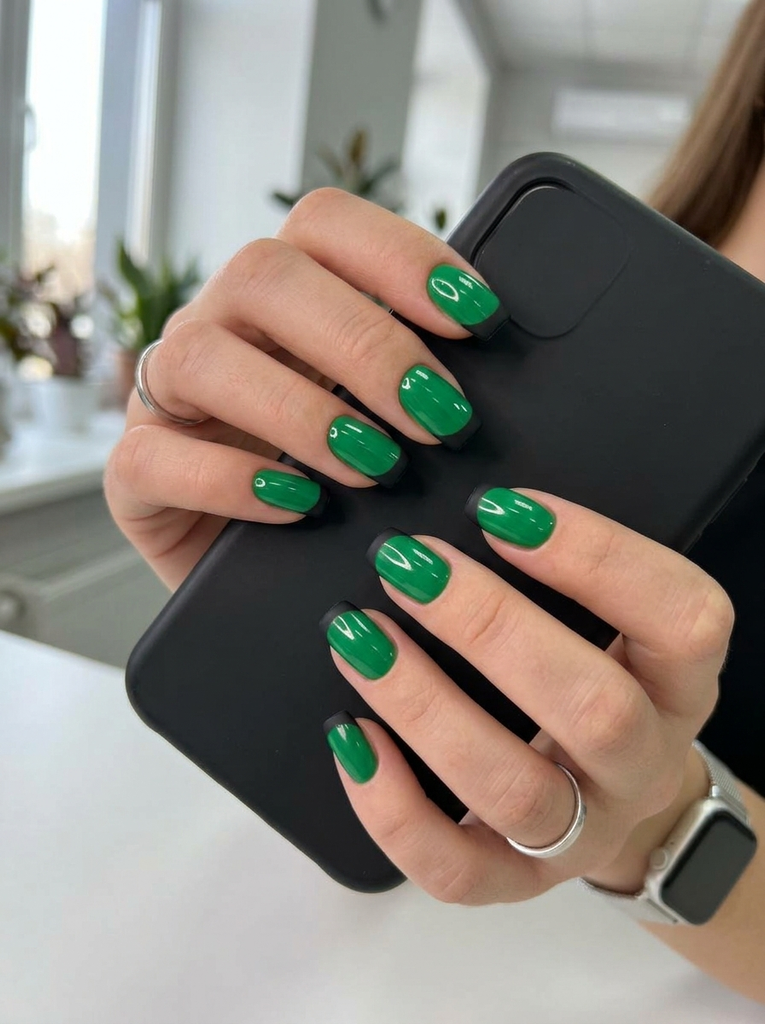
Matte black tips on a glossy green base create a modern contrast. Shape: square or rounded square; length: any. Finish: matte on tips, shiny base for two-tone effect. Suits: sleek, contemporary wardrobes. Tip: Use a matte top coat exclusively on the tips for a crisp, eye-catching look.
- Best for: Any length with a bold, two-tone style.
- Difficulty: Easy; just control where the matte layer ends.
- Best occasion: Work-friendly Halloween events and parties.
- Tip: Apply a thin layer of base coat before the matte to protect natural nails.
9. Tie-Dye Halloween Nails
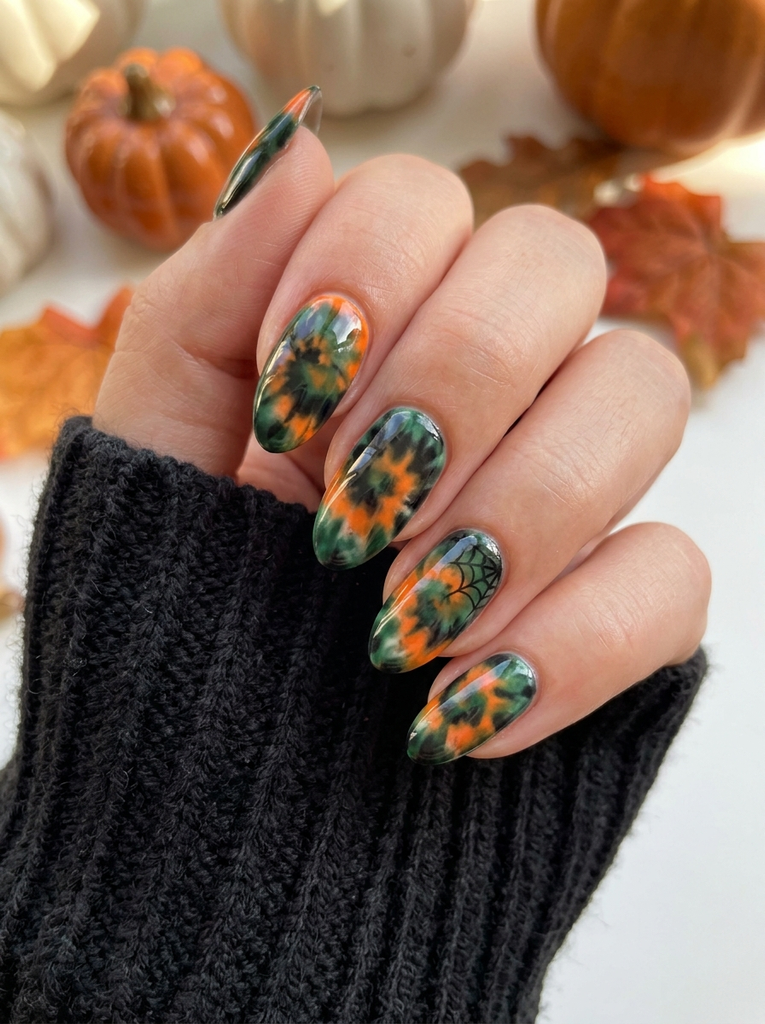
Swirled mix of green, black, and perhaps a hint of orange for a retro tie-dye vibe. Shape: rounded almond; length: medium. Finish: glossy. Best for: free-spirited Halloween looks. Tip: Use a damp brush to blend colors on the nail while still wet to create authentic tie-dye effects.
- Best for: Medium nails with lots of surface area for color blends.
- Difficulty: Moderate; blending requires a light touch.
- Best occasion: Casual Halloween gatherings and festivals.
- Tip: Seal with a flexible top coat to prevent chipping on textured designs.
10. Lime Green Ghost Splat Nails
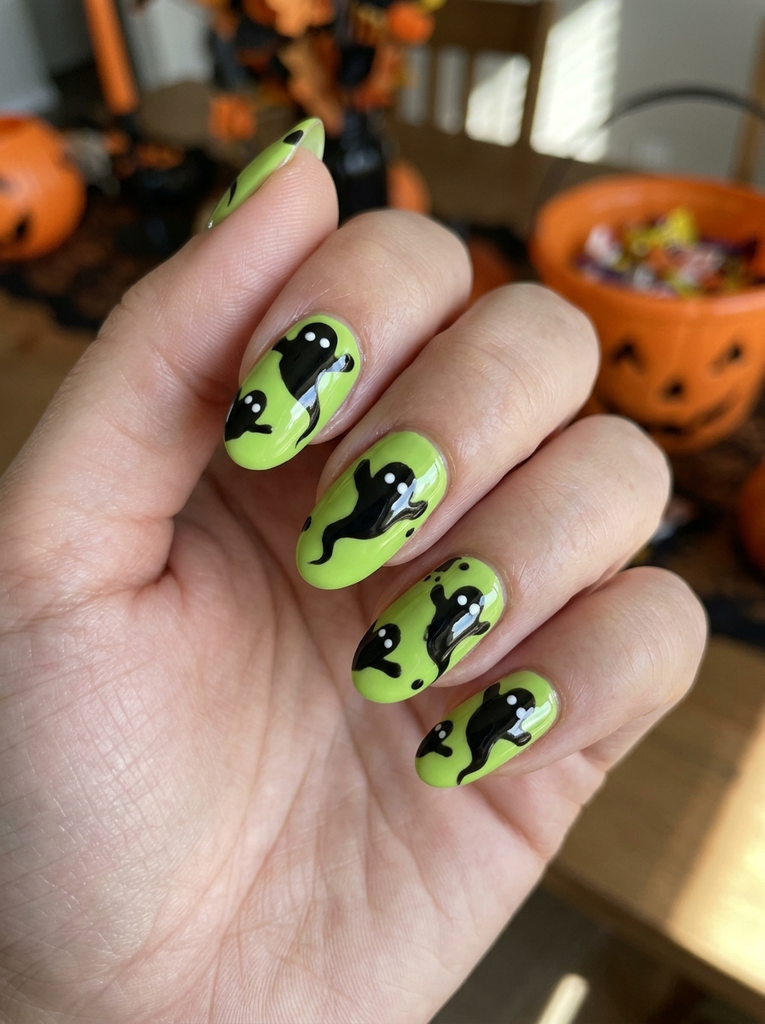
Playful lime green base with bold black ghost silhouettes or splats. Shape: oval or round; length: medium. Finish: glossy. Suits: fun Halloween events and family-friendly looks. Tip: Use a stencil or stamp for clean ghost shapes to keep spontaneity readable.
- Best for: Playful, narrative designs on mid-length nails.
- Difficulty: Easy to moderate depending on ghost detailing.
- Best occasion: Halloween parties, trunk-or-treats.
- Tip: Add a tiny white dot for eyes to give ghosts character.
11. Green and Black Chevron Halloween Nails
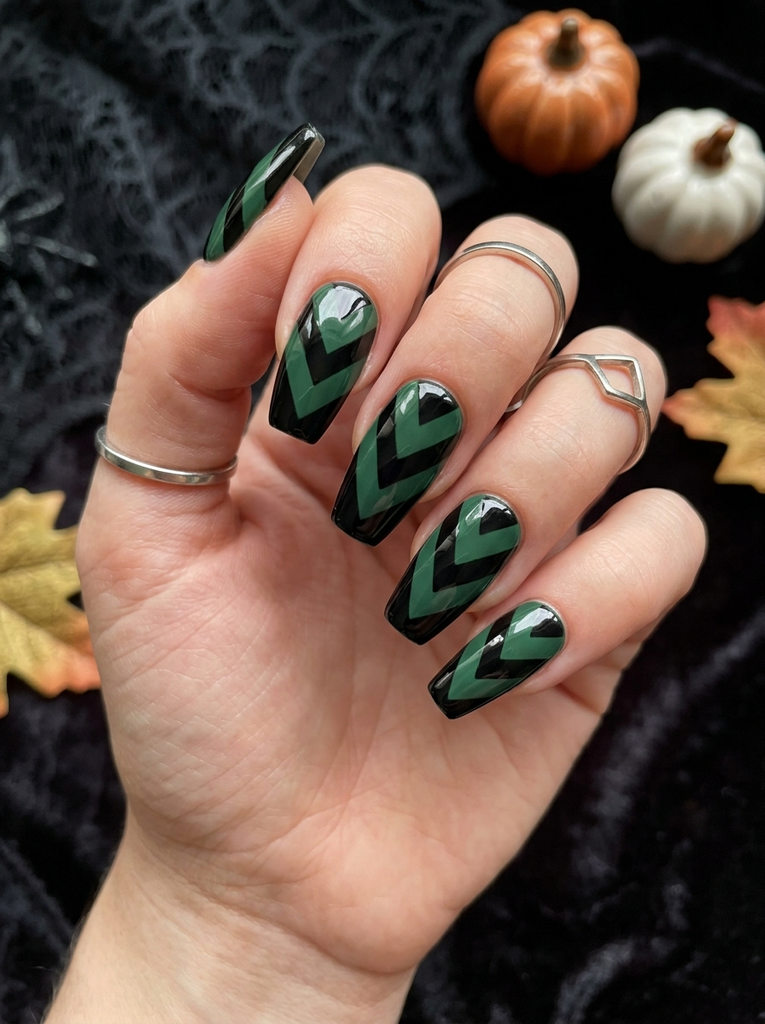
A bold chevron pattern alternating green and black creates a modern Halloween statement. Shape: coffin or almond; length: medium. Finish: glossy. Best for: graphic nail art lovers. Tip: Use a stencil or guide to keep the chevrons sharp and evenly spaced.
- Best for: Medium nails with a graphic edge.
- Difficulty: Moderate; precision helps keep lines clean.
- Best occasion: Costume parties or fashion-forward shoots.
- Tip: Start from the center and work outward to balance the pattern.
12. Green Gradient with Black Geometric Nails
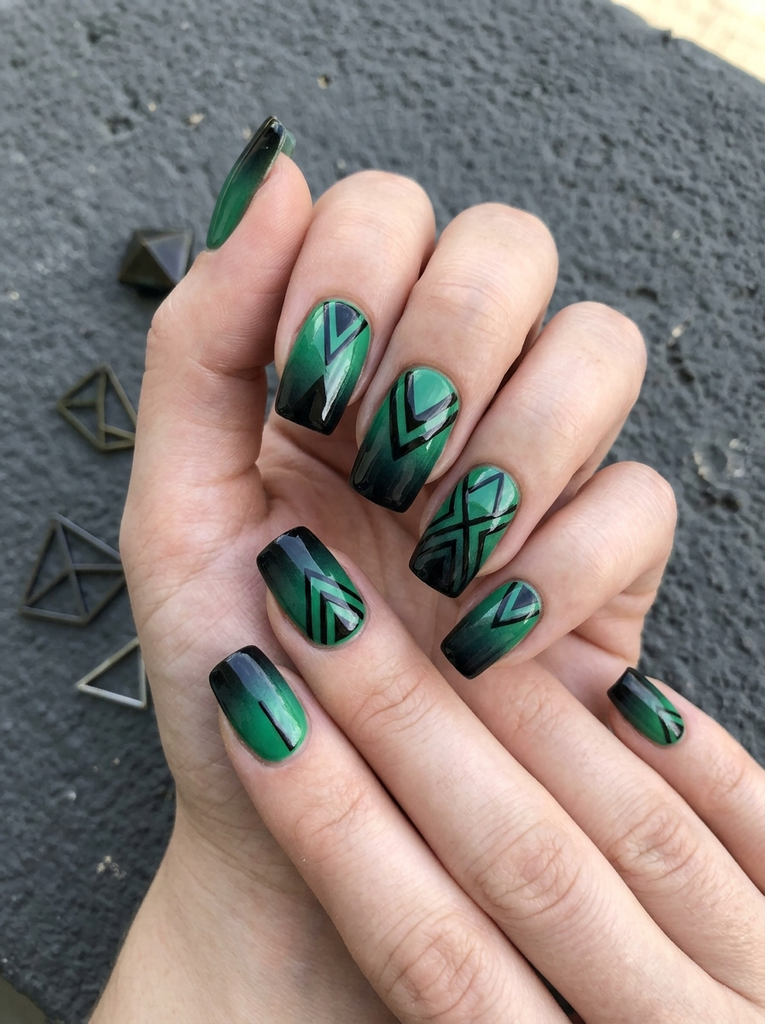
A green-to-black gradient base with bold black geometric shapes layered on top. Shape: square or squoval; length: medium. Finish: satin or glossy depending on preference. Suits: modern Minimalists and geometric lovers. Tip: Use thin striping tape to create crisp shapes.
- Best for: Nails with architectural vibes.
- Difficulty: Moderate; tape work requires patience.
- Best occasion: Art parties or fashion events during Halloween season.
- Tip: Allow base gradient to dry before applying geometric patterns to avoid bleeding.
13. Lime Green Batty Nail Art
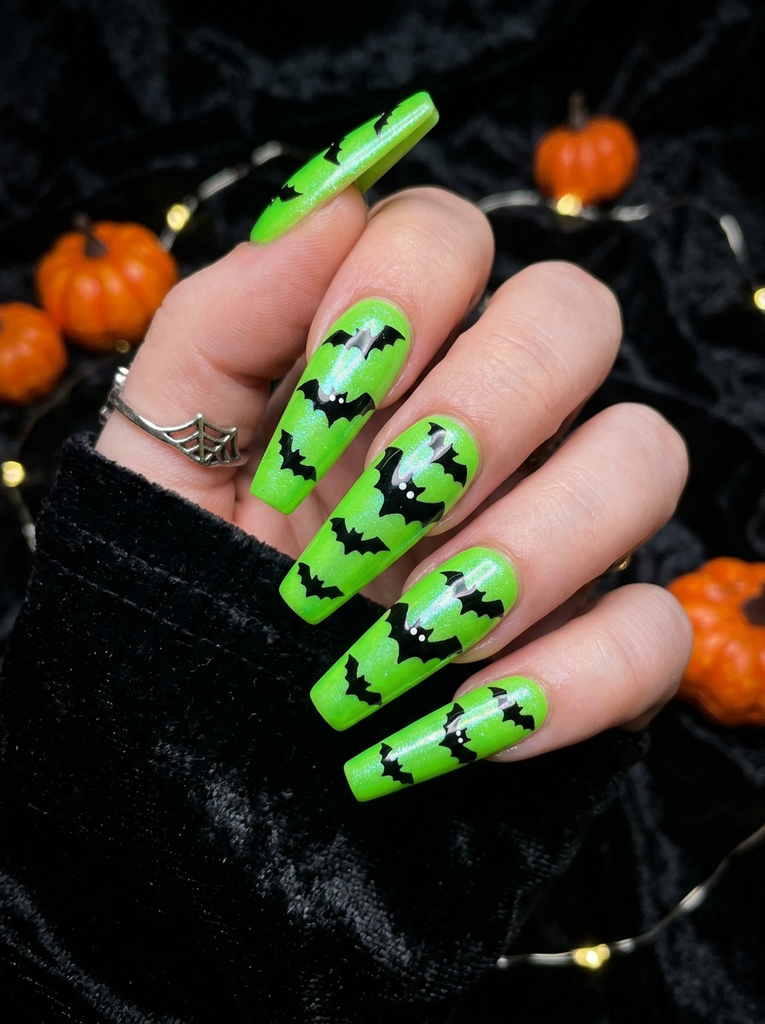
Vivid lime green nails with black bat silhouettes flying along the length. Shape: coffin; length: long for ample space. Finish: gloss with subtle shimmer. Suits: spooky, playful styles. Tip: Use a fine brush to outline wings for crisp silhouettes.
- Best for: Long nails that showcase multiple bats.
- Difficulty: Moderate due to small details.
- Best occasion: Halloween parties or photo sessions.
- Tip: Add a tiny white dot to the eye for a cute touch.
For a polished everyday look, explore halloween nails long almond that bring fresh colors, simple details, and stylish inspiration to your next manicure.
14. Black and Green Candy Stripe Nails
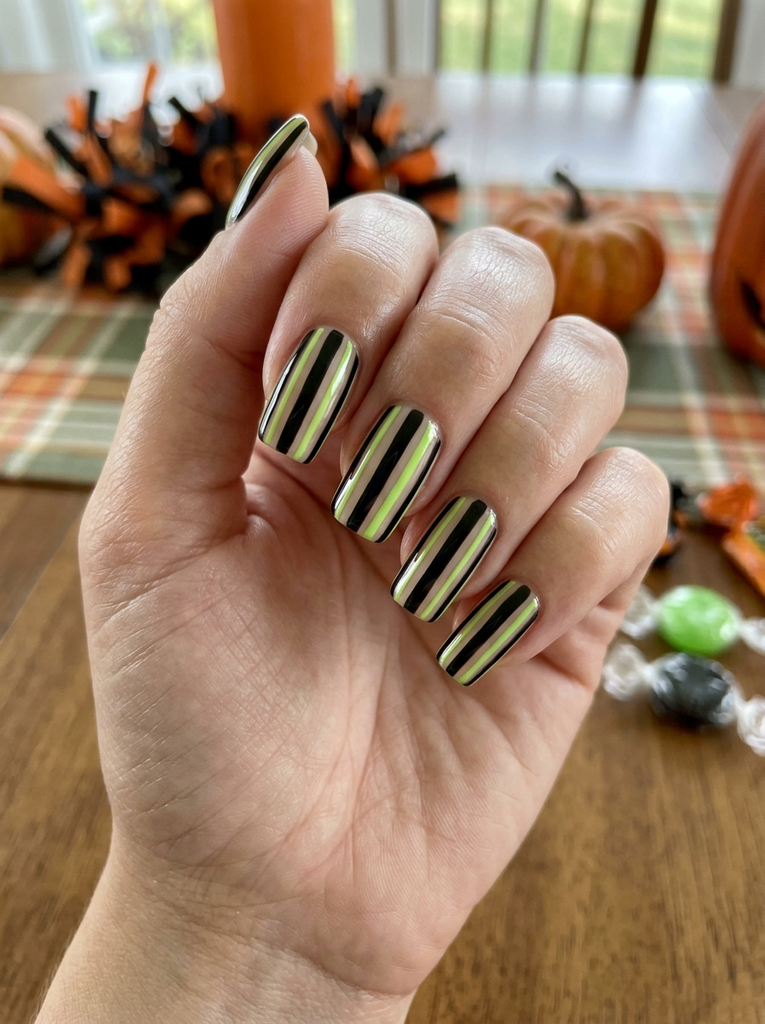
Classic candy stripes alternating black and green on a neutral base gives a retro Halloween feel. Shape: square with rounded edges; length: medium. Finish: matte or gloss. Best for: playful everyday looks during the season. Tip: Use a very fine brush to draw the lines and a quick-dry top coat to prevent smudges.
- Best for: Medium nails with crisp lines.
- Difficulty: Easy to moderate, depending on stripe width.
- Best occasion: Casual Halloween gatherings and themed parties.
- Tip: Alternate stripe line thickness for visual interest.
15. Green and Black Spider Web Nails
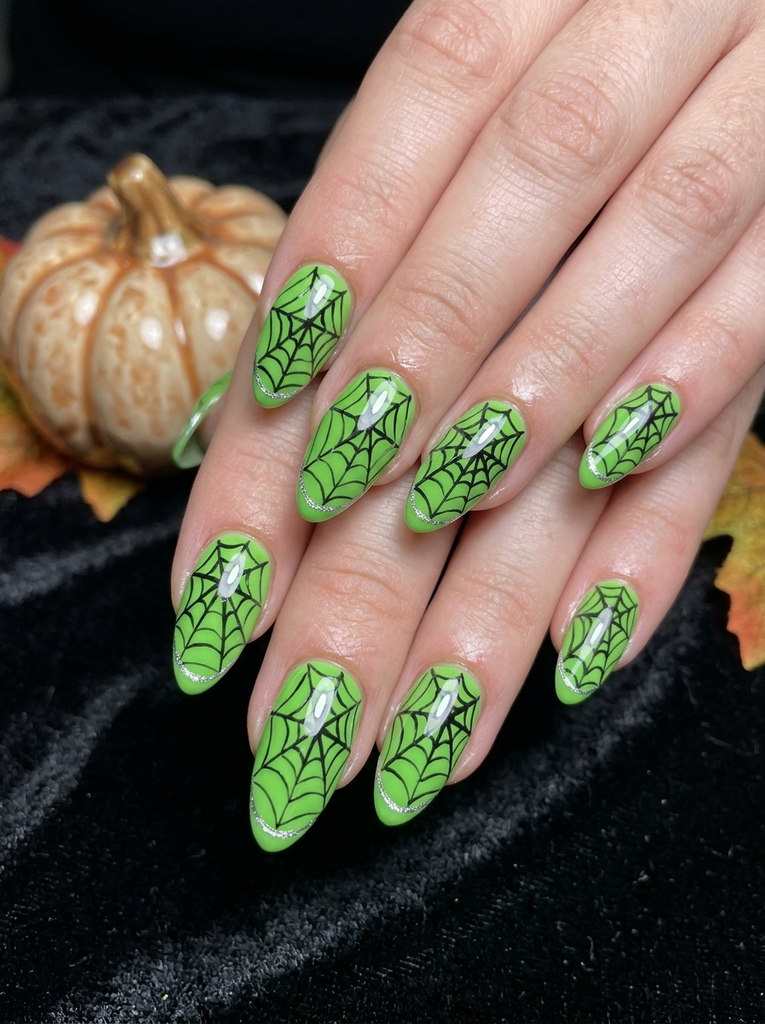
Black web lines drawn over a green base create a spooky, instantly recognizable motif. Shape: oval or almond; length: medium. Finish: high gloss. Suits: fans of classic Halloween symbols. Tip: Use a very fine brush and mirror white for tiny web highlights.
- Best for: Medium nails needing a strong motif.
- Difficulty: Moderate; delicate lines require precision.
- Best occasion: Costume events, horror movie nights.
- Tip: Add a thin silver line at the edge to mimic dew on the web.
16. Lime Green Glitter Gel Nails
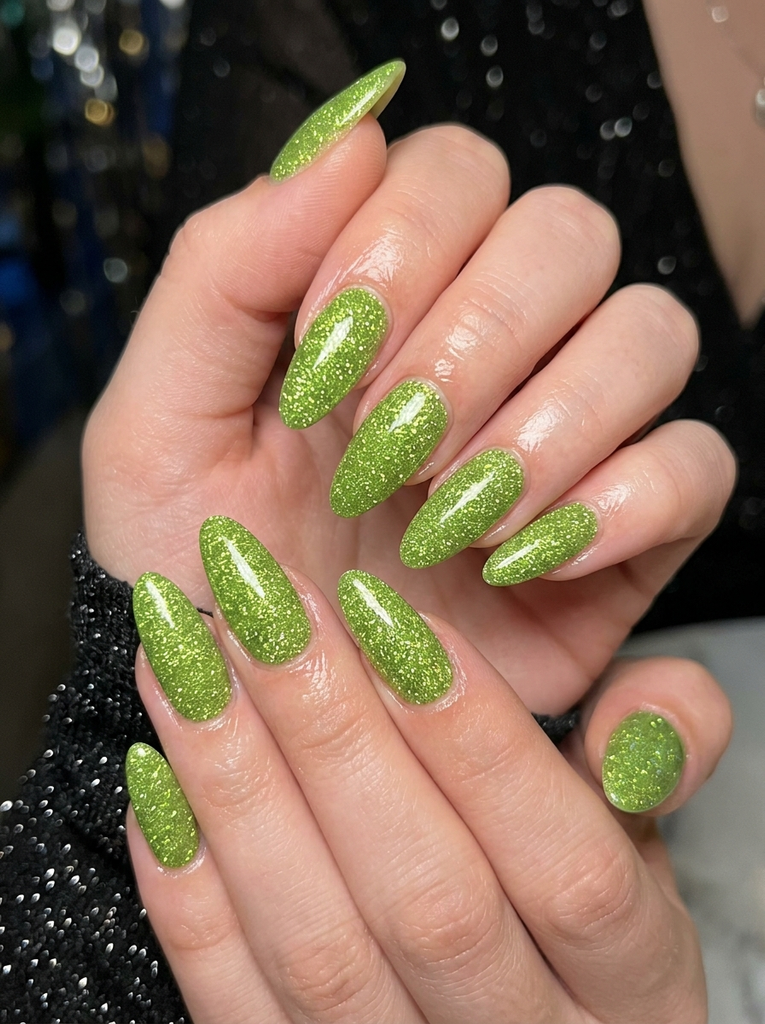
Solid lime green gel with embedded fine glitter for a candy-sparkle finish. Shape: almond; length: long for extra drama. Finish: glossy with sparkles. Suits: party looks and nail-art enthusiasts. Tip: Build up layers gradually to control glitter density and avoid bulk.
- Best for: Long nails that hold thick gel with ease.
- Difficulty: Easy to moderate due to gel application technique.
- Best occasion: New year’s spreads and Halloween galas.
- Tip: Cure under LED lamp in thin coats to prevent chipping.
17. Green Black Ombré with Glitter
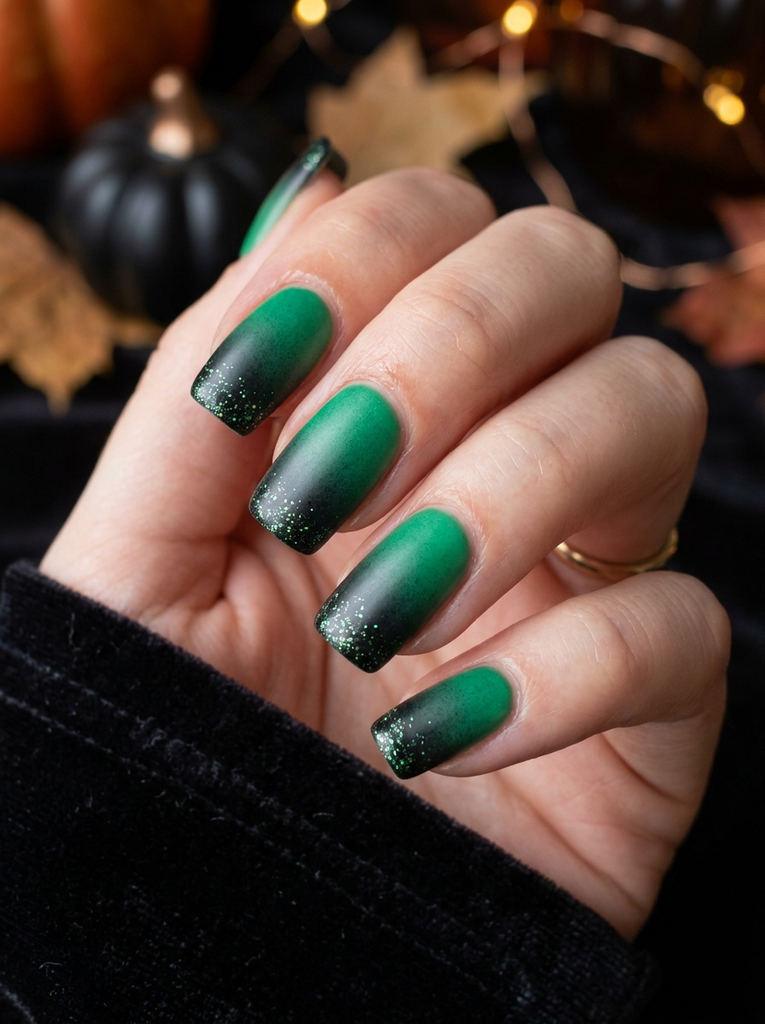
A seamless green-to-black gradient with a light dusting of fine glitter at the cuticle or tip edge. Shape: rounded square; length: medium. Finish: satin glow. Suitable for: anyone who loves a smooth transition with a festive sparkle. Tip: Use a makeup sponge to blend colors for a softer ombré.
- Best for: Medium-length nails with a classic gradient look.
- Difficulty: Moderate; blending the two colors evenly takes practice.
- Best occasion: Halloween dinners or gatherings.
- Tip: Apply a thin layer of clear gel over the glitter to lock in shine.
18. Witchy Green Black Nail Art with Dots
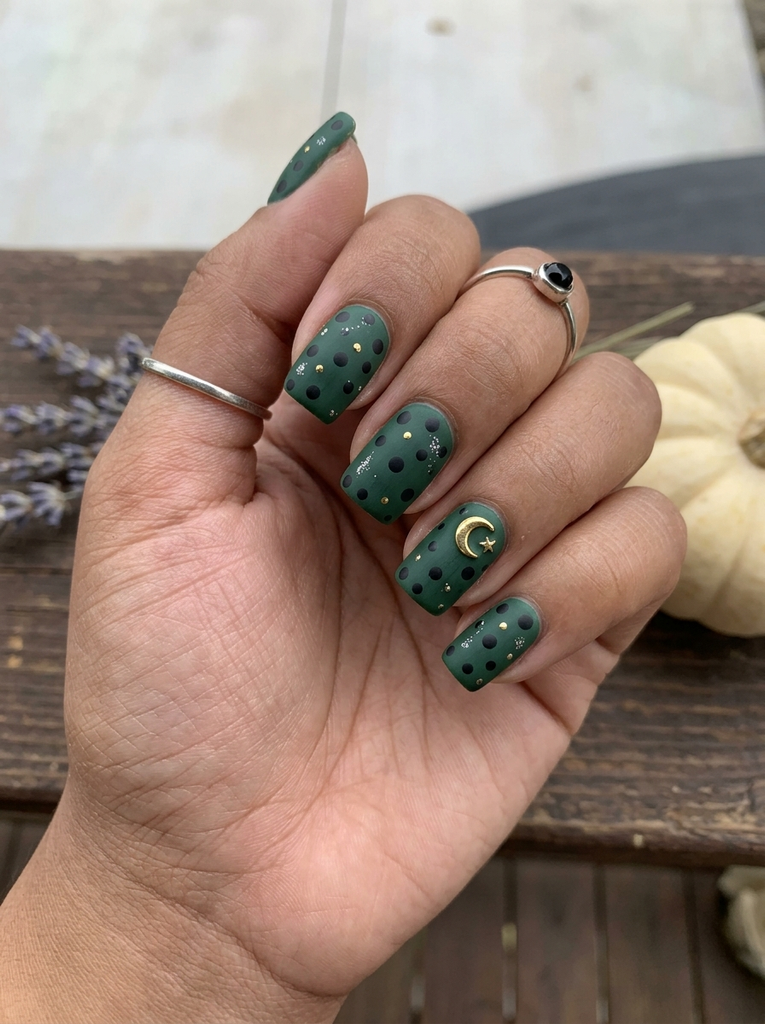
Green base with scattered black dots and tiny metallic accents for a playful, mystical vibe. Shape: square or stiletto; length: short to medium. Finish: matte or satin. Best for: whimsical styles and quick party nails. Tip: Use a dotting tool for uniform dot sizes and align them in a constellation pattern.
- Best for: Short to medium nails needing light ornamentation.
- Difficulty: Easy; simple dot patterns are forgiving.
- Best occasion: Casual Halloween events or pumpkin patch photos.
- Tip: Mix one tiny silver dot for a subtle starry effect.
19. Green Black Almond Nails with Rhinestones
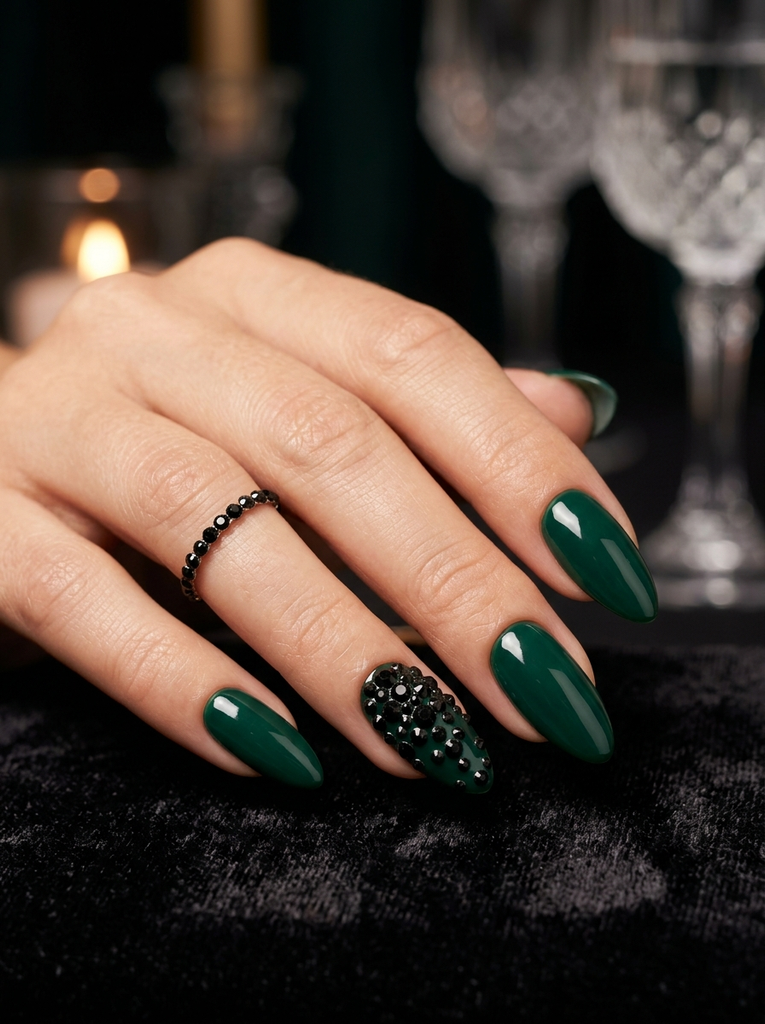
Simple green base with a row of tiny black rhinestones along one side or an accent nail with a cluster. Shape: almond; length: medium. Finish: glossy with a touch of sparkle. Suitable for: glam Halloween looks without heavy motifs. Tip: Use a small bead or nail glue to ensure rhinestones stay put longer.
- Best for: Subtle, luxe Halloween styling.
- Difficulty: Easy to moderate depending on rhinestone placement.
- Best occasion: Parties or fancy gatherings during the season.
- Tip: Clear top coat over rhinestones helps prevent snagging on fabrics.
20. Simple Green Black Halloween Nails
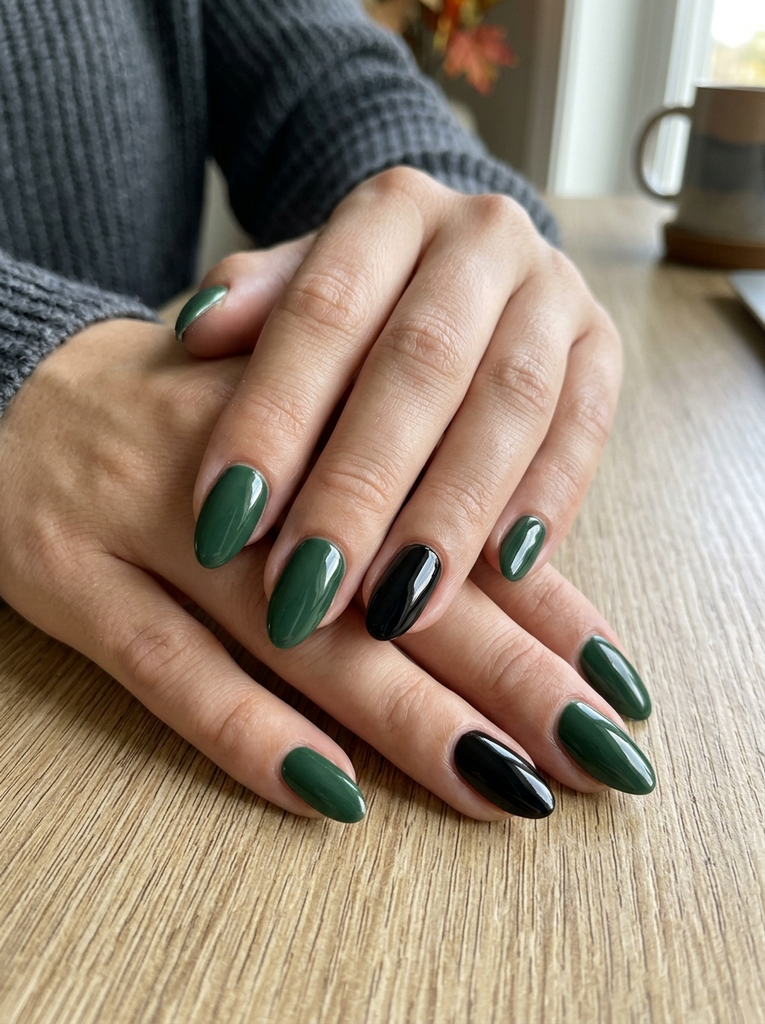
A minimalist approach uses solid green nails with a single black accent nail or a clean diagonal split. Shape: coffin or almond; length: short to medium. Finish: high gloss. Suits: anyone who prefers a straightforward, chic look for Halloween. Tip: Keep lines crisp with tape or a stencil for the accent nail.
- Best for: Everyday wear during spooky season with a simple twist.
- Difficulty: Easy; perfect for beginners or busy days.
- Best occasion: Work events, family gatherings, casual parties.
- Tip: Match the green shade to your skin undertone for a flattering pop.
FAQs
What length works best for halloween nails green and black designs?
Most of these designs read well on short to medium nails, which keeps details clear and manageable. Longer nails offer more surface to showcase patterns, but they require steadier hands for precision work.
Can I recreate these looks with press-on nails?
Yes. Many ideas translate well to press-ons, especially solid colors, gradients, and simple motifs. For intricate designs, you’ll get the best results with a steady hand or by outlining motifs on the nail before transferring to the press-on.
How do I prevent staining when using black polish?
Apply a clear base coat before black polish to create a barrier between the pigment and your nail. Work in thin layers and seal with a top coat to minimize staining and chipping.
What finish is best for a Halloween green and black nail look?
Finish choice depends on mood. Glossy finishes read festive and bright in photos, while matte can feel more moody and modern. A satin finish on detailed art can offer a balanced, non-glossy look.
Do these designs work well on gel or acrylic nails?
Absolutely. Gel and acrylic provide a strong base for intricate art and longer wear. The key is to cure layers properly and seal the finished design with a durable top coat.
Conclusion
With these halloween nails green and black ideas, you can choose a look that matches your mood, nail length, and event. From marbled drama to playful ghosts, there’s a design for every reader. Try one that fits your style and share your mani on social media to inspire others.
If you’re hunting for more inspiration, start with halloween nails green and black and adapt to your routine, then experiment with finishes and textures to make it uniquely yours.