Halloween nails nightmare before xmas: 20 Jack Skellington & Sally Nail Art Ideas
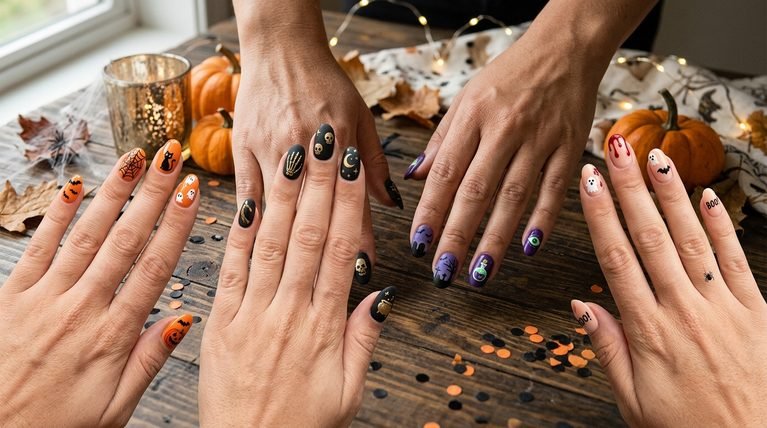
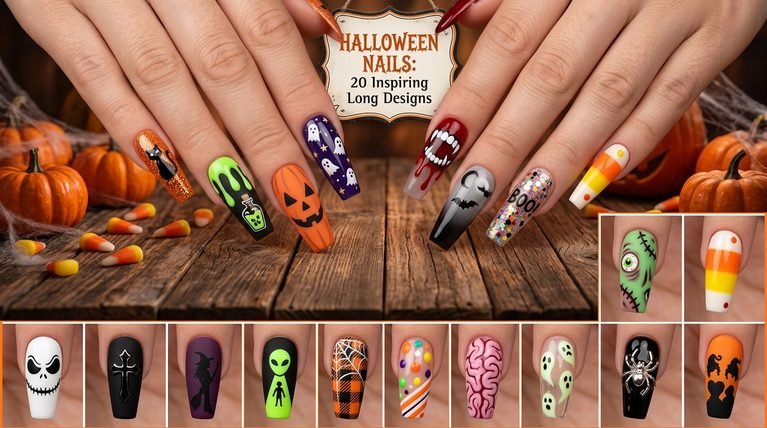
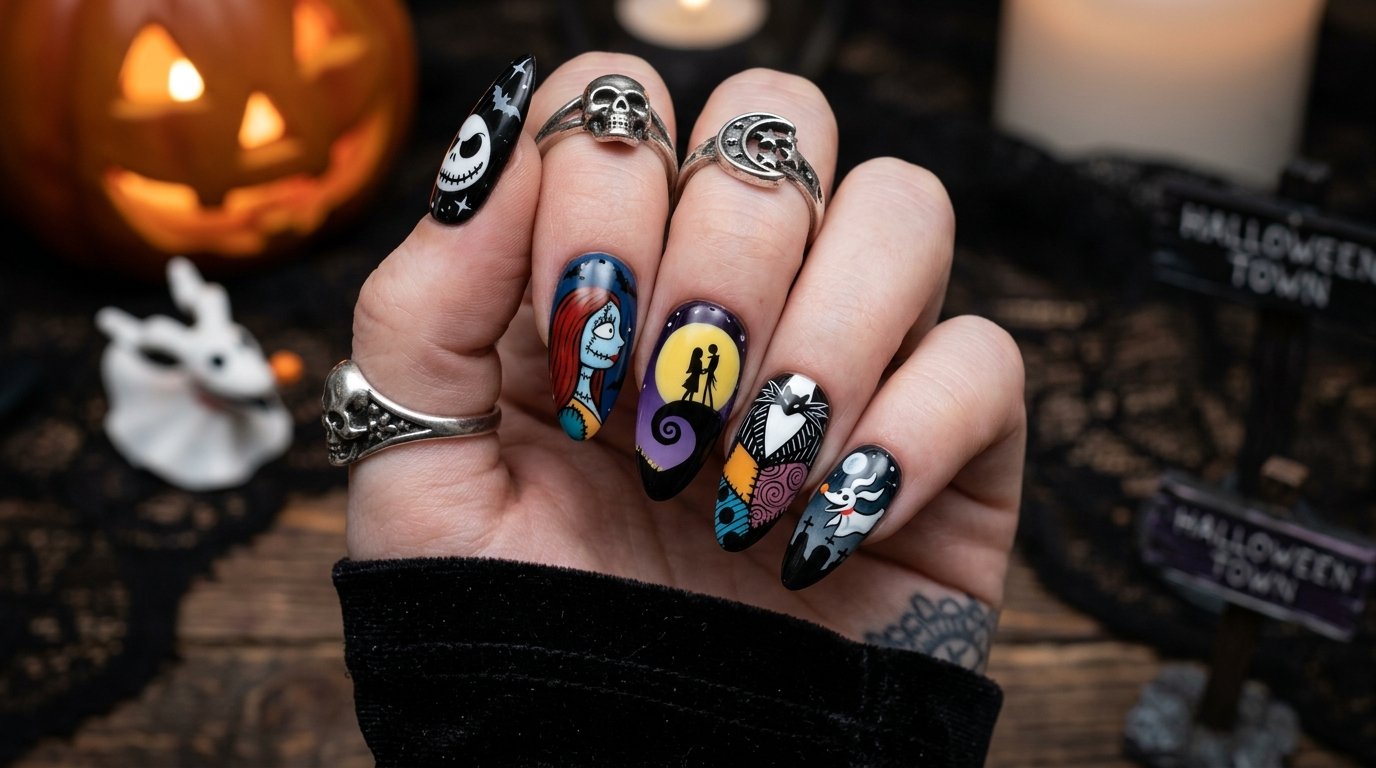
If you’re chasing halloween nails nightmare before xmas inspiration, you’ll find 20 creative designs inspired by Jack Skellington, Sally, and Tim Burton aesthetics. Each idea offers practical steps, color ideas, and tips to make the artwork look polished at home or in the salon chair. Read on to pick a look that matches your mood and your nail length.
1. Spooky Skellington Nail Idea
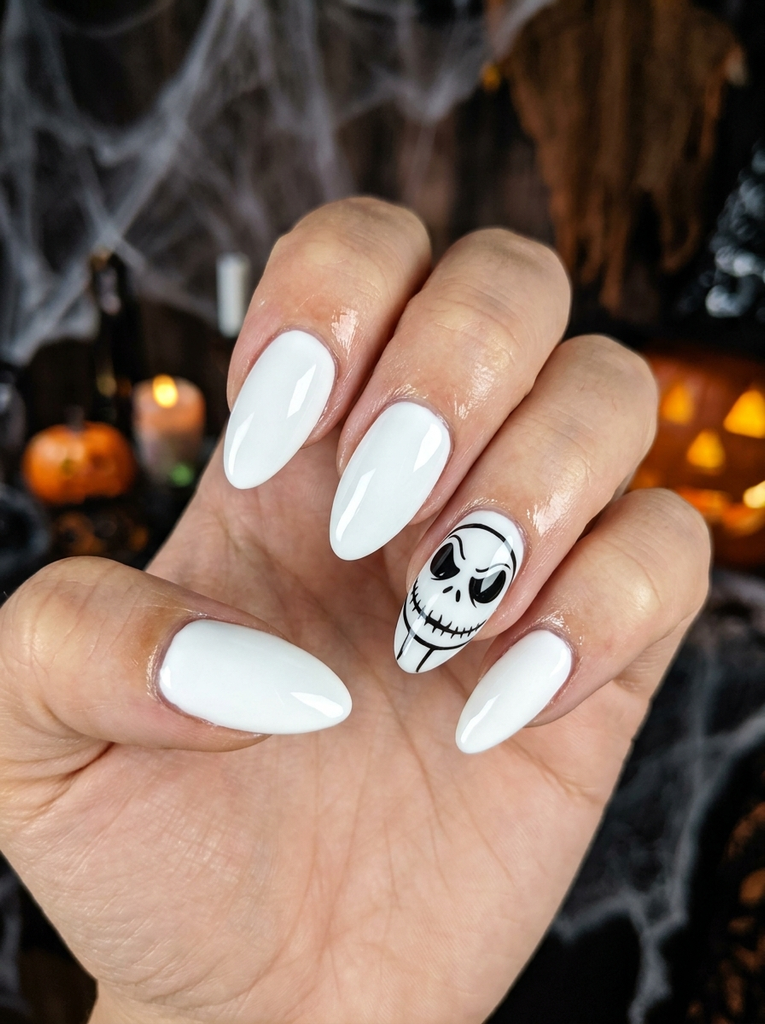
This design uses a white base on almond-shaped nails with a single accent nail featuring a black Jack Skellington skull carved into negative space. The eyeballs, nose, and grin are defined by thin black lines, letting the white background pop. Keep the other nails simple to let the skull remain the focal point. It’s bold enough for a party but clean enough for everyday wear. Tip: steady your hand with a steady brush and seal with a glossy top coat to preserve the lines.
- Best for: Halloween parties or photoshoots
- Difficulty: Moderate
- Best occasion: Costume events, themed gatherings
- Tip: Use a fine liner brush for crisp skeletal details
2. Sally Patchwork Nails
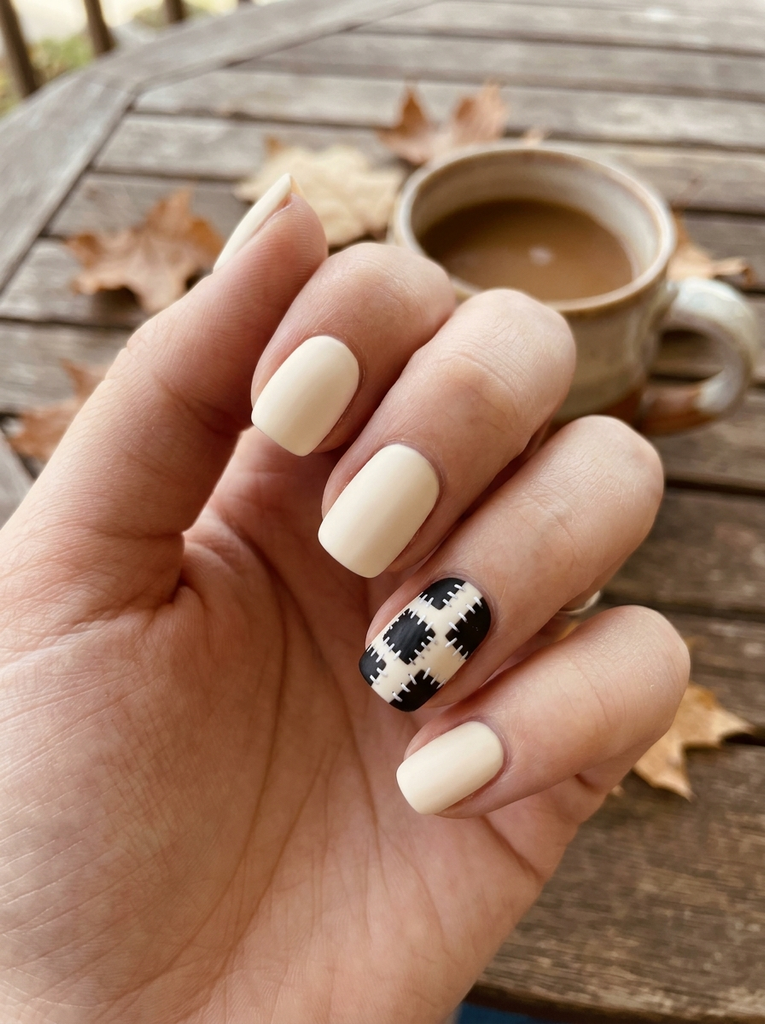
Paint the nails in a soft ivory base, then add black fabric-inspired patches in a grid pattern on an accent nail. Vary the patch sizes with tiny white stitches to mimic Sally’s ragdoll style. Keep the patches asymmetrical to resemble a true patchwork. This design reads artistic and adorable, ideal for fall gatherings. Tip: use a tiny dotting tool to create the stitch lines for a refined look.
- Best for: Daytime events and photos
- Difficulty: Easy to Moderate
- Best occasion: Halloween brunches, casual parties
- Tip: Finish with a matte top coat for a fabric feel
3. Tim Burton Lace Silhouette
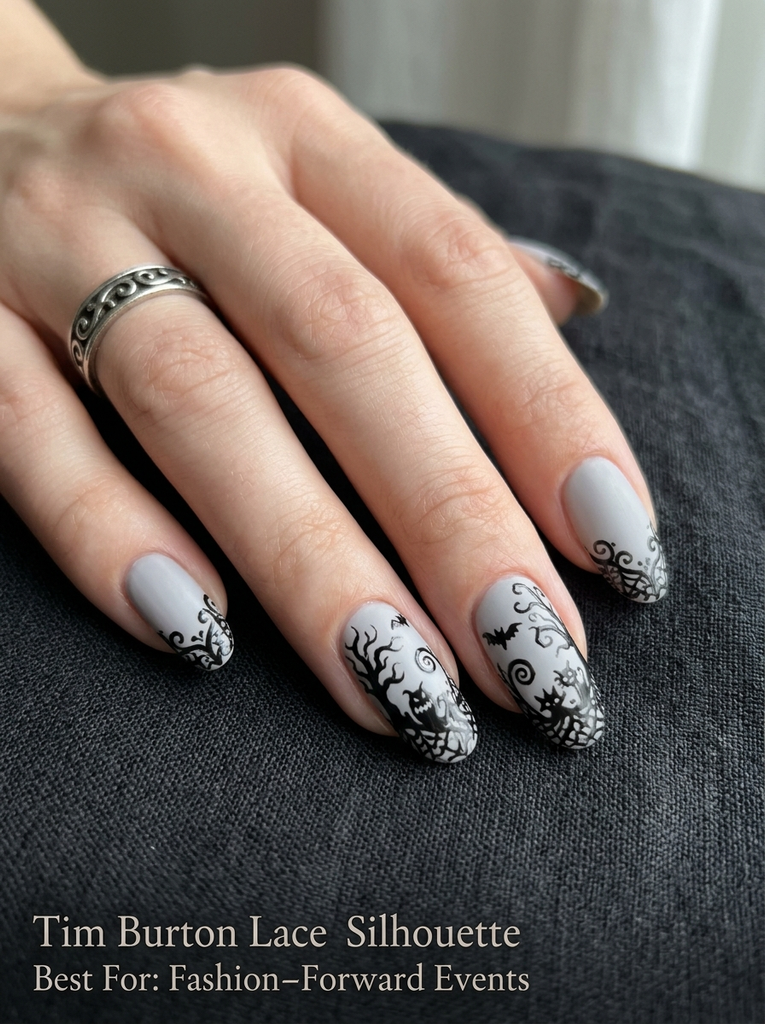
Go for a pale nude or pale gray base and layer black lace-like silhouettes of twisted trees or whimsical creatures along the tips. Use negative space to keep areas of the nail exposed and dramatic. The silhouette can be extended across two nails for a cohesive look. It suits long or medium nails best. Tip: a fine brush helps you outline delicate lace shapes without blurring.
- Best for: Fashion-forward events
- Difficulty: Moderate
- Best occasion: Themed parties, fashion shoots
- Tip: Use slow-drying polish to prevent smudges
4. Disney Halloween Palette
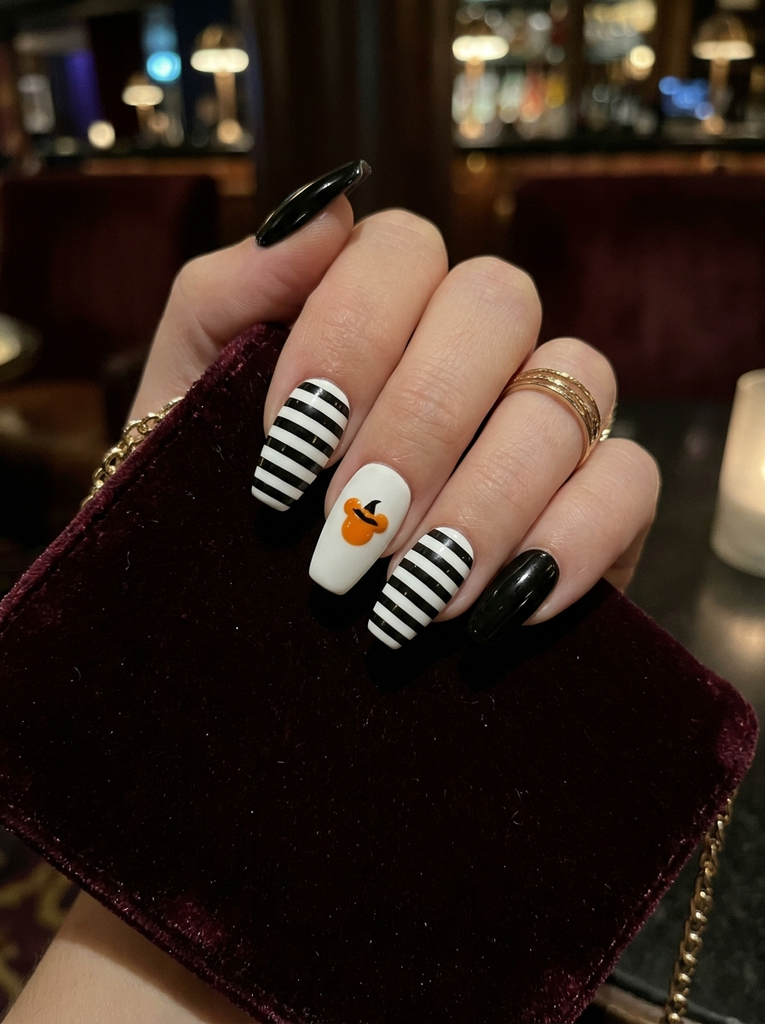
Combine classic black and white with a pop of orange or jewel tones to echo Disney’s playful vibe. Think black and white stripes on a couple nails, while others feature small character silhouettes in the color pops. Shape can be coffin or almond for a more modern look. This design reads playful yet refined, perfect for a night out or a movie premiere. Tip: keep the colored accents small to maintain balance.
- Best for: Themed nights and date nights
- Difficulty: Easy to Moderate
- Best occasion: Theatre outings, Halloween parties
- Tip: Use striping tape for clean lines
5. Halloween nails nightmare before xmas – Black and White Bat Theme
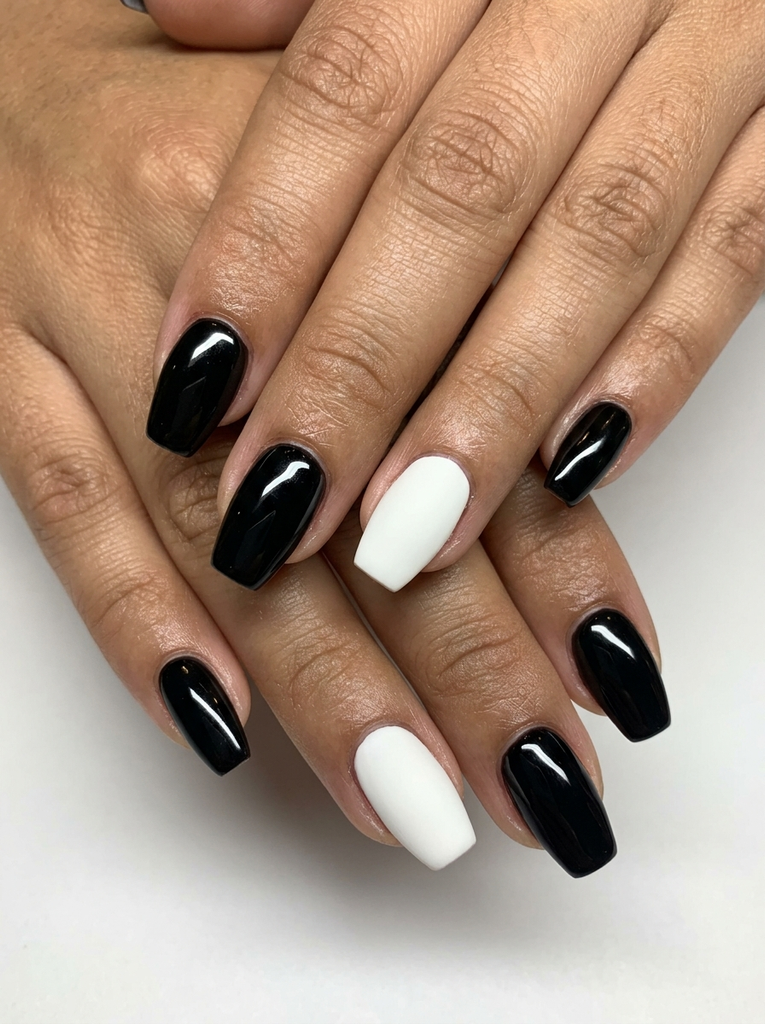
Paint a black base on short coffin nails with a white bat silhouette flying across the tip. The negative space around the wings adds a haunting glow. Balance with one solid white nail to anchor the look. Great for a spooky-chic vibe that reads both Halloween and holiday edges. Tip: outline the bats with a fine black liner to sharpen their shapes.
- Best for: Nighttime events
- Difficulty: Moderate
- Best occasion: Halloween parties, themed photos
- Tip: Use black stamping polish for crisp silhouettes
When your manicure feels complete, pair it with Brunette Hair Color Ideas for Fall that create a coordinated beauty look without requiring complicated styling or extra time.
6. Skellington Stripe Design
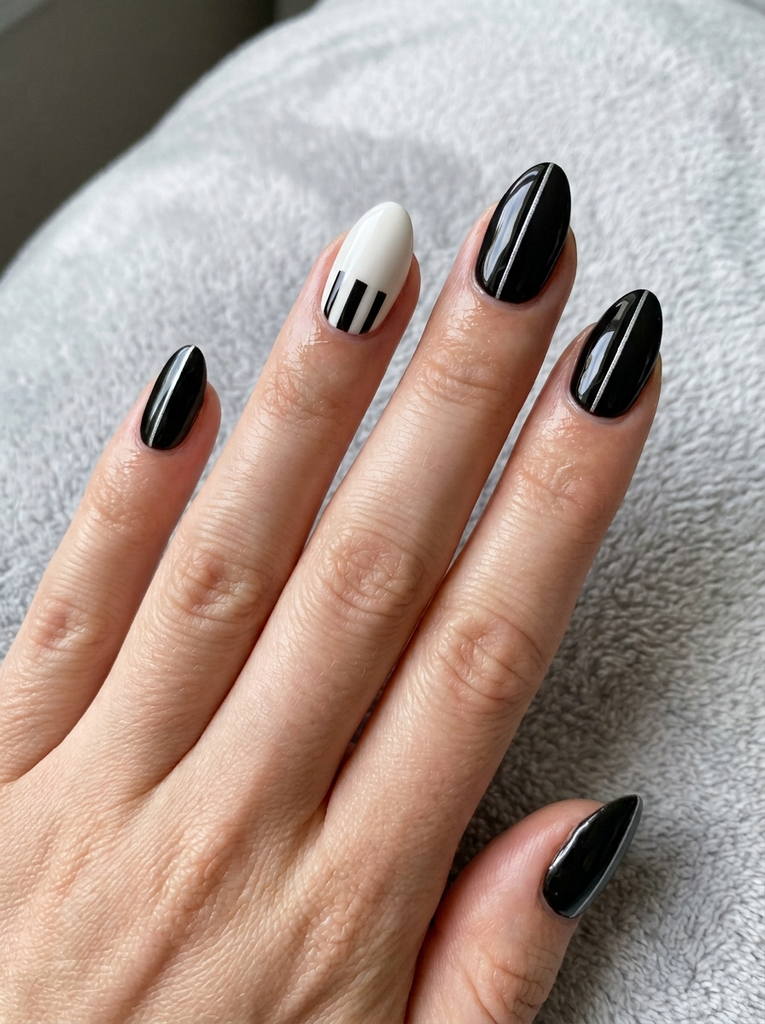
Choose a white or pale base and add bold vertical or diagonal black stripes near the cuticle on an accent nail. The rest of the nails can be solid black or white with a thin silver or gray line to echo a clean, graphic mood. It’s modern and high-impact without being overly busy. This look works well on medium-length nails. Tip: use nail tape to achieve perfectly straight stripes.
- Best for: Minimalist yet bold looks
- Difficulty: Easy
- Best occasion: Work events, casual parties
- Tip: Finish with a fast-dry top coat to prevent smudges
7. Sally Patchwork French Tips
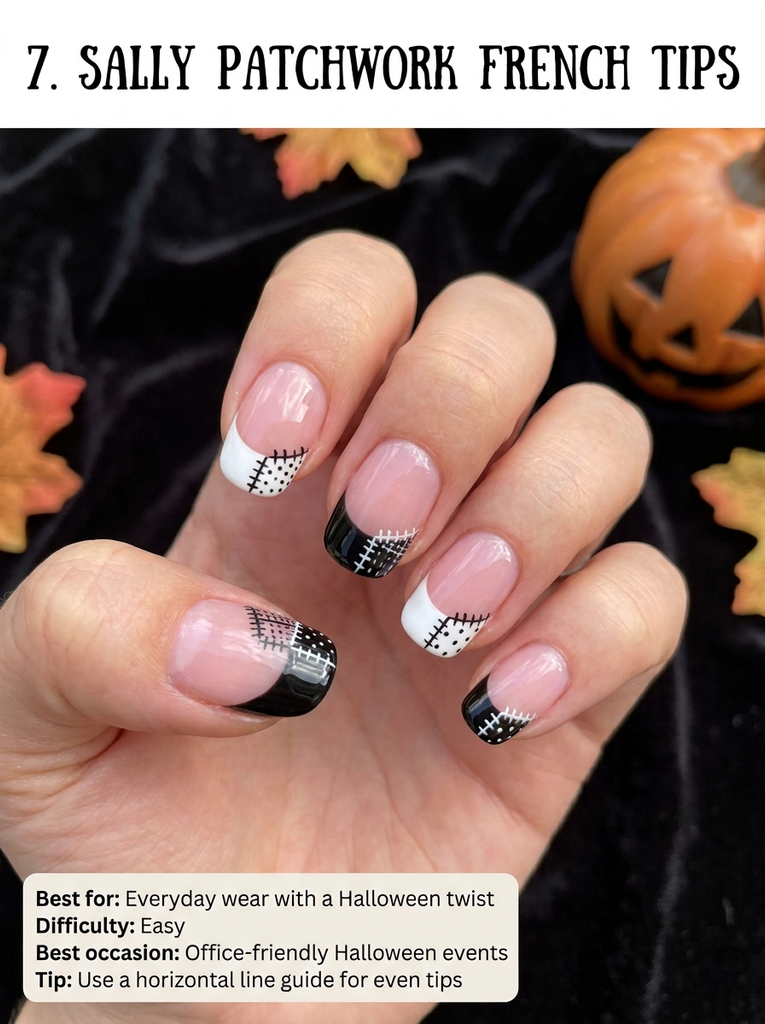
Start with a sheer base and paint two French tips—one black, one white—on alternating nails. Overlay tiny patchwork squares on the tips using a thin brush in black and white. The result is a playful, wearable nod to Sally’s patchwork dress. Suits short to medium nails for a neat, tidy look. Tip: cap each tip with a gloss top coat to keep the lines pristine.
- Best for: Everyday wear with a Halloween twist
- Difficulty: Easy
- Best occasion: Office-friendly Halloween events
- Tip: Use a horizontal line guide for even tips
8. Oogie Boogie Glow Gradient
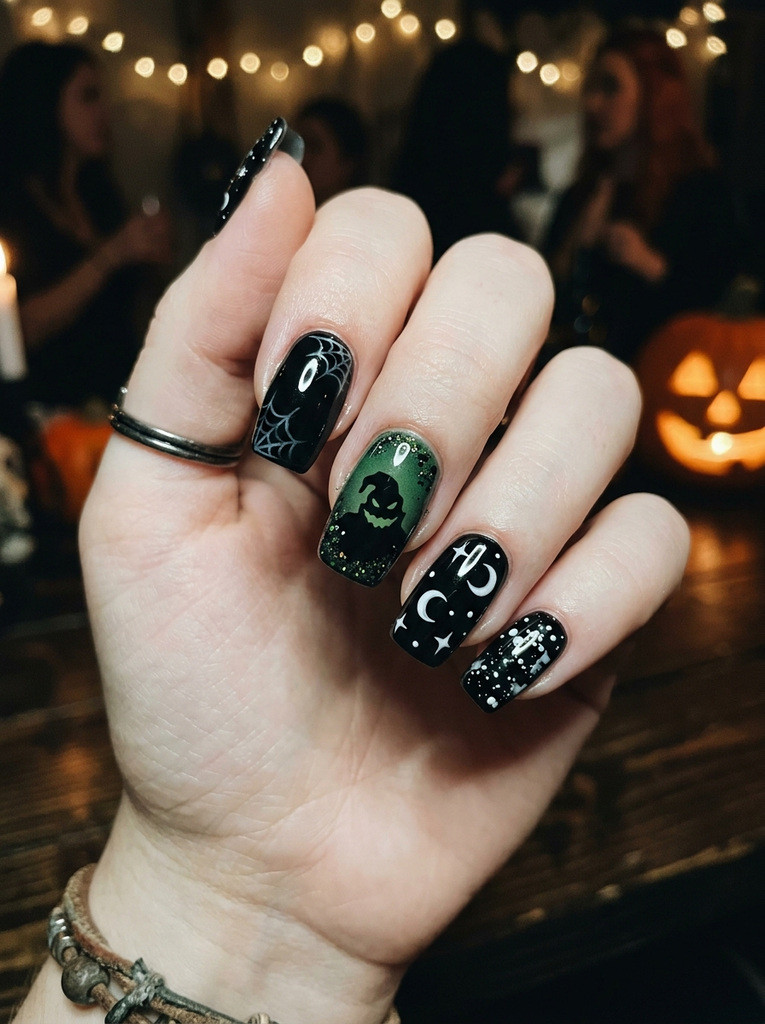
Build a gradient from dark forest green at the base to black at the tip, then place a silhouette of Oogie Boogie on the middle finger as a focal point. Add subtle glitter to mimic a smoky, “bag of bugs” effect along the edges. Pair with a clean black and white for the other nails to balance the look. This is fun and slightly kooky, great for a party mood. Tip: use a thin brush to paint the silhouette and a dotting tool to scatter the tiny glitter specks.
- Best for: Costume parties
- Difficulty: Moderate
- Best occasion: Halloween night events
- Tip: Use a gel top coat for long-lasting shine
9. Skeleton Web Reverse French
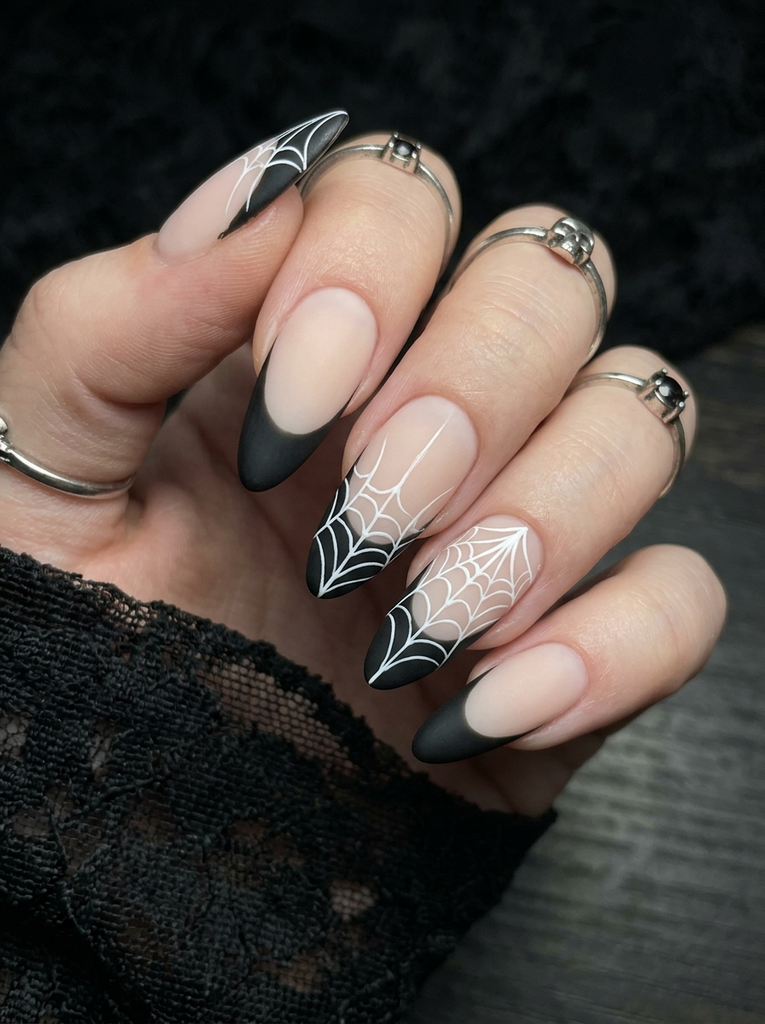
Paint the tips in black, then create a spiderweb outline that tapers into the nail bed using white lines. The rest of the nail remains a pale base to emphasize the web. Keep the lines thin and precise for a delicate effect. This design is striking on longer nails and pairs well with matte finishes. Tip: practice the web lines on a sticker sheet first to ensure even curves.
- Best for: Gothic-inspired looks
- Difficulty: Moderate
- Best occasion: Nighttime events
- Tip: Work slowly with a fine liner brush
10. Nightmare Acrylic Accent Nail
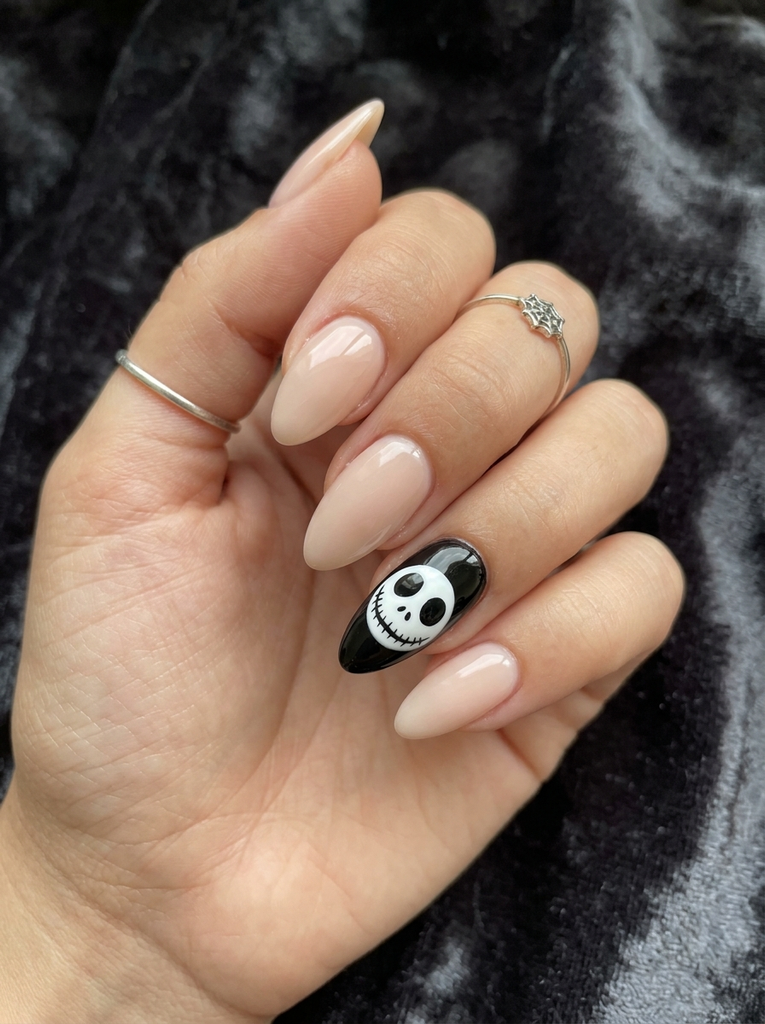
Use a nude or pale base on all nails, then paint the accent nail with a glossy black or deep plum. Add a tiny Jack Skellington face using white and black details, or a small white stitched line for texture. Keep other nails clean to let the accent nail shine. This look is elegant enough for a date night or a harvest festival. Tip: ensure the accent nail is sculpted well with acrylic for a durable focal point.
- Best for: Special occasions
- Difficulty: Moderate
- Best occasion: Date night, events
- Tip: Shape the acrylic neatly to prevent snagging
11. Pumpkin Spine Glitter
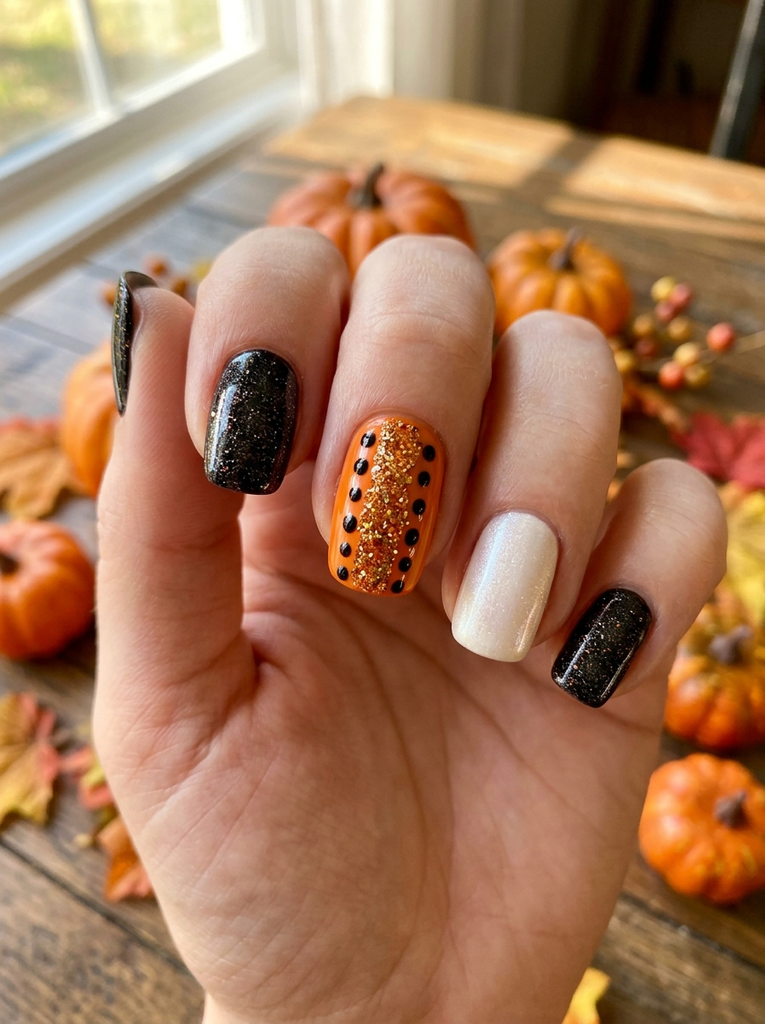
Choose a pumpkin-orange base on short nails and outline a spine-like glitter stripe from cuticle to tip on one nail. Add tiny black dots along the spine to mimic pumpkin seeds. The rest of the nails can be black or white with a subtle shimmer. It’s playful and festive, perfect for autumn gatherings. Tip: apply glitter in thin layers to avoid rough texture on the surface.
- Best for: Autumn parties
- Difficulty: Easy
- Best occasion: Halloween or Thanksgiving events
- Tip: Buff the surface before applying top coat
12. Sally Cross-Stitch Nails
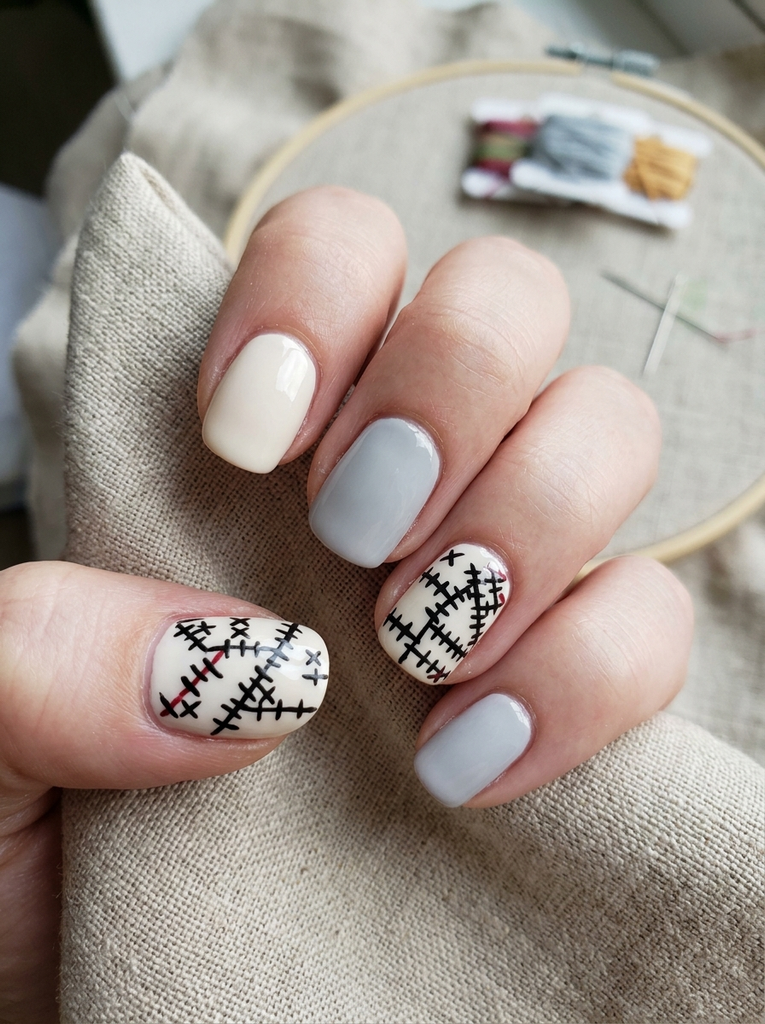
Base color a soft ivory, then use a fine brush and black lacquer to create tiny cross-stitch patterns on one or two nails. Keep stitches irregular to mimic fabric. Alternate with solid ivory or pale gray nails for balance. The look nods to Sally’s patched dress while staying chic and wearable. Tip: seal each stitch line with a tiny amount of top coat to prevent snagging.
- Best for: Craft-inspired looks
- Difficulty: Moderate
- Best occasion: Craft fairs, Halloween parties
- Tip: Use a slow-drying polish for control
13. Skeletal French Tips
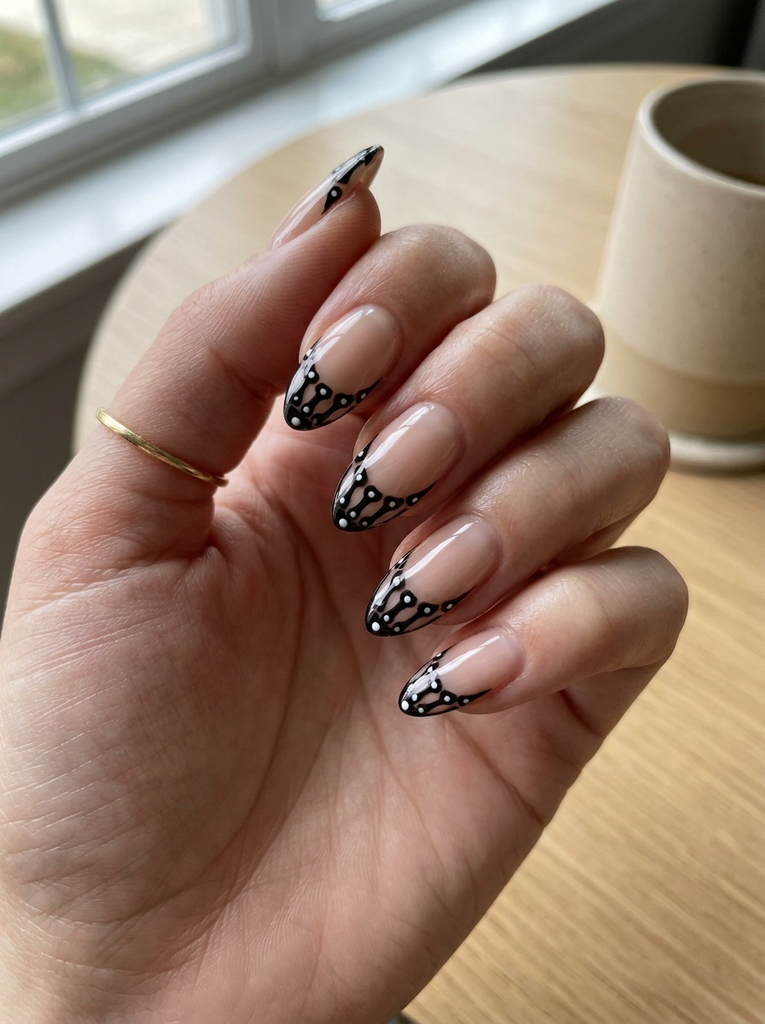
Keep a sheer base and replace the traditional white French tip with a black skeletal bone pattern. Paint the bones along the tip line so the natural nail bed peeks through. This combines classic elegance with a spooky twist. Works well on almond or coffin shapes for a modern vibe. Tip: use a thin brush to draw the fine bone lines and a white dot for the center of the bone if needed.
- Best for: Subtle Halloween style
- Difficulty: Easy to Moderate
- Best occasion: Work events, family gatherings
- Tip: Start with light pencil guides before painting bones
14. City Lights Outline
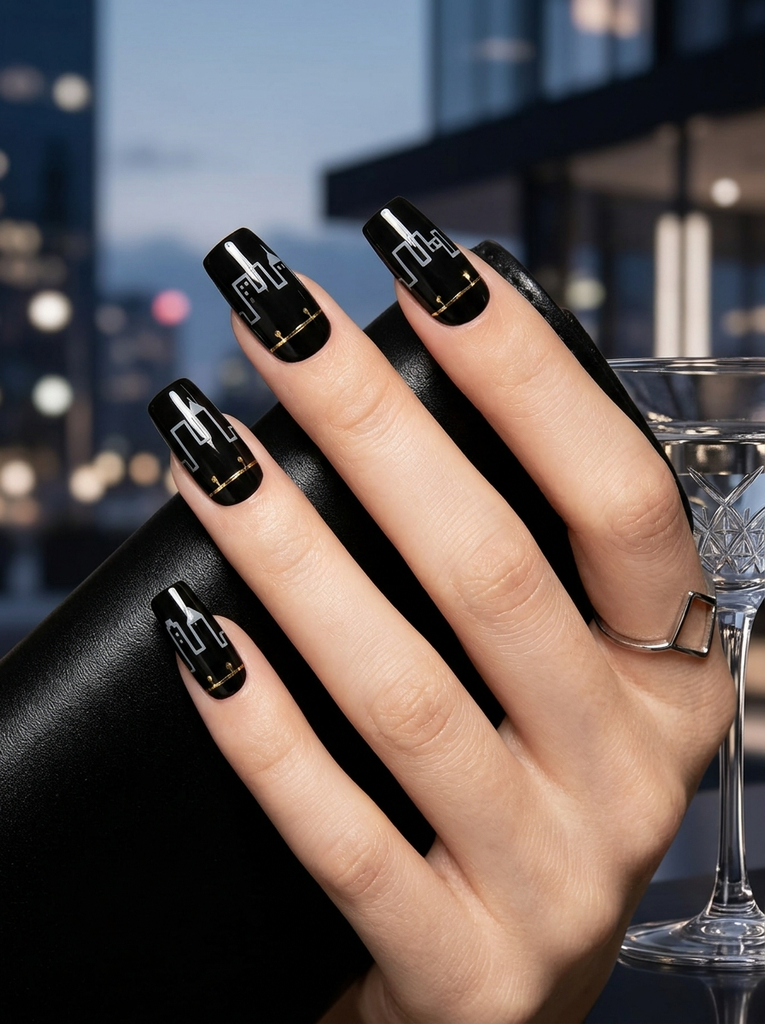
Paint a black or white base with a pale city skyline outline along the free edge of the nail. Keep the buildings minimal and geometric for a crisp silhouette. A thin, metallic line addition can imitate street lights for a subtle glow. This look feels modern and sleek, suitable for long nails or square shapes. Tip: rely on a steady hand and steady straight lines for best results.
- Best for: Contemporary party looks
- Difficulty: Moderate
- Best occasion: Evening events
- Tip: Use tape to guide the skyline lines
15. Snowy Night Skellington
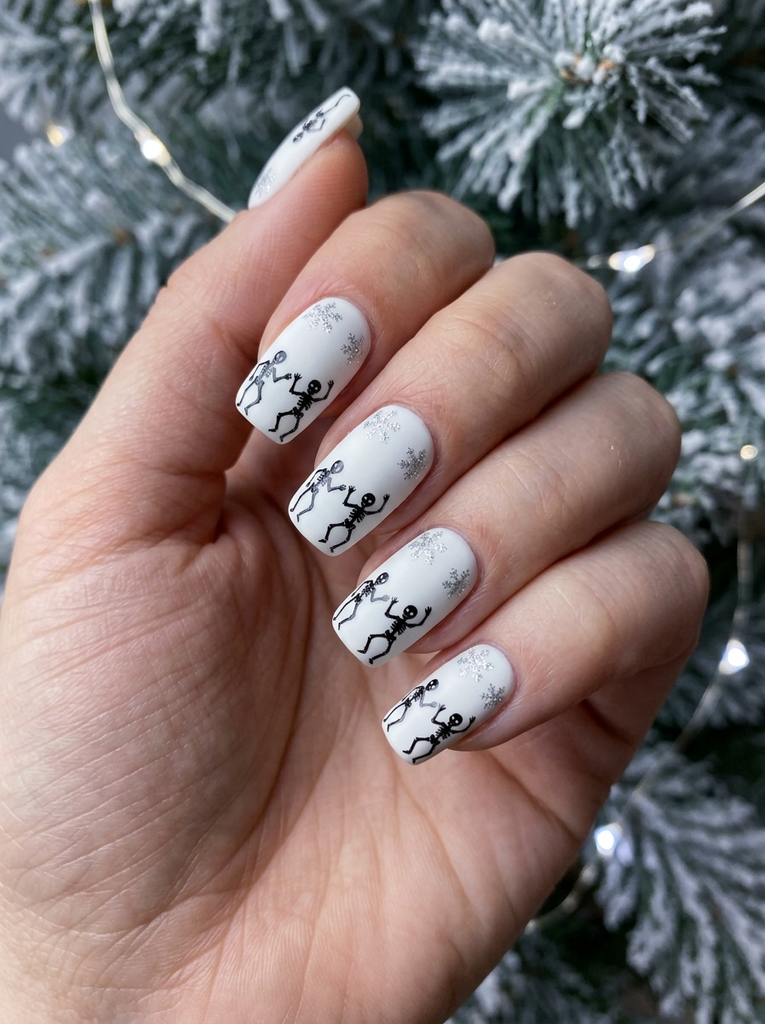
A white snowy base with black skeleton silhouettes dancing along the tips evokes a chilly, festive vibe. Add tiny silver snowflakes near the cuticle for a wintry touch. Keep the rest of the nails matte to emphasize contrast. This design reads both Halloween and Christmas, perfect for late-season parties. Tip: use a fine glitter for snowflakes to avoid clumping.
- Best for: Winter celebrations
- Difficulty: Moderate
- Best occasion: Holiday gatherings
- Tip: Matte top coat to reduce glare
16. Jack and Sally Daydream Duo
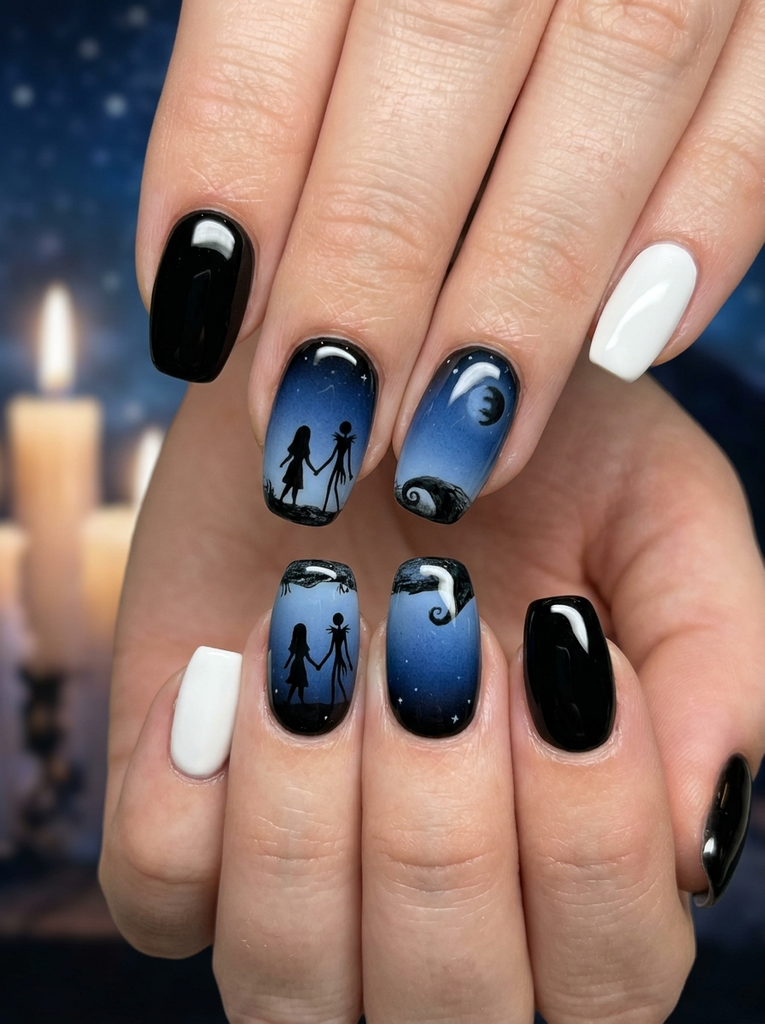
Feature tiny silhouettes of Jack and Sally walking hand in hand along a moonlit horizon on two nails, with a gradient background from black to midnight blue. The other nails can be solid black or white to keep focus on the duo. This design feels storytelling and romantic while staying spooky. Tip: vary the moon scale and silhouettes for a natural, whimsical balance.
- Best for: Halloween date nights
- Difficulty: Moderate
- Best occasion: Themed dinners, cosplay events
- Tip: Use a soft brush to blend the night sky
17. Tim Burton Marble Veins
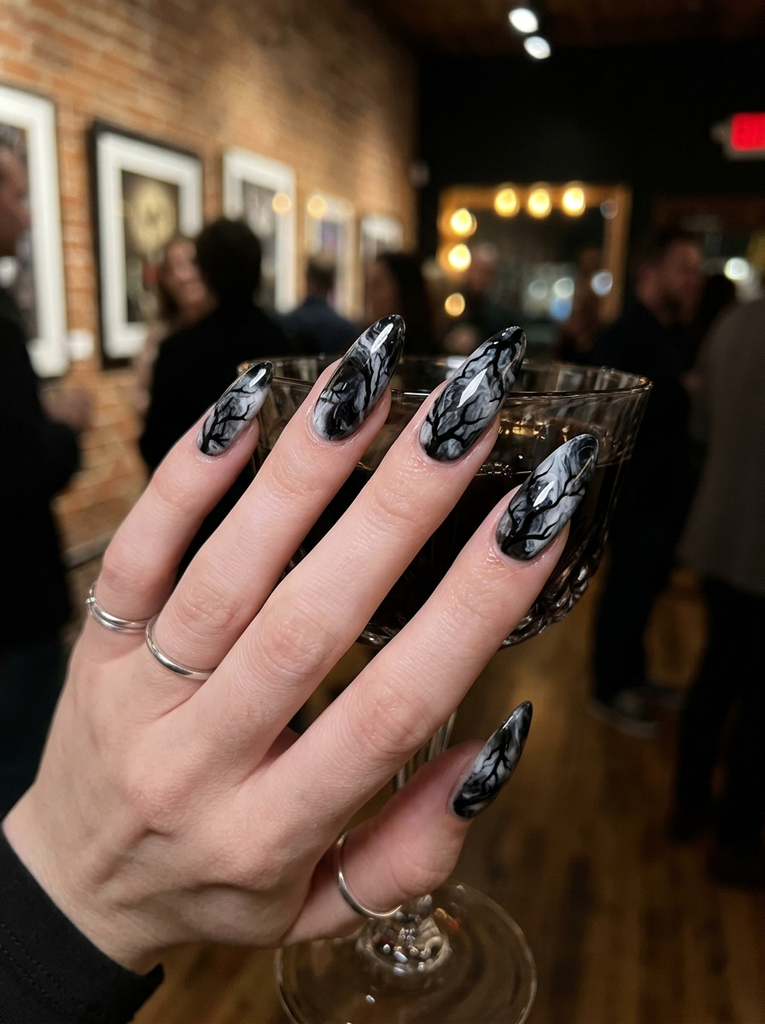
Create a marbled effect with black, white, and a hint of gray on long nails. Add jagged, tree-like veins using a fine brush to evoke Burton’s signature style. Keep the edges soft for an organic look rather than a harsh line. This design remains wearable with a glossy top coat. Tip: tilt the brush slightly to drag veins in a natural pattern.
- Best for: Artistic nights
- Difficulty: Moderate
- Best occasion: Gallery openings, cinema nights
- Tip: Work in small sections to maintain control
18. Candy Cane Skeletons
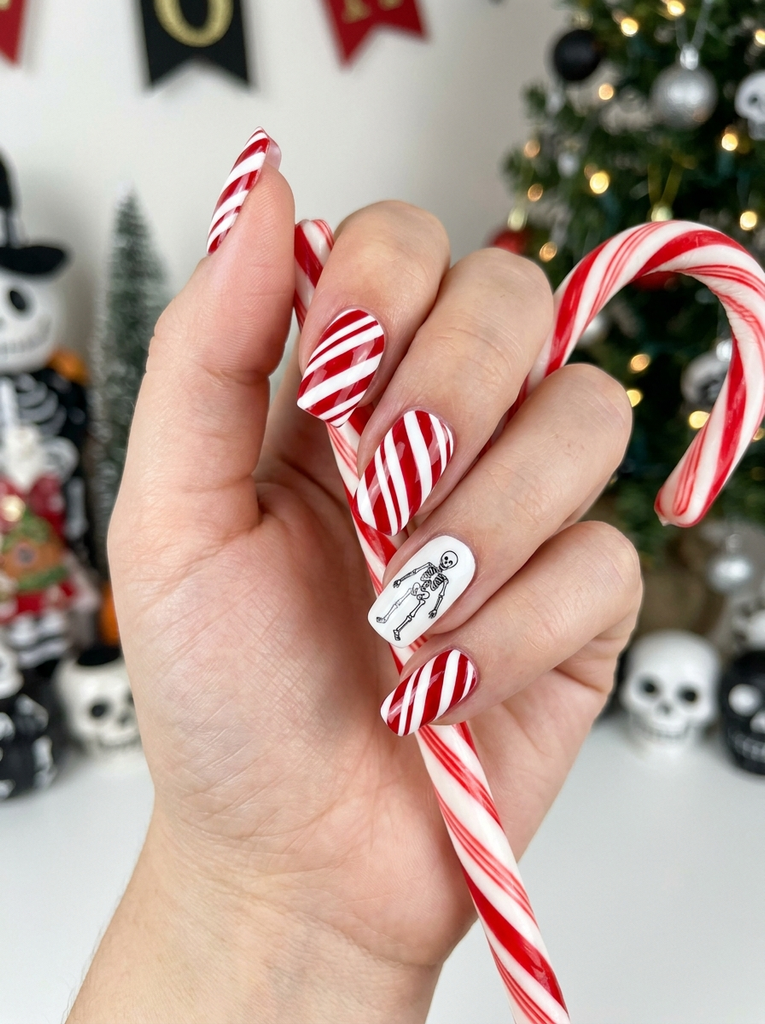
Alternate red-and-white stripes on some nails and place tiny skeleton outlines in black on a white base of others. The candy cane pattern adds a festive note while the skeletons keep the Halloween vibe. This look is playful and eye-catching, suitable for short or medium nails. Tip: use striping tape to keep the stripes crisp and clean.
- Best for: Holiday parties with a spooky twist
- Difficulty: Easy
- Best occasion: Family gatherings, trick-or-treat nights
- Tip: Seal stripes with several thin coats of top coat
19. Blood Moon Night Nails
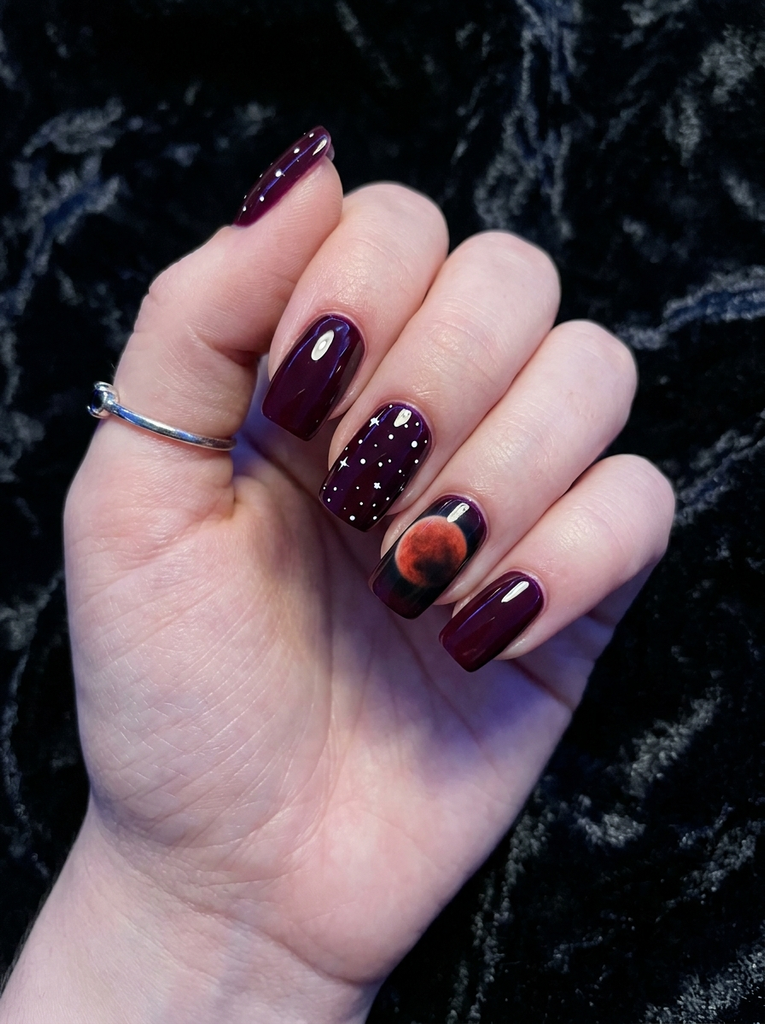
A deep red or plum base with a black circle on the moon that looks like a blood moon increases drama. Add tiny white stars as a finishing touch across two nails. The overall effect is bold and moody, perfect for a Halloween club night or a photoshoot. Tip: use a dotting tool to place the moon accurately and keep the circle smooth.
- Best for: Dramatic looks
- Difficulty: Moderate
- Best occasion: Nighttime events
- Tip: Pre-draw the moon circle with a light pencil guide
20. Black White Plaid Twist
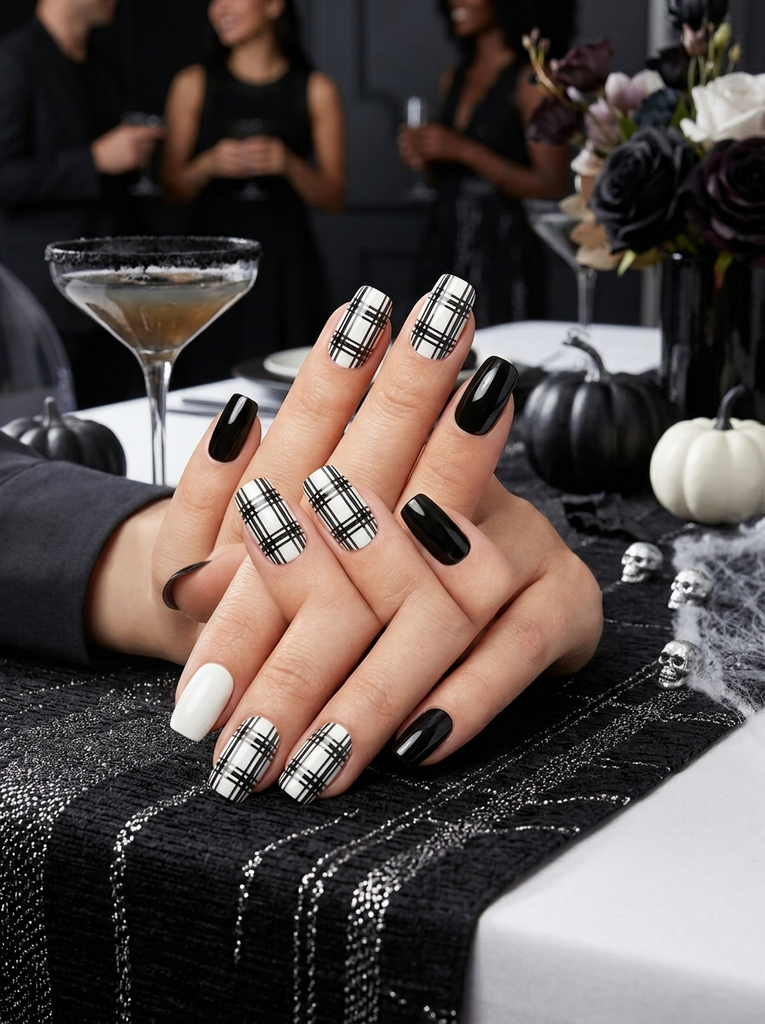
A classic black-and-white plaid pattern on two nails with the remaining nails in solid black or white creates a timeless look with a Halloween edge. Keep the plaid lines slim and evenly spaced for a chic finish. This design works well on square or squoval nails and is comfortable for longer wear. Tip: use a plaid stamping plate for consistent results if freehand looks feel tricky.
- Best for: Classic, fashion-forward events
- Difficulty: Easy to Moderate
- Best occasion: Parties, social events
- Tip: Apply top coat in thin coats to prevent smudging
FAQs
What are halloween nails nightmare before xmas designs?
They blend the eerie, whimsical elements of The Nightmare Before Christmas with common Halloween motifs. The ideas range from Jack Skellington silhouettes to Sally-inspired patchwork and Tim Burton-inspired silhouettes, all designed for nail art enthusiasts.
How can I recreate these designs at home?
Start with clean nails and a base color that suits the design. Use fine brushes or nail art pens for details, and apply thin layers to avoid dragging. Finish with a clear top coat to seal the design and maintain shine.
Which nail shapes work best for these looks?
Medium-length almond or squoval nails provide a strong canvas for detailed work, while coffin nails offer a bold, modern frame for graphic elements. Shorter nails can still carry simpler versions of the patterns with careful line work.
Do these designs require special tools?
A fine brush or nail art pen, striping tape for clean lines, and a steady hand are the main tools. A dotting tool helps with small details like stitches or dots. A quality top coat is important to protect intricate lines.
Are acrylics suitable for these designs?
Yes. Acrylic nails give extra length and a broader canvas for larger designs, while gel finishes stay flexible and durable. Regardless of method, prep your nails well and seal edges to maximize longevity.
Conclusion
These twenty ideas deliver a wide spectrum of “halloween nails nightmare before xmas”-inspired looks, from graphic Skellington silhouettes to Sally patchwork and Tim Burton marbling. Whether you want a bold statement or a subtle nod to The Nightmare Before Christmas, there’s a design here to suit your mood and nail shape. Try one that matches your event, then tweak color and pattern to make it uniquely yours.