Halloween Nails Kid Friendly: 20 Cute and Easy Designs for Kids
Looking for halloween nails kid friendly ideas that are cute, non-scary, and easy for little hands? This guide shares 20 distinct designs—each with kid-appropriate motifs, short shapes, and simple application tips—so you can celebrate Halloween with cheerful nails that appeal to kids and parents alike.
1. Halloween nails kid friendly: Cute Pumpkin for Kids
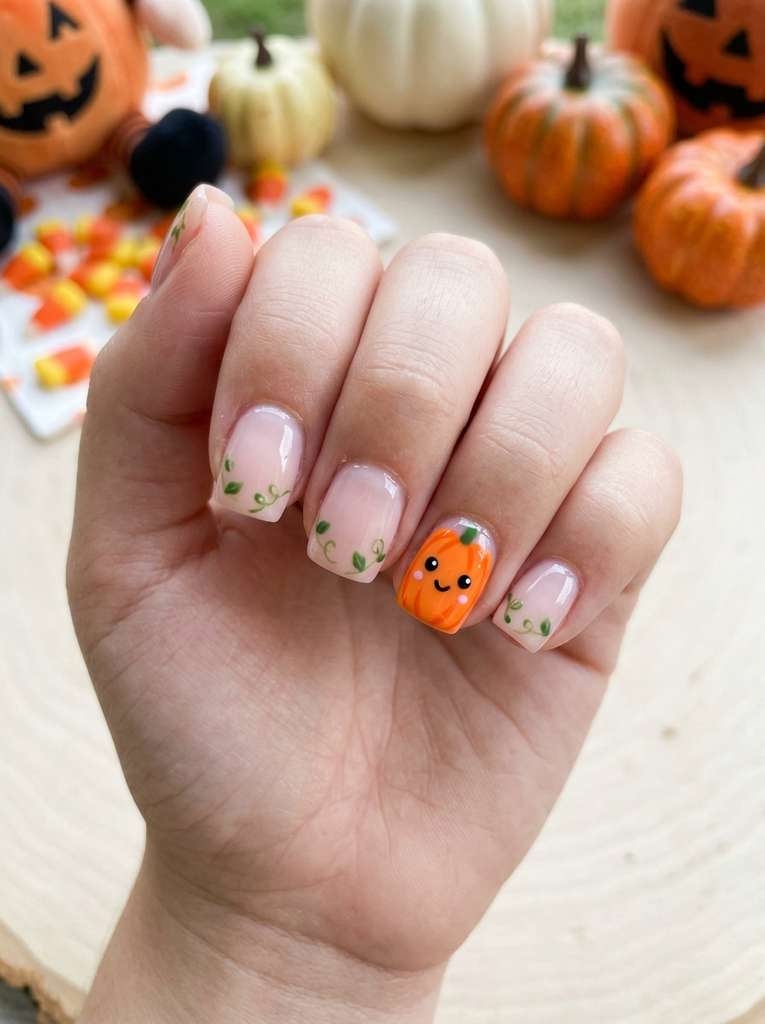
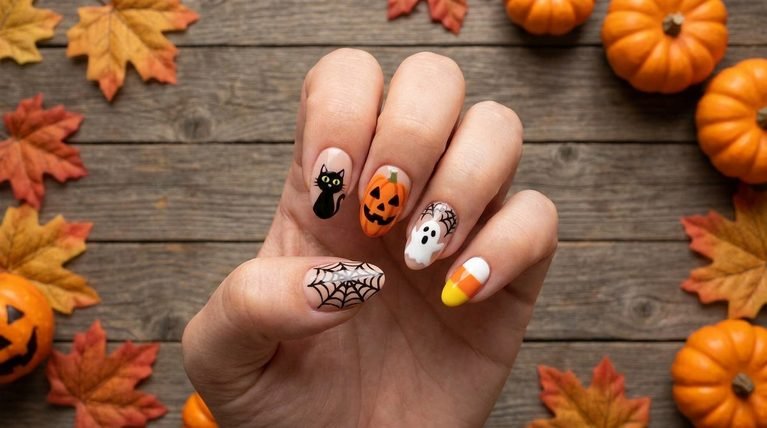
Start with short square nails in a clear or pale pink base for safety and kid-friendly wear. Paint a bright orange pumpkin on one accent nail and keep others simple with tiny green leaf accents to mimic vines. Use a fine brush to sketch a cute pumpkin face with a tiny smile. Pair with a soft top coat to keep the finish smooth and comfortable for little hands. For easy application, use a dotting tool to create the eyes and smile, avoiding complex lines.
- Best for: Playdates, school events, and family photos.
- Difficulty: Easy
- Best occasion: Halloween class party
- Tip: Use a quick-dry top coat to prevent smudges during busy days.
2. Ghost nails for kids: Friendly Ghosts on Tips
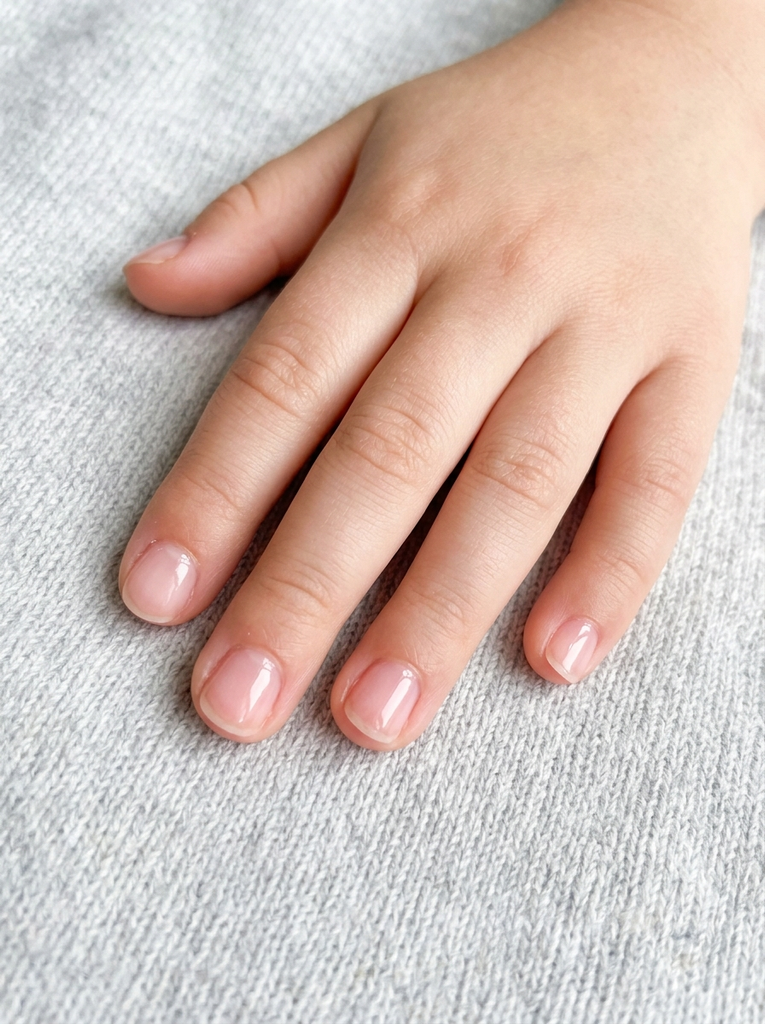
Begin with short rounded nails and a sheer pink or nude base to keep it gentle for kids. On two accent nails, paint friendly white ghost shapes with black dot eyes and a tiny smile. Let the rest of the nails stay simple with a subtle shimmer or a pale blue tint. This look reads playful rather than spooky and works well for classroom wear. Finish with a glossy top coat to seal the design.
- Best for: School events and after school fun.
- Difficulty: Easy
- Best occasion: Halloween party at the park
- Tip: Use a fine brush for the eyes to keep the expression friendly.
When your manicure feels complete, pair it with Brunette Hair Color Ideas for Fall that create a coordinated beauty look without requiring complicated styling or extra time.
3. Candy corn tips: Soft Tri-Color Smile
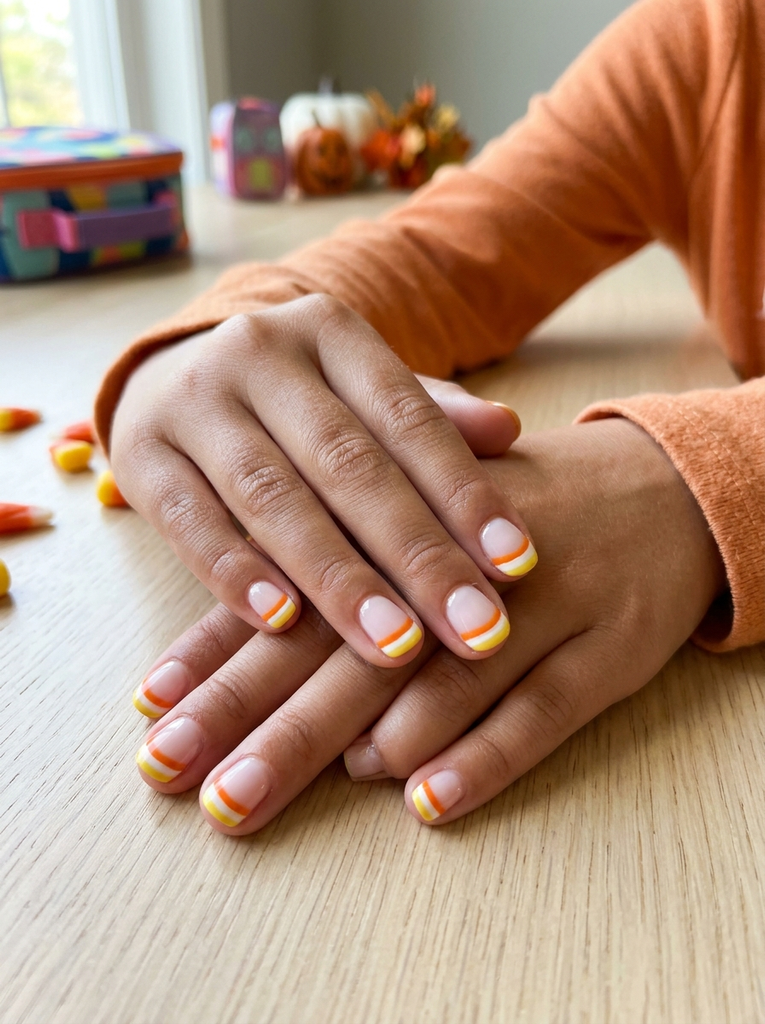
Choose nude or pale pink nails as a base for a soft, kid-friendly canvas. On the tips, create candy corn stripes in the classic order of orange, white, and yellow. Keep each stripe narrow and even with a small brush or striping tape. Use a clear top coat to add a gentle gloss over the stripes. This look is cheerful and instantly recognizable for Halloween without being scary.
- Best for: Halloween school events and family photos.
- Difficulty: Easy
- Best occasion: Costume day at school
- Tip: Use striping tape to keep lines clean on small nails.
4. Bat accents: Tiny Bat Silhouettes
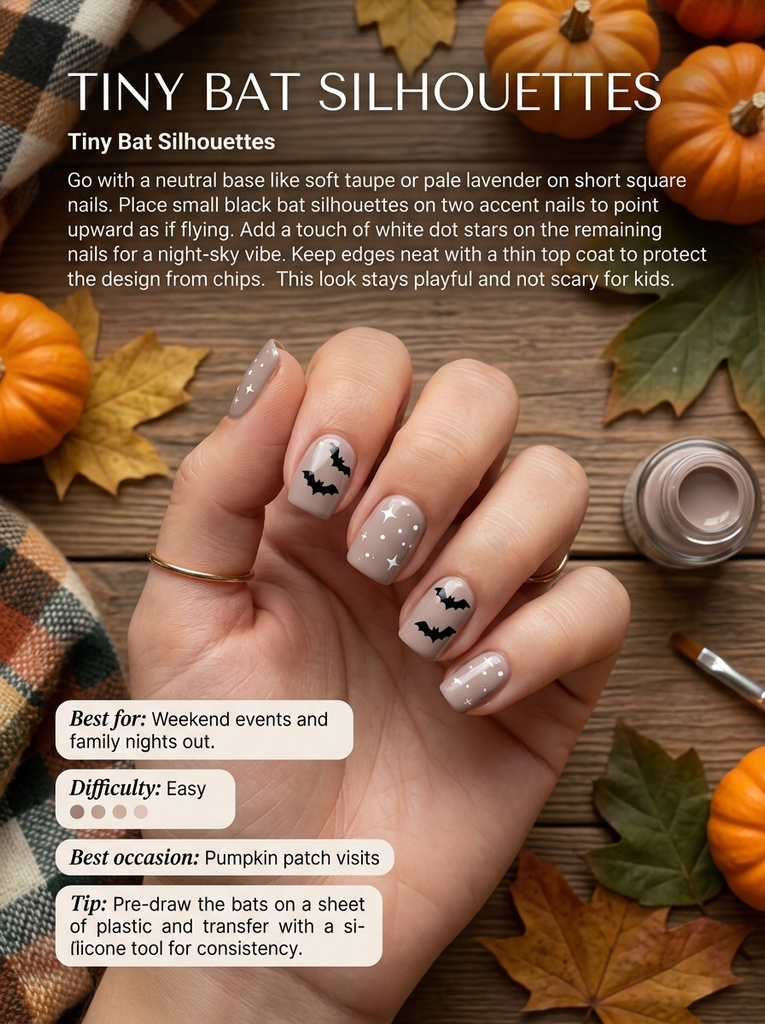
Go with a neutral base like soft taupe or pale lavender on short square nails. Place small black bat silhouettes on two accent nails to point upward as if flying. Add a touch of white dot stars on the remaining nails for a night-sky vibe. Keep edges neat with a thin top coat to protect the design from chips. This look stays playful and not scary for kids.
- Best for: Weekend events and family nights out.
- Difficulty: Easy
- Best occasion: Pumpkin patch visits
- Tip: Pre-draw the bats on a sheet of plastic and transfer with a silicone tool for consistency.
5. Moon and stars: Night Sky Glitter
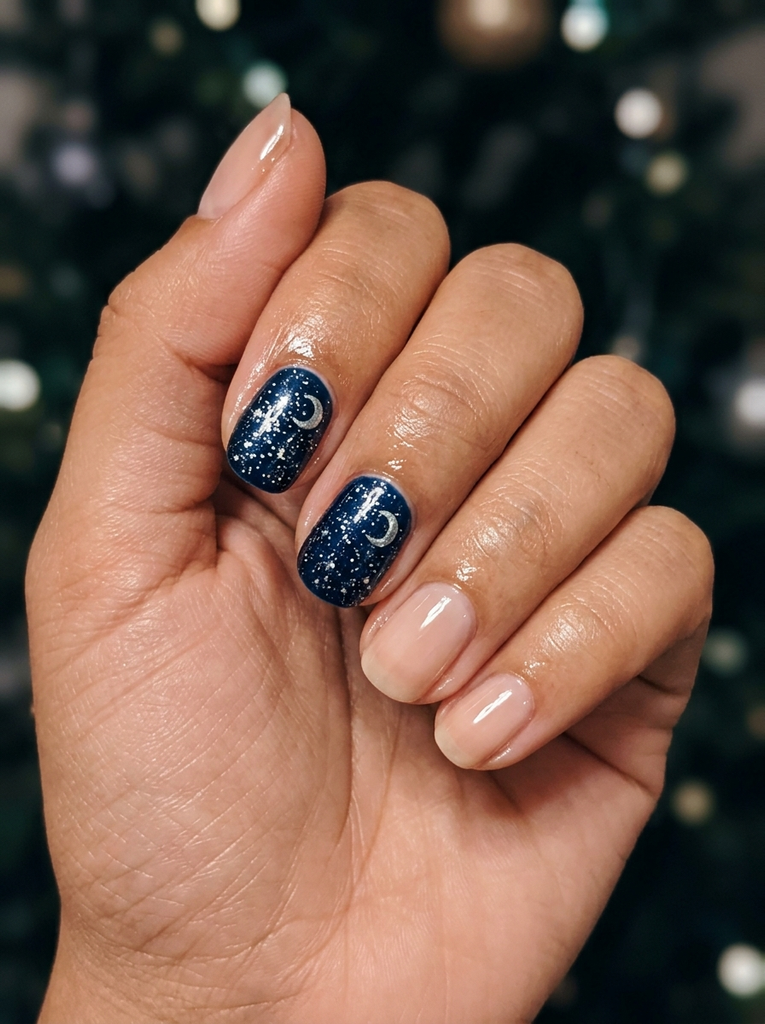
Paint a dark navy or midnight blue base on two nails for a night-sky look. Use silver glitter polish to create a sprinkle effect like stars and add a small pale crescent moon. Keep the other nails simple with a sheer base to balance the design. This theme feels magical without being eerie and looks great in photos. Finish with a high-gloss top coat to intensify the sparkle.
- Best for: Evening events and lights-out photos.
- Difficulty: Easy
- Best occasion: Trunk or treat evenings
- Tip: Use a glitter top coat for durability on tips that get the most wear.
6. Pumpkin gradient: Orange Ombre with Green Vines
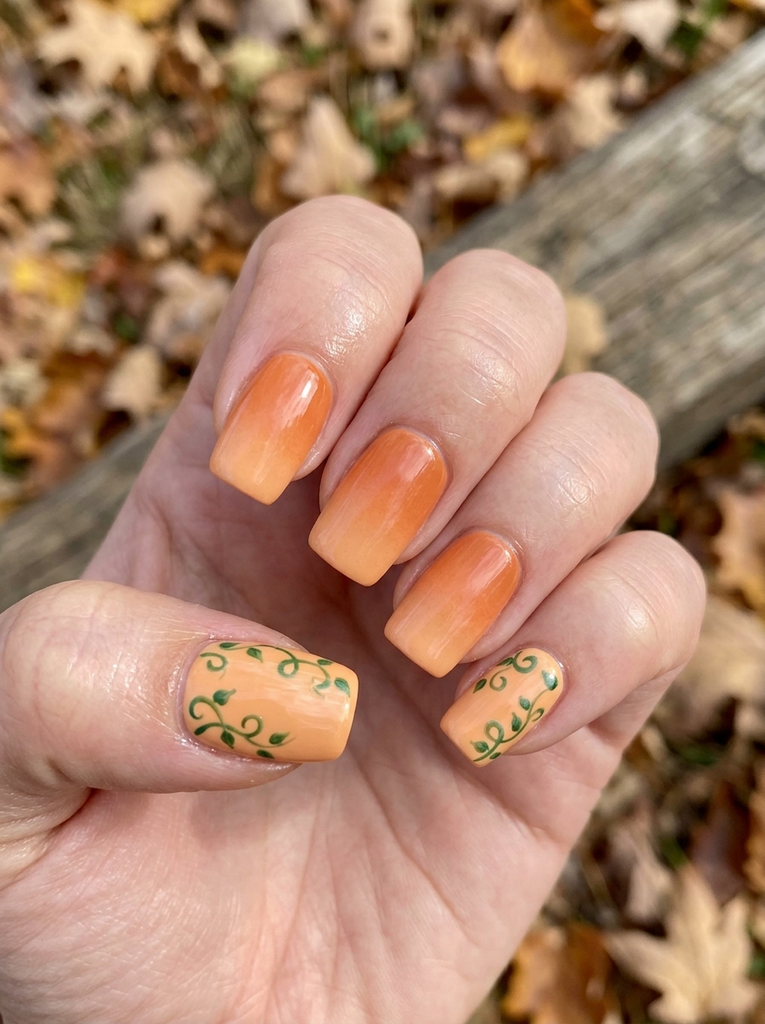
Create a soft orange to lighter orange gradient on three nails using a makeup sponge for a gentle fade. On accent nails, paint tiny green vine swirls winding around the nail bed. Keep the rest of the nails glossy and clean to highlight the gradient. This design feels fresh and kid friendly while still staying Halloween themed. Seal with a top coat to preserve the ombre and vines.
- Best for: Everyday wear during October and school events.
- Difficulty: Easy
- Best occasion: Family outings
- Tip: Clean up the edges with a small brush dipped in remover for a neat finish.
7. Monster pals: Smiley Monster Faces
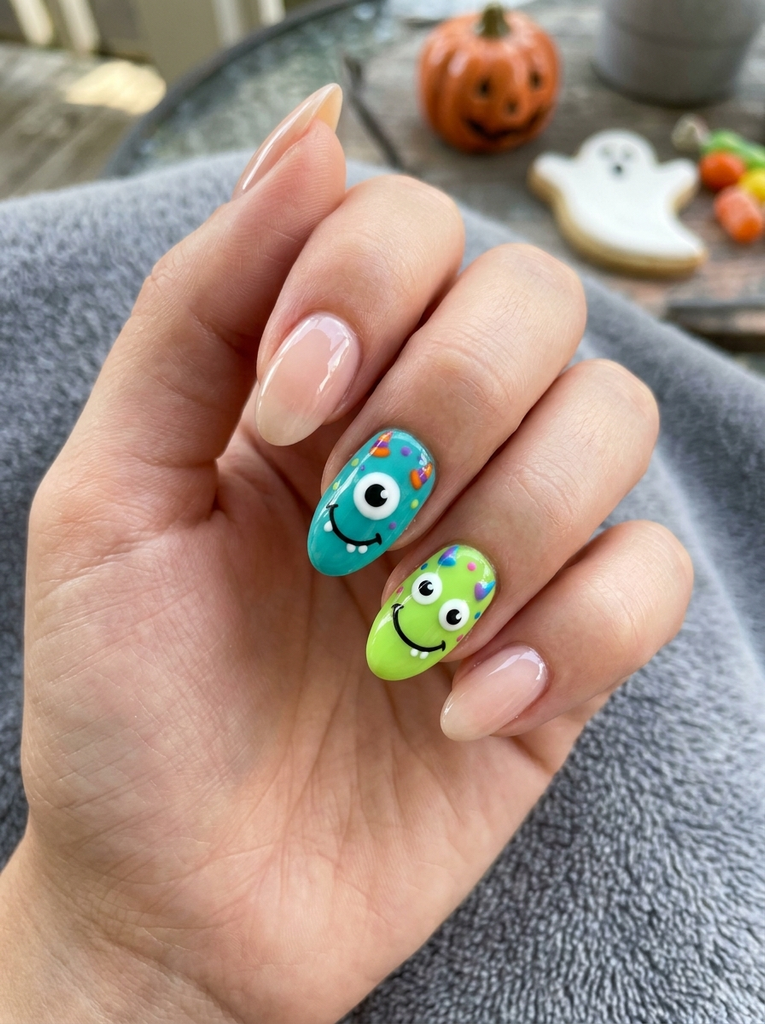
Choose a bright base such as lime green or teal on short almond nails. Draw cute monster faces with one eye or two, using black and white for eyes and a friendly mouth. Add tiny colorful horns or antennae to keep the look playful. Leave most nails clean with just a subtle gloss to let the faces pop. This design celebrates Halloween without frightening features.
- Best for: Playful kids who love cartoons.
- Difficulty: Easy
- Best occasion: Costume party breakfast run
- Tip: Use a dotting tool for precise eyes and mouths.
8. Witch hat accents: Tiny Witch Hats
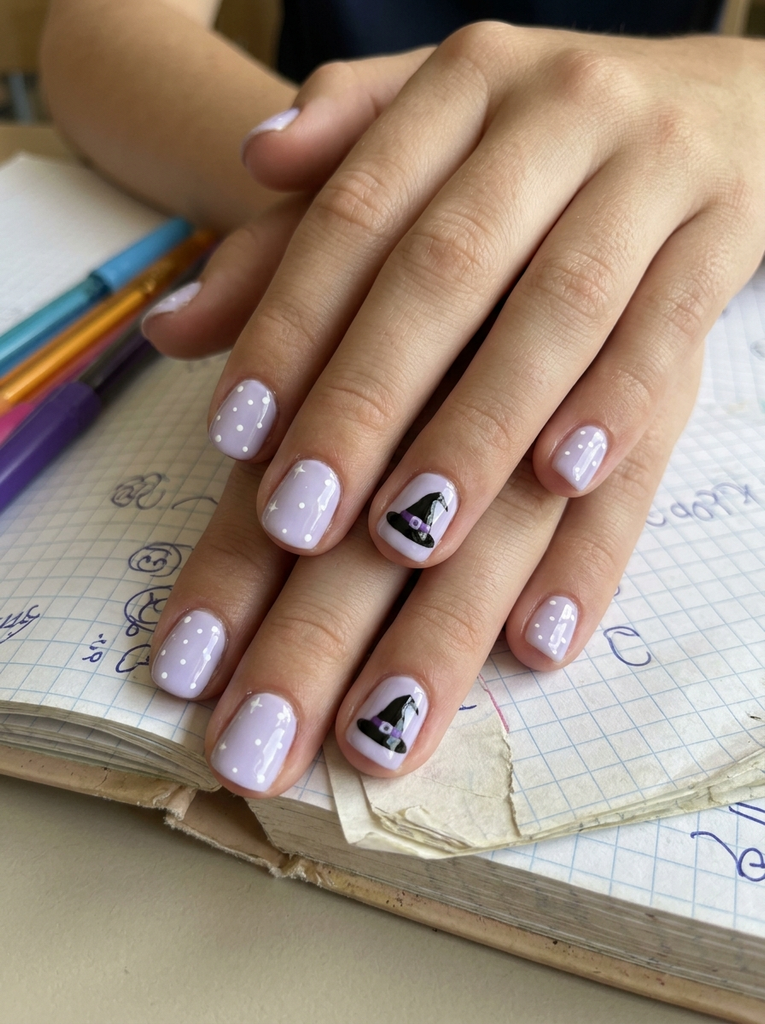
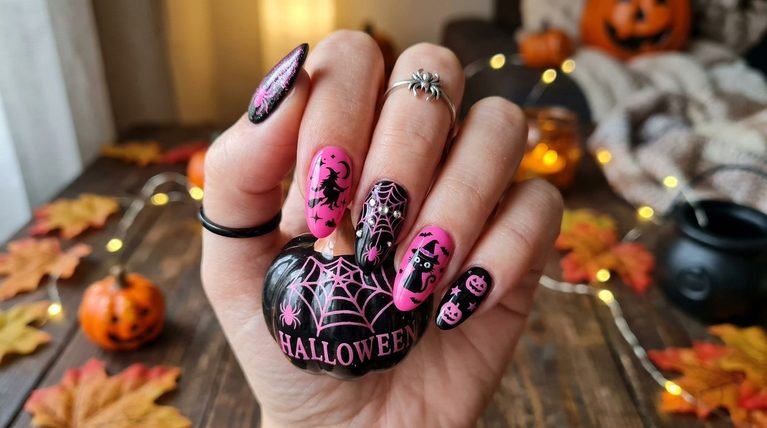
Paint a pale lavender or pale pink base and add tiny black witch hats on two accent nails. Use a thin brush to create the hat shape and a small purple band for detail. Pair with a couple of white dots on the other nails to resemble stars. This look is charming and not spooky, perfect for younger Halloween fans. Finish with a durable top coat for simple wear.
- Best for: School events and family dinners.
- Difficulty: Easy
- Best occasion: Halloween day at school
- Tip: Keep hat shapes small to fit short nails comfortably.
9. Cat silhouettes: Playful Cat Silhouettes
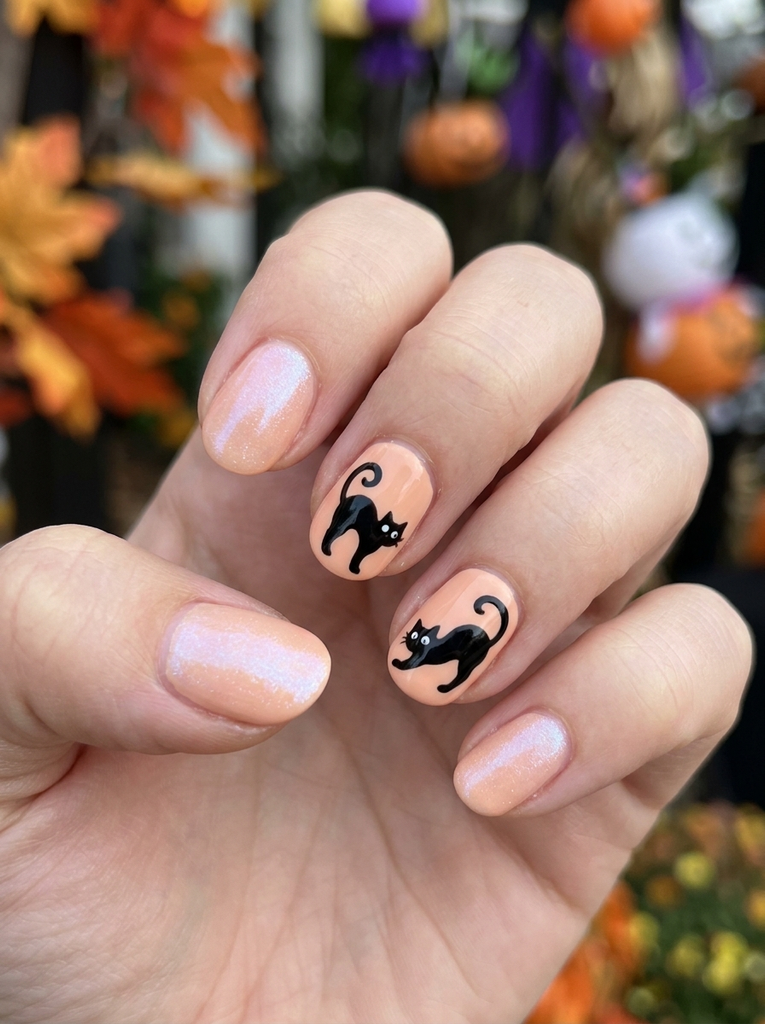
Opt for a soft peach or pale pink base and add small black cat silhouettes on two nails. Keep the silhouettes friendly with curved tails and arched backs. Use a tiny white dot for eyes to keep it cute. The rest of the nails can have a sheer top coat or a soft shimmer to balance the look. It reads as fun and approachable for kids who love animals.
- Best for: Pet lovers and animal-themed parties.
- Difficulty: Easy
- Best occasion: Halloween pet parade
- Tip: Use stamping or decals for precise silhouettes if freehand is tough.
10. Lace webs: Gentle Lace Webs
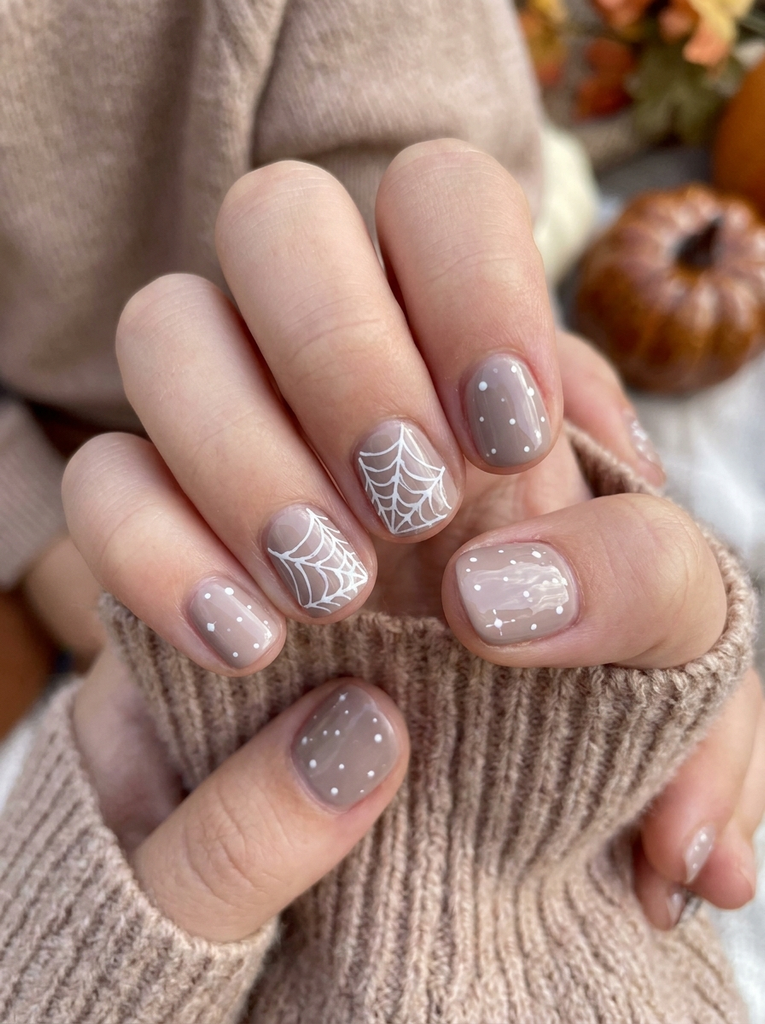
Apply a neutral base like soft taupe and draw delicate white web lines across two accent nails. Scatter tiny white dots to resemble tiny stars across the others. Keep the overall look airy and not heavy. This design is elegant yet playful and ideal for kids who prefer subtle nail art. Finish with a smooth top coat for long-lasting shine.
- Best for: Dressier Halloween events and photos.
- Difficulty: Easy
- Best occasion: Family portraits
- Tip: Use a fine liner brush for web accuracy.
11. Candy corn French: Candy Corn French
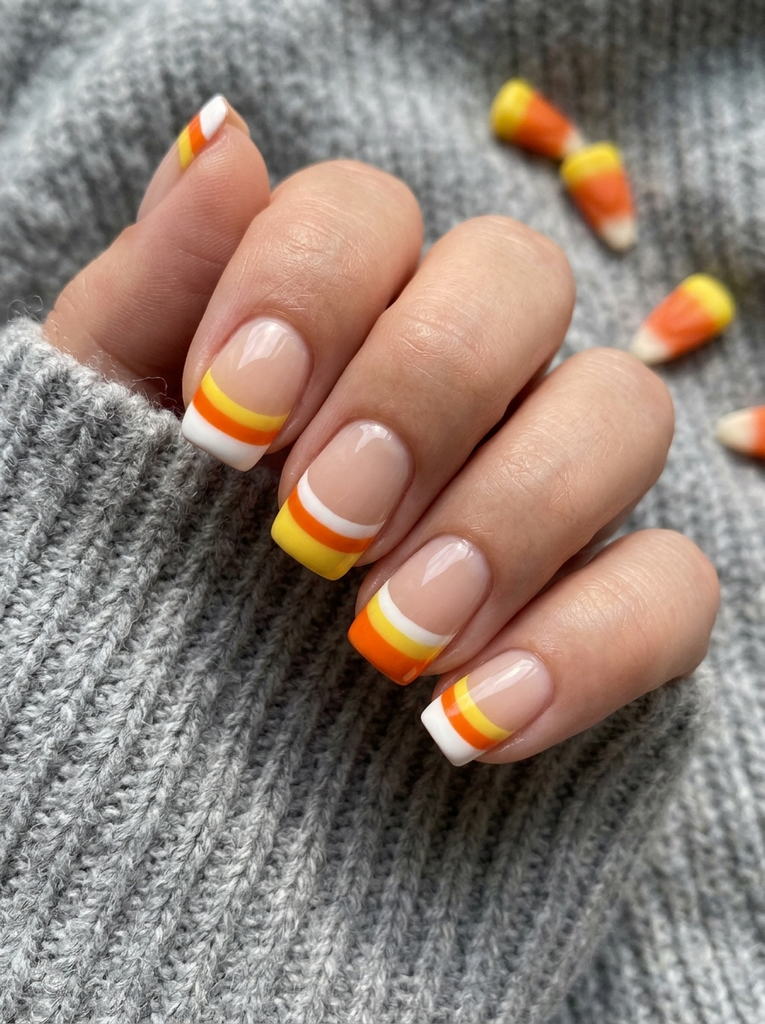
Set a neutral base and paint candy corn stripes along the tips as a modern French. Alternate each nail with a different color order for variety, using orange, white, and yellow on separate nails. Keep the rest of the nails plain to avoid visual clutter. This look is crisp, fun, and instantly recognizable as Halloween themed without being scary. Finish with a clear top coat to protect the design during daily activities.
- Best for: Everyday wear with a Halloween twist.
- Difficulty: Easy
- Best occasion: School events and family outings
- Tip: Use a long-lasting top coat to prevent chipping on busy days.
12. Mini pumpkins leaves: Mini Pumpkins and Leaves
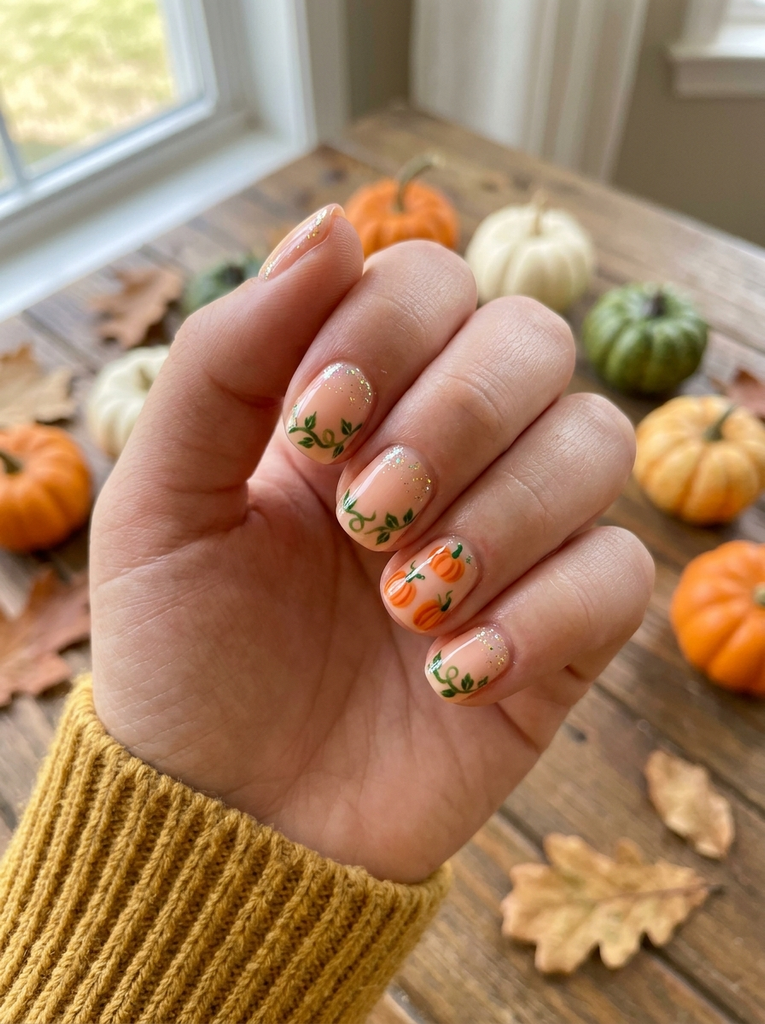
Create tiny pumpkin shapes on one accent nail using orange with a green stem. On adjacent nails, paint small green vines and leaves meandering along the tip. Keep a soft base on the rest of the nails and add a touch of glitter near the cuticle for a playful sparkle. The overall look is bright, cheerful, and kid friendly. Complete with a glossy top coat for a smooth finish.
- Best for: Harvest-themed events and classroom activities.
- Difficulty: Easy
- Best occasion: October parties
- Tip: Use a tiny brush to create delicate leaves for clean lines.
13. Friendly Boo letters: Friendly Boo on Tips
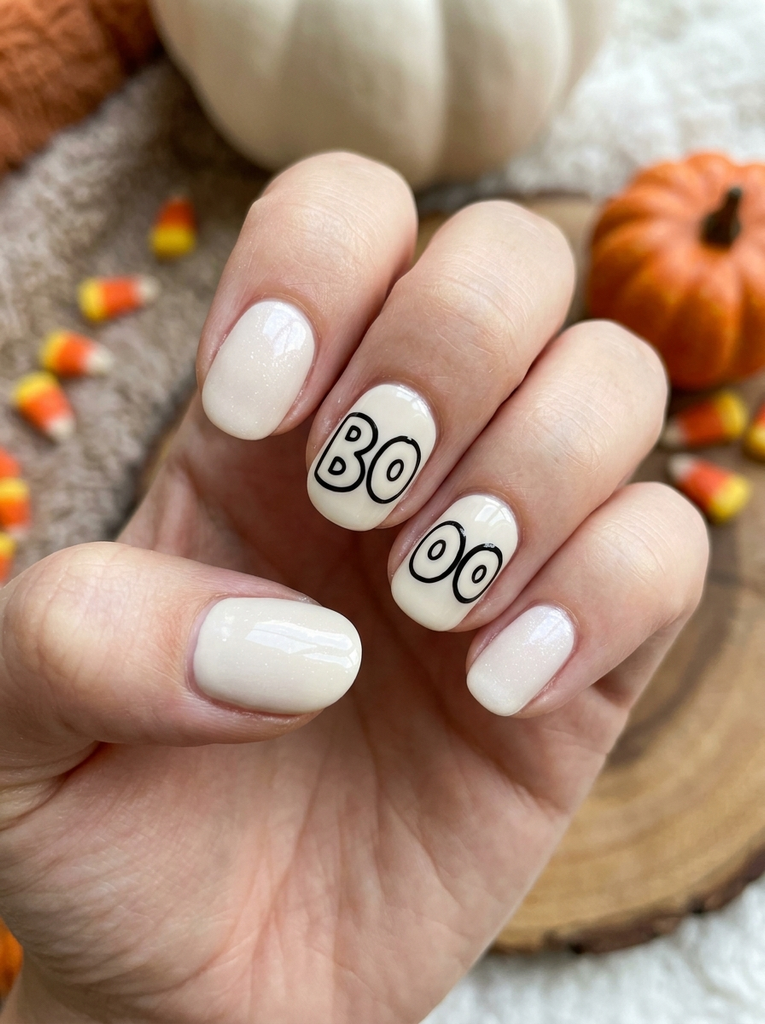
Choose a white or pale base and write simple Boo letters on two accent nails. Use black or navy to outline the letters for readable contrast. Keep other nails in a matching pale tone or shimmer to balance the look. This design is cute and instantly readable as Halloween friendly text. Seal with a glossy top coat to protect the letters.
- Best for: Text-based themed parties and card days at school.
- Difficulty: Easy
- Best occasion: Halloween class party
- Tip: If freehand is tricky, use letter decals for neat results.
14. Stacked pumpkin parade: Stacked Pumpkin Parade
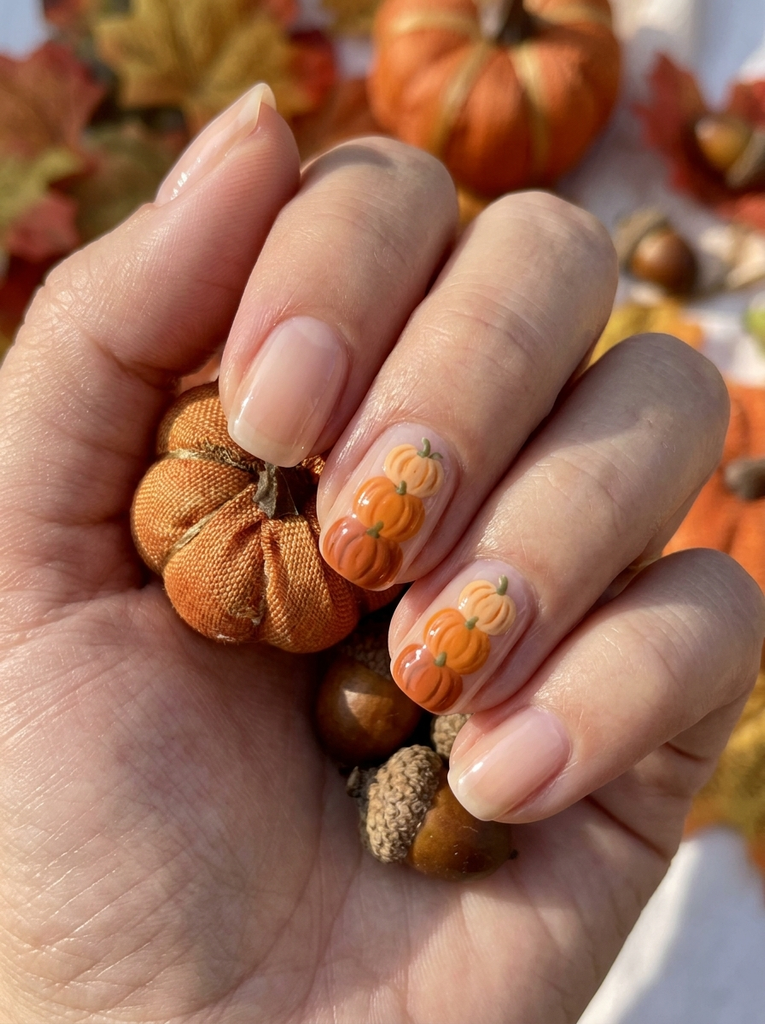
Feature three mini pumpkins stacked vertically on one accent nail. Alternate orange shades for each pumpkin and add tiny green stems. Keep the other nails simple with a sheer base to emphasize the stacked motif. This playful design reads as friendly and festive for little ones. Finish with a sturdy top coat to keep the stack intact during wear.
- Best for: Halloween parades and family events.
- Difficulty: Easy
- Best occasion: Costume day and photo shoots
- Tip: Use a small brush to keep the pumpkins perfectly round.
15. Halloween scene nails: Halloween Scene on Nails
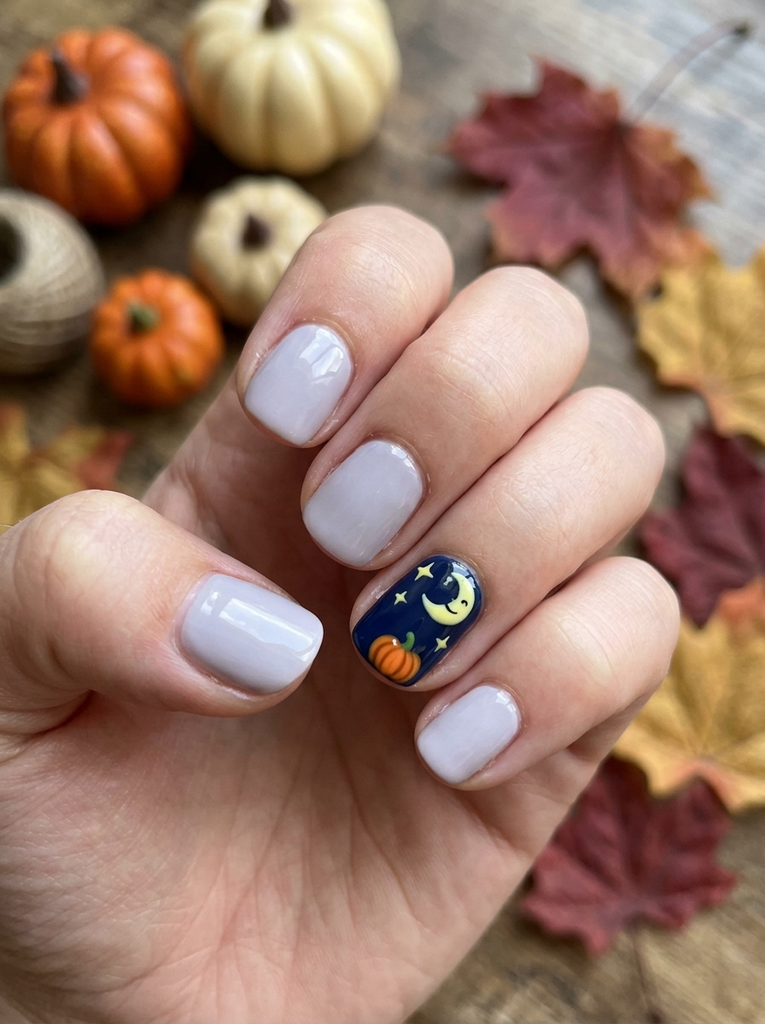
On a single accent nail, create a tiny scene with a moon, a pumpkin, and a couple of stars. Use navy or twilight blue as the base to set the scene. Keep other nails in a coordinating pale shade to frame the scene. This style tells a little story and feels age appropriate for kids. Finish with a protective top coat to keep the tiny details sharp.
- Best for: Storybook inspired looks and photo moments.
- Difficulty: Easy
- Best occasion: Halloween parties
- Tip: Pre-draw the scene on a nail sticker sheet for accuracy if needed.
16. Ghost striped nails: Ghostly Stripes
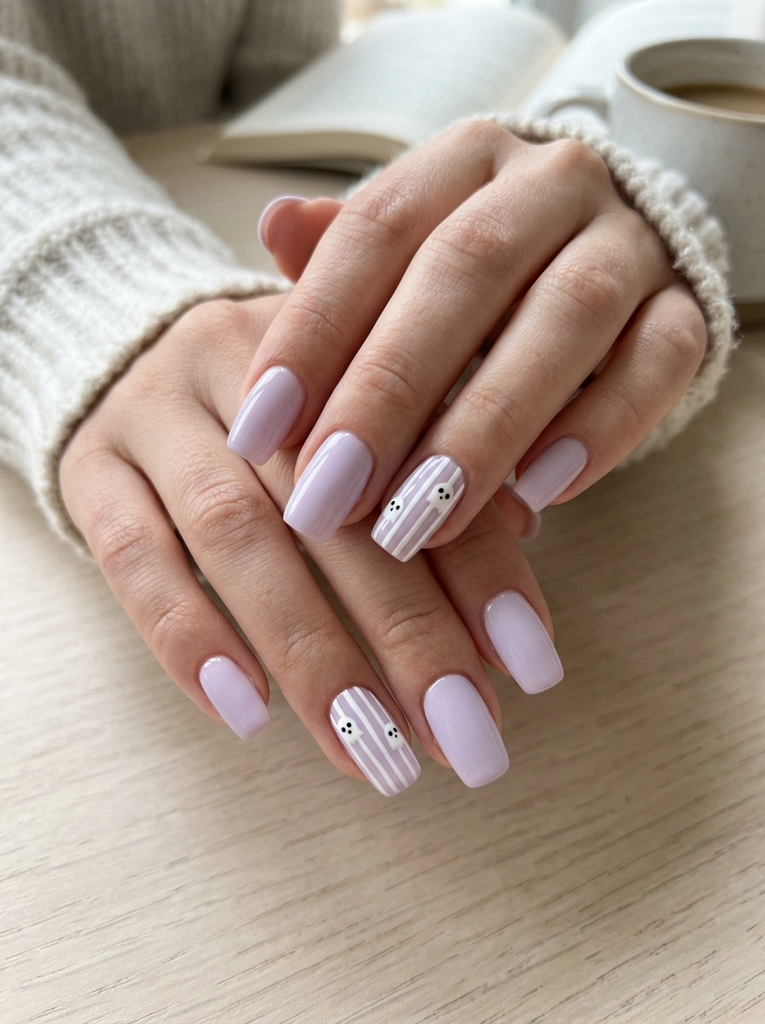
Paint a pale blue or lavender base with white vertical stripes on two accent nails to mimic ghostly lines. Add tiny black eyes on a couple of white circles to hint at faces. Keep the rest of the nails simple with a sheer gloss. This look blends subtlety with a nod to spooky season without scaring kids. Finish with a soft top coat for a gentle shine.
- Best for: Everyday wear with a hint of Halloween flair.
- Difficulty: Easy
- Best occasion: School days and playdates
- Tip: Use a steady hand and a fine liner brush for stripes.
17. Glitter pumpkin accents: Glitter Orange Pumpkins
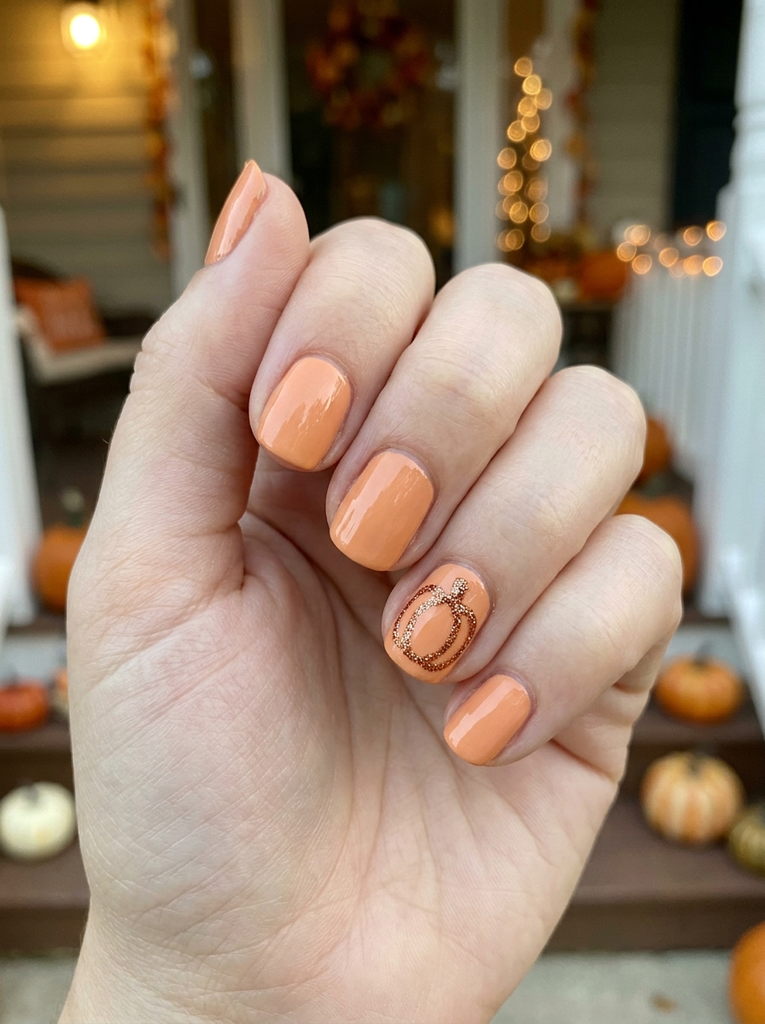
Apply a soft orange base on all nails and add a glitter pumpkin on one accent nail. Keep the pumpkin shape simple with a round body and a small stem. Use fine copper or gold glitter to outline the pumpkin for a sparkly touch. Limit the glitter to a single nail to avoid overwhelming the look. This design is festive and kid friendly with a bit of sparkle.
- Best for: Party nights and photo moments
- Difficulty: Easy
- Best occasion: Trick or treat events
- Tip: Apply a glitter top coat in light layers to prevent chunky texture.
18. Starry ghost combo: Starry Ghosts
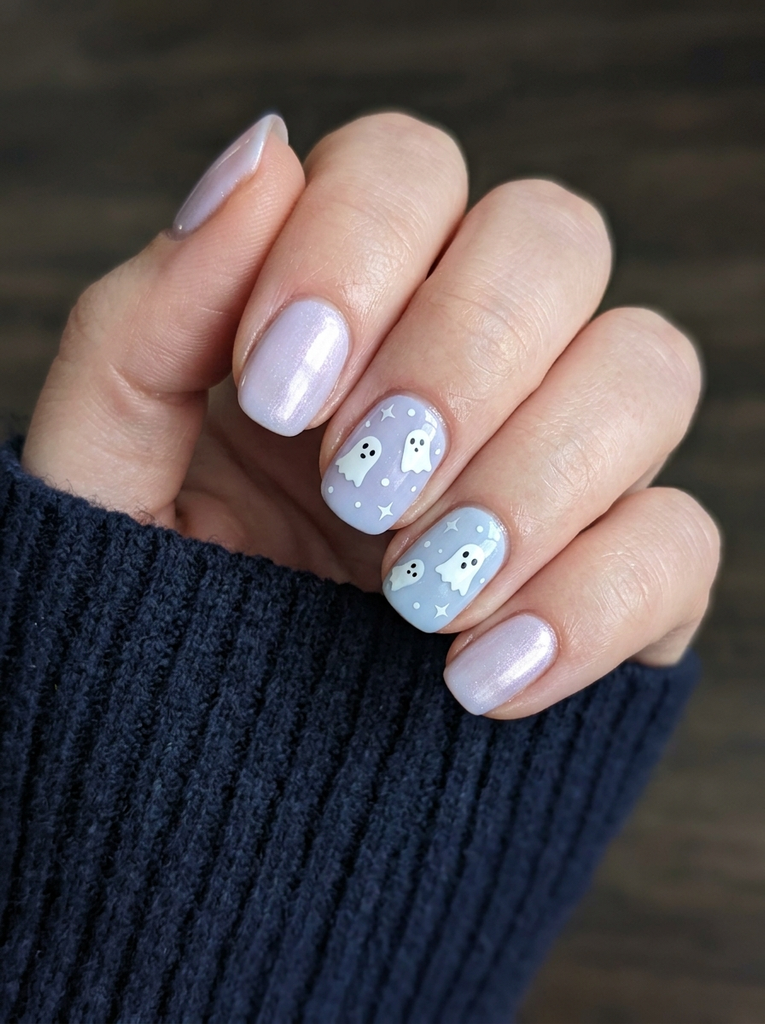
Base nails in a pale lavender or pale blue and add small ghost decals on two nails. Scatter tiny white stars around the ghosts to create a playful night sky. Keep other nails simple with a soft shimmer or a clear gloss to balance the composition. The combination reads cute and dreamy rather than scary. Finish with a protective top coat for lasting shine.
- Best for: Nighttime Halloween vibes and photos
- Difficulty: Easy
- Best occasion: Outdoor family events
- Tip: Use a steady hand or decals for precise ghosts and stars.
19. Confetti fall digits: Confetti Fall Confetti
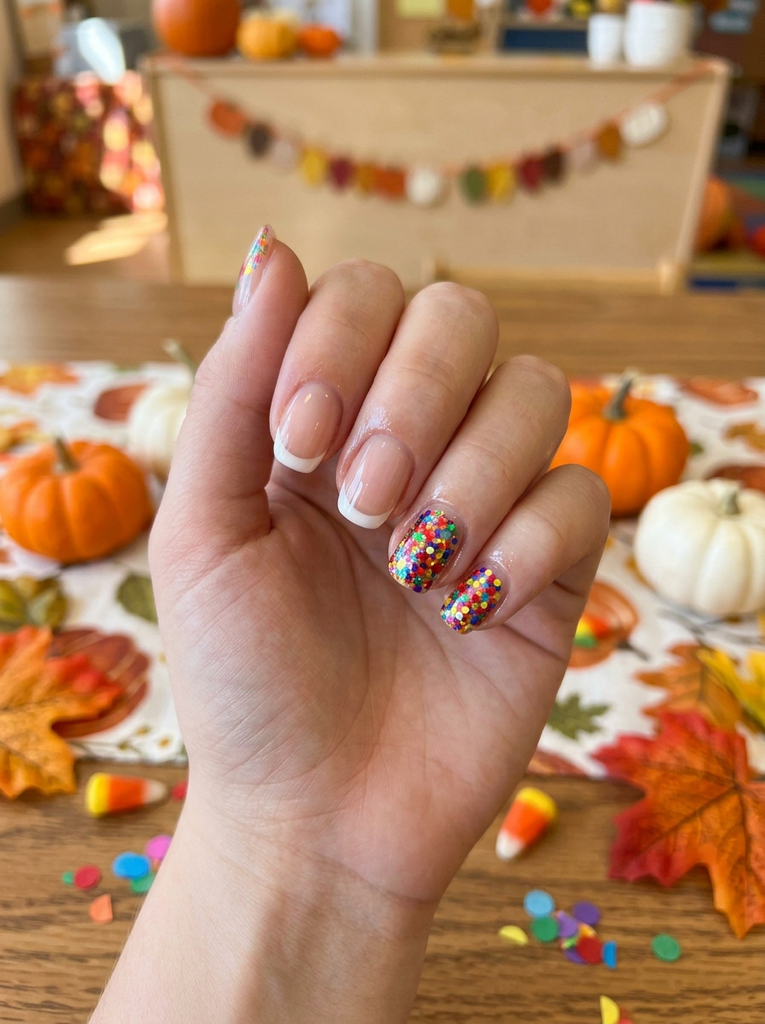
Choose a sheer base and sprinkle multicolor confetti across two accent nails for a festive look. Keep the rest of the nails neutral to let the confetti stand out. This style is spontaneous and playful, perfect for kids who love color. Use a thick top coat to keep the confetti in place and prevent snagging. It is easy to customize with different color mixes for each child.
- Best for: Casual Halloween days and celebrations
- Difficulty: Easy
- Best occasion: Harvest events and classroom celebrations
- Tip: Use tiny specks of top coat to keep the confetti flat.
20. Emoji pumpkin faces: Cute Emoji Pumpkin Faces
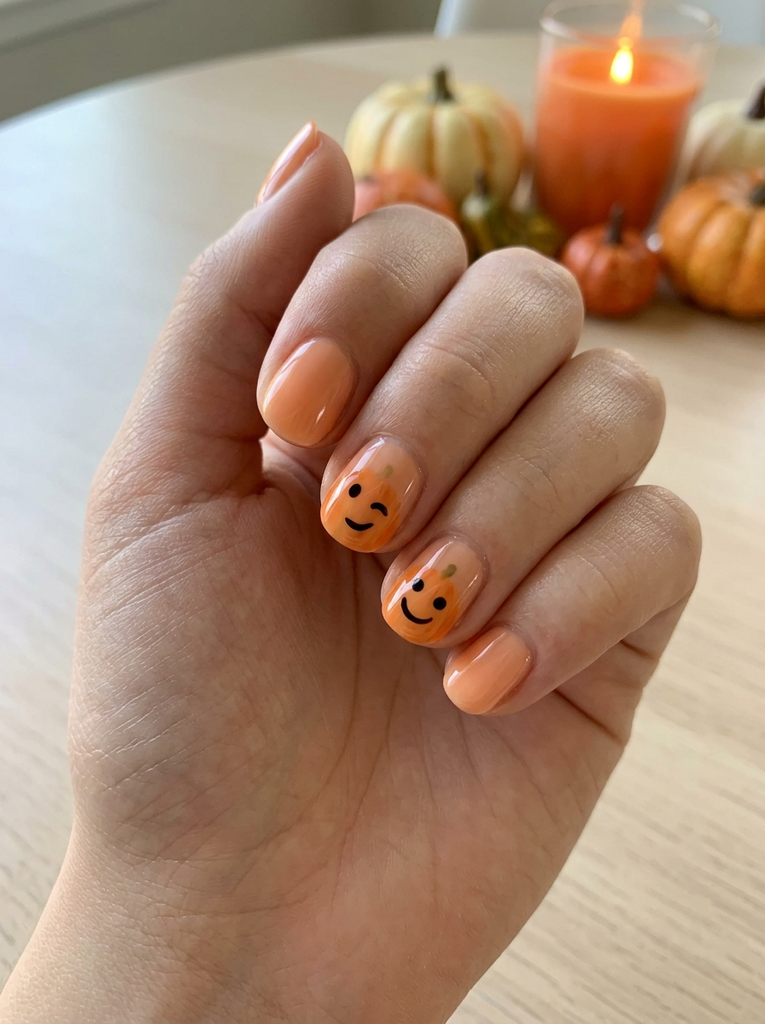
Paint orange nails with tiny emoji faces on the tips of two accent nails. Use black eyes and mouths to convey friendly expressions. Keep the rest of the nails simple with a soft orange or sheer base. This design is modern, cheerful, and perfect for kids who love playful icons. Finish with a clear top coat to preserve the emoji art during daily activities.
- Best for: Trendy kid looks and social media photos
- Difficulty: Easy
- Best occasion: Halloween parties
- Tip: Use a nail sticker sheet to help with uniform emoji placement.
FAQs
What makes halloween nails kid friendly
Kid friendly Halloween nails focus on fun, non scary motifs and small, simple designs. They use tiny details and soft colors to keep things age appropriate while still feeling festive.
Can these designs be done at home
Yes. Most ideas rely on basic tools like a thin brush, dotting tool, and a top coat. Having a steady hand helps, but decals and stickers can simplify the process for beginners.
What nail shapes work best for kids
Short square or rounded nails are typically easiest for kids. They resist breakage and are comfortable for everyday activities at school or play.
How should I remove these designs from kids nails
Use a gentle nail polish remover and a soft cotton pad. Remove one or two nails at a time to avoid excessive rubbing, and moisturize afterward to prevent dryness.
Are these designs school-appropriate
Yes. The designs stay within a light to moderate Halloween theme and avoid scary imagery, making them suitable for school environments while still celebrating the season.
Conclusion
With these options, you can choose a halloween nails kid friendly look that suits your child both in style and practicality. The ideas range from cute pumpkins to friendly ghosts and playful scenes, all designed to stay age appropriate. Try a design this weekend and share your photos with friends and family to inspire others.